Comment

The Trip That Changed My Life

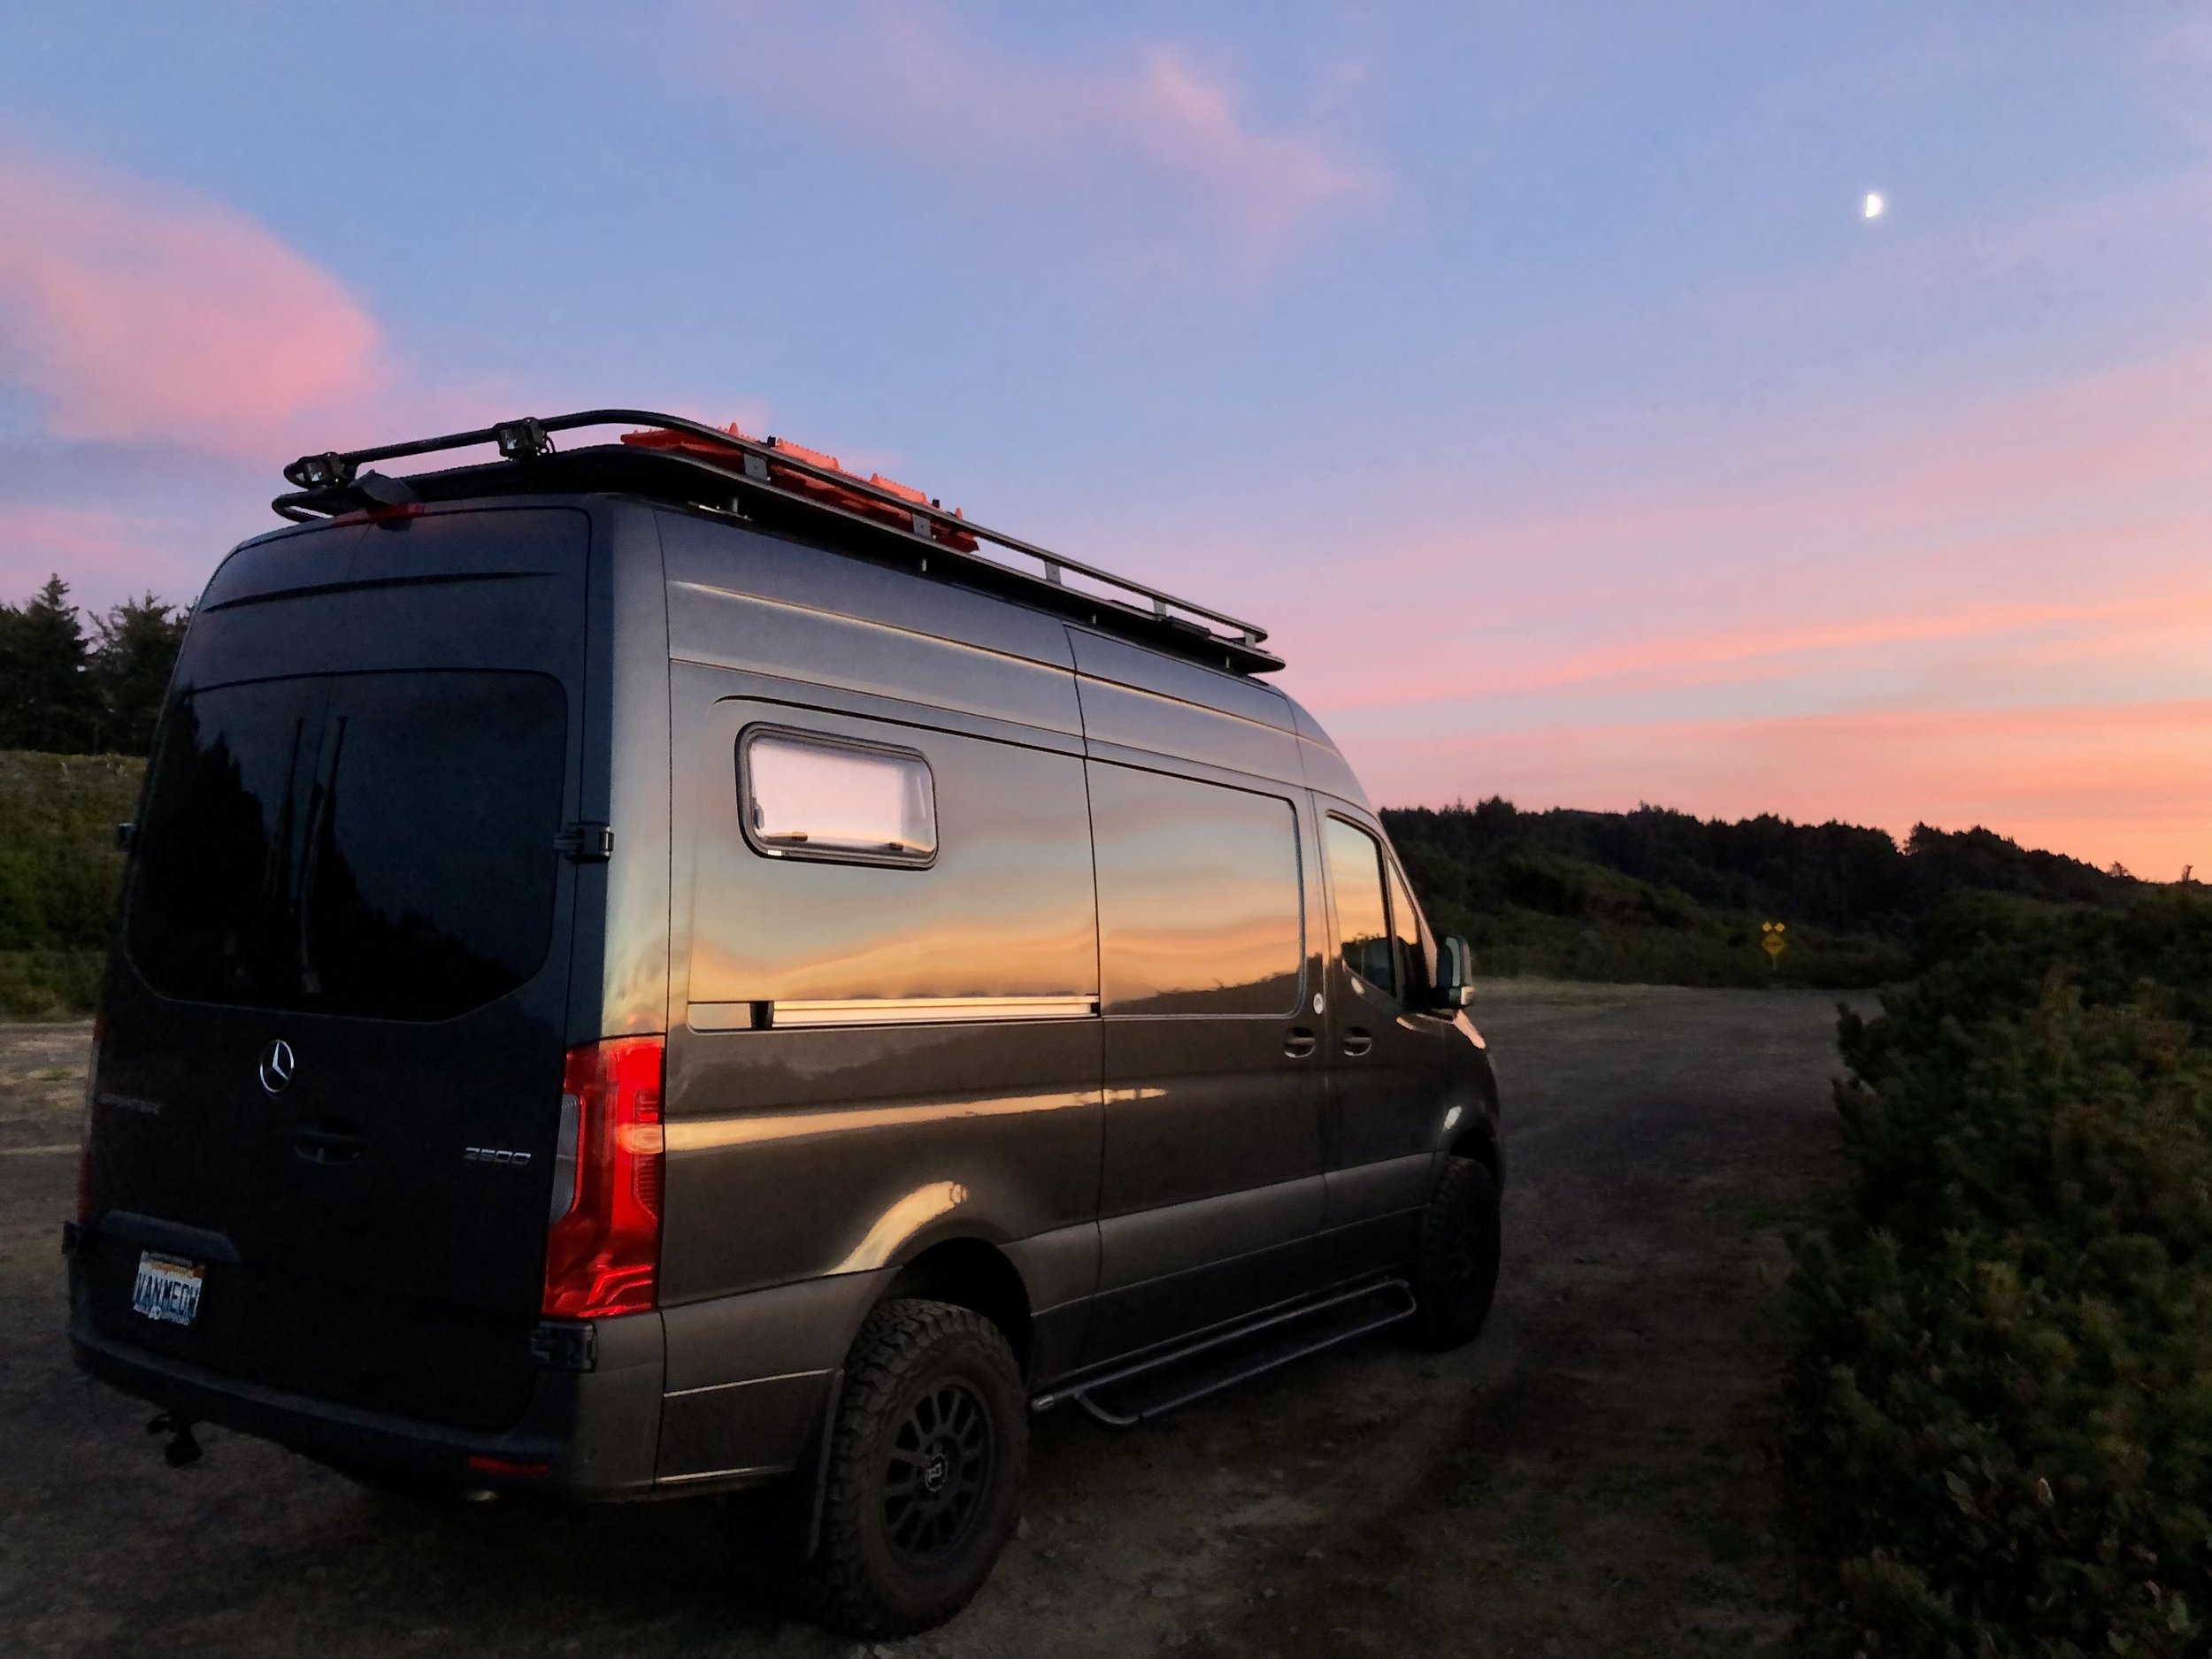
As many of you know, I decided to pack up my life in California back in Fall of 2020 and move to the Pacific Northwest. I had been wanting to move out of California for awhile, mainly because I didn’t love the heat and traffic, but I was so established there between friendships, work, and my house that moving seemed like a lot of work and a little scary. I always heard that once you move out of California, it’s hard to move back, especially if you sell your house. Then in August 2020, Silicon Valley was hit with a huge dry lightning storm that caused some of the biggest fires in California history. For two weeks we had an orange apocalyptic sky with bad AQI that ended up affecting the whole West Coast, with smoke moving across the whole country! Between the fires and the increased amount of summer days over 100*F, I was over the heat and smoke, so I went on a 5 week road trip to Oregon and Washington to see where I would want to live.

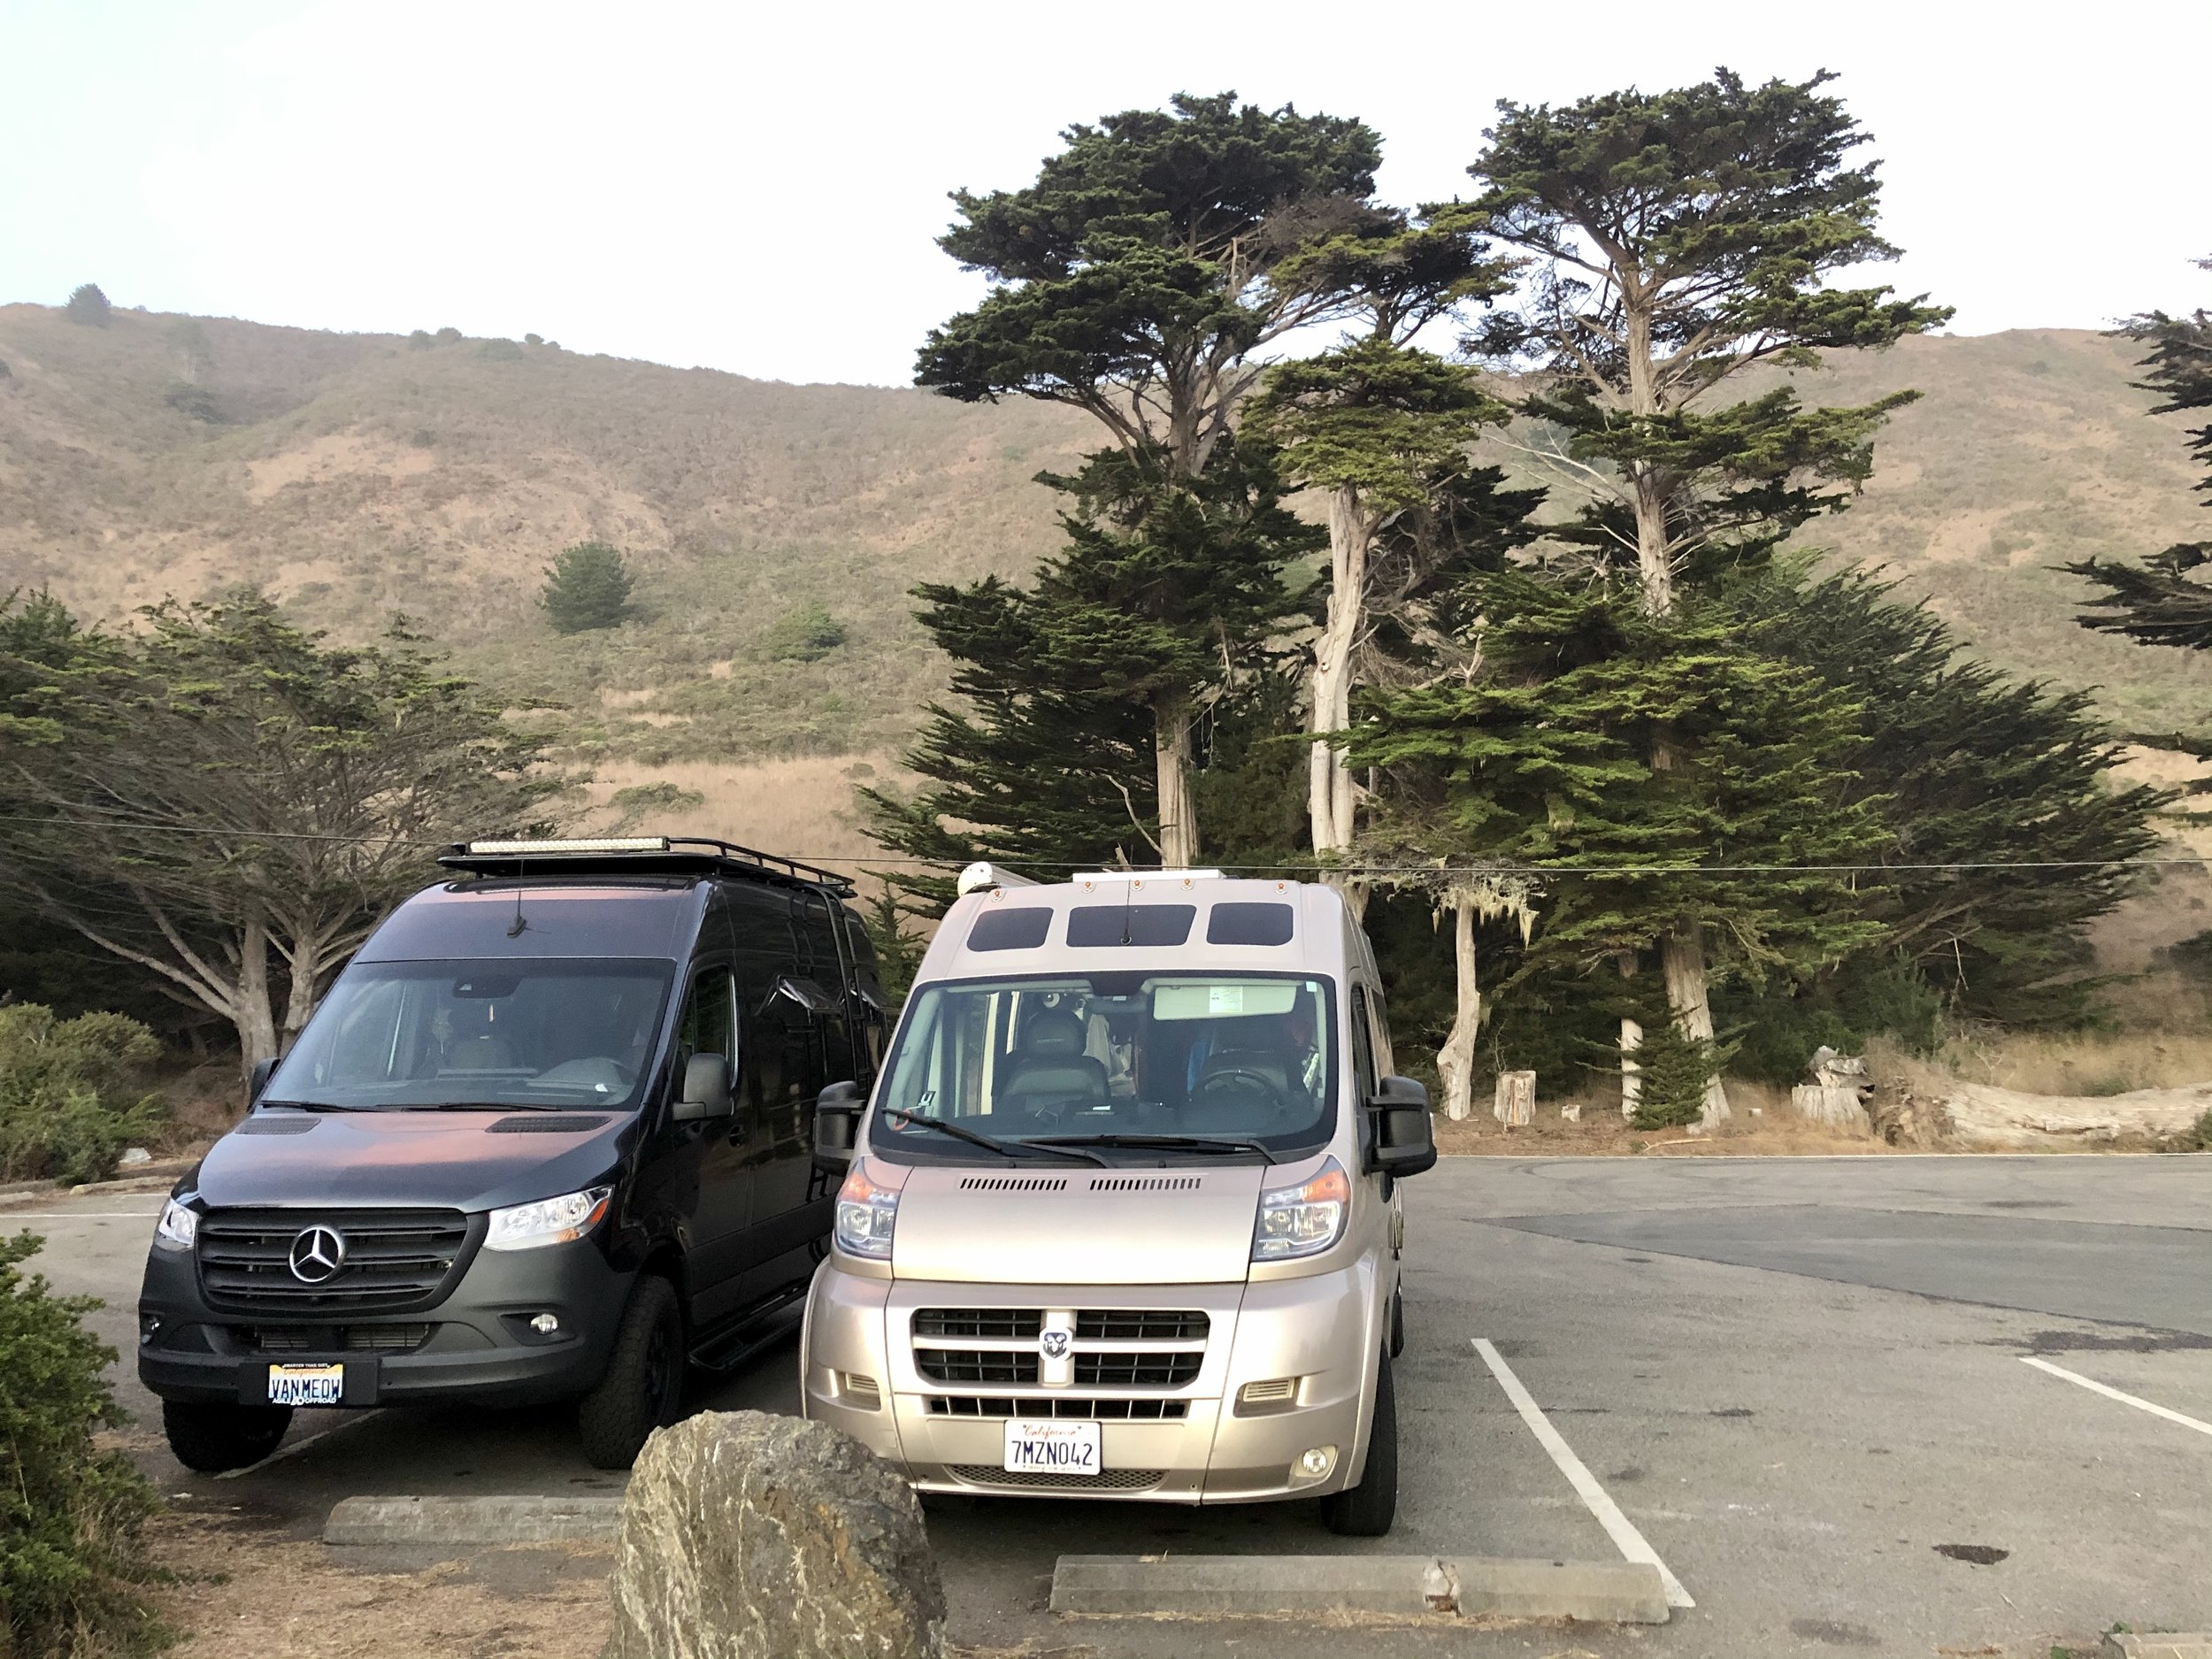
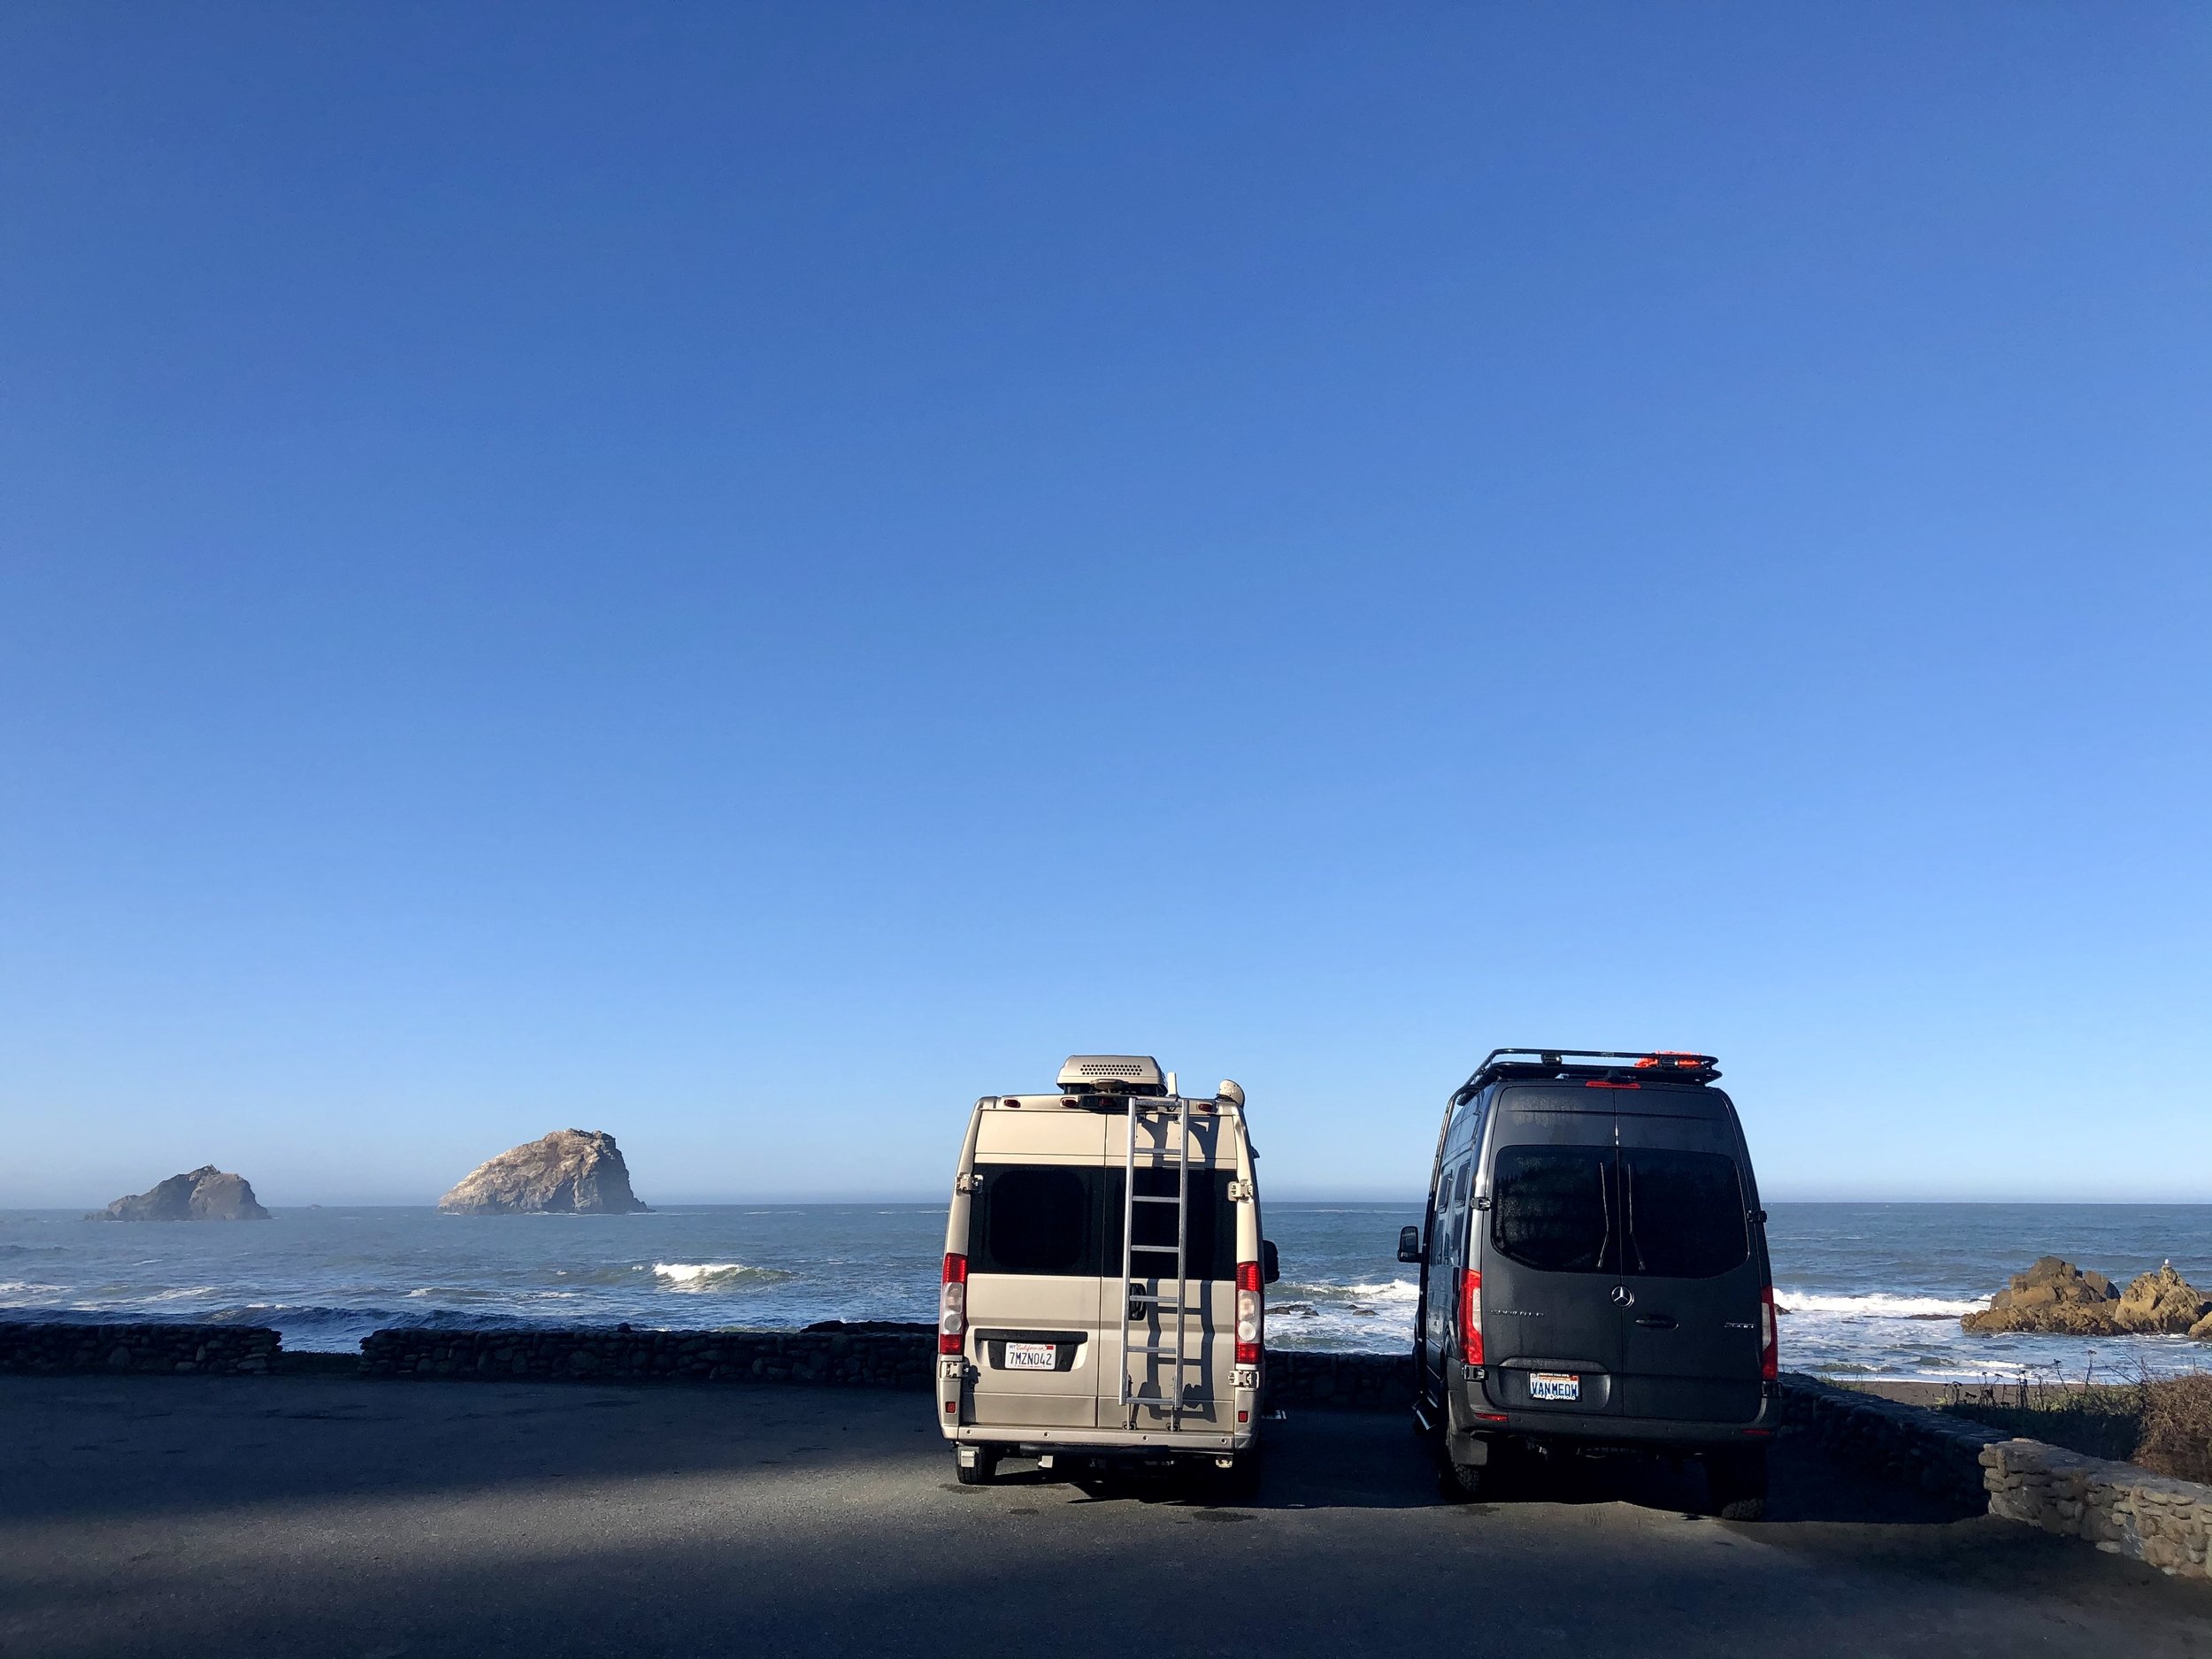
For some reason, I never made it to the PNW until 2016, despite living in California most of my life. The guy I was dating that year took me on a vanlife road trip to Oregon and Washington, which is when I discovered how much I liked those two states. I kept visiting and exploring them over the next few years in my RV and enjoying my time there, making them viable choices of where to live next. I also considered moving to the Central Coast of California, somewhere near Pismo Beach. I went on this month-long road trip with another female vanlifer named Cory whom I met at a few vanlife gatherings over the years. She also wanted to leave the Bay Area and move to the PNW. We started the journey on September 24th and worked out way north to Fort Braggg, through the various Redwoods in Northern California, and even stopped at Moonstone Beach.

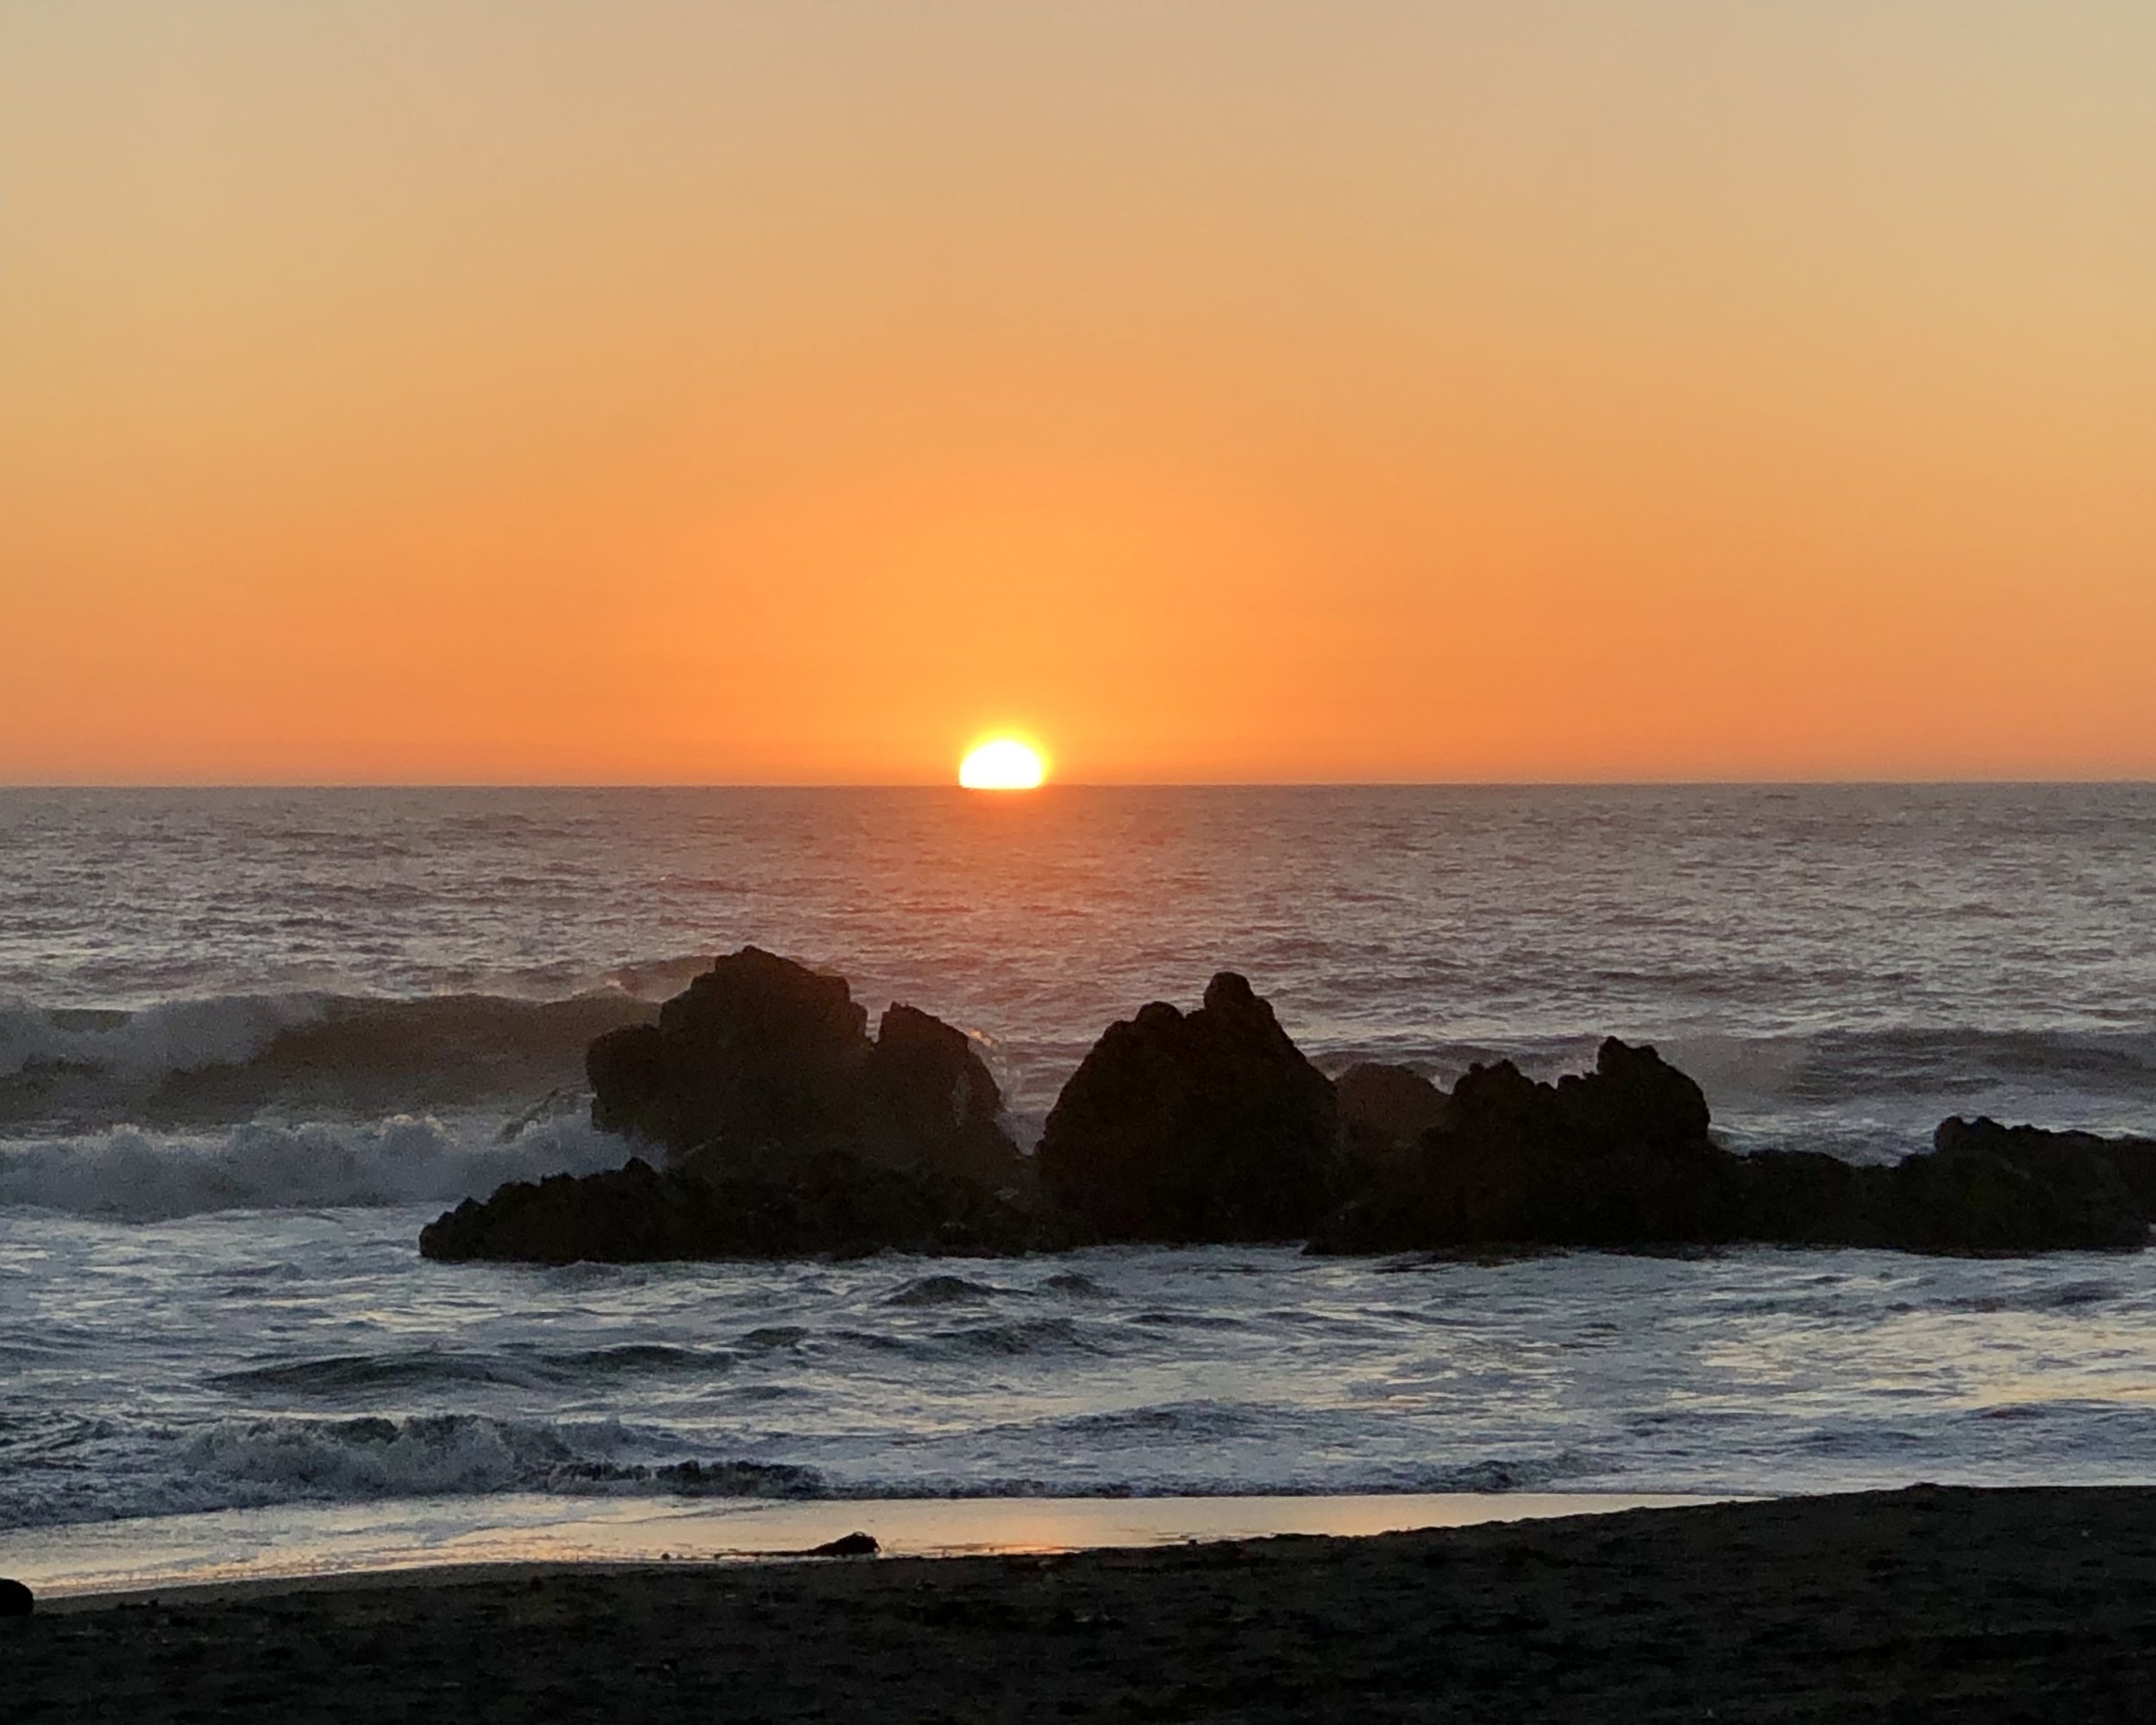
I originally figured I’d find the perfect beach town in Oregon as I’ve always wanted to live by water. Brookings was a front runner prior to the trip, mainly due to being right at the California border and having a lot of sunny days compared to other oceanside towns. One concern I had though was health care in these small beach towns as they don’t have the same amenities as big cities, which aren’t exactly that close. I did enjoy my time in Harbor and Brookings, but there was a heatwave hitting California and Southern Oregon with 90+* temps that made me reconsider the idea of moving to a place that was still quite hot at the beginning of Fall. I also heard from some newer locals I met who had moved there that finding a house was hard since not much inventory was available. One family had been looking for a year and still hadn’t found a house that was worthwhile. Cory and I decided to drive further north to get away from the heat and continue to see what towns were more favorable.

After a nice stint on the Oregon coast with stops in Bandon, Florence, Coos Bay, Yachats, Newport, Tillamook, Manzanita (another town that topped my list), and Astoria, we worked out way inland along the Columbia River Gorge on the Washington side to Skamokawa for riverside camping, and then even further inland to Graham where Cory had some friends that hosted us with a gorgeous view of Mount Rainier. From there we headed to Alki Beach in West Seattle, but the weather turned gray and misty, plus we spent a restless night along the waterfront due to traffic and noise. Cory needed to get her Roadtrek serviced near Seattle for a few days, so we parted ways and I headed north to Bellingham to visit a friend from high school who always spoke very highly of this small city near the Canadian border.

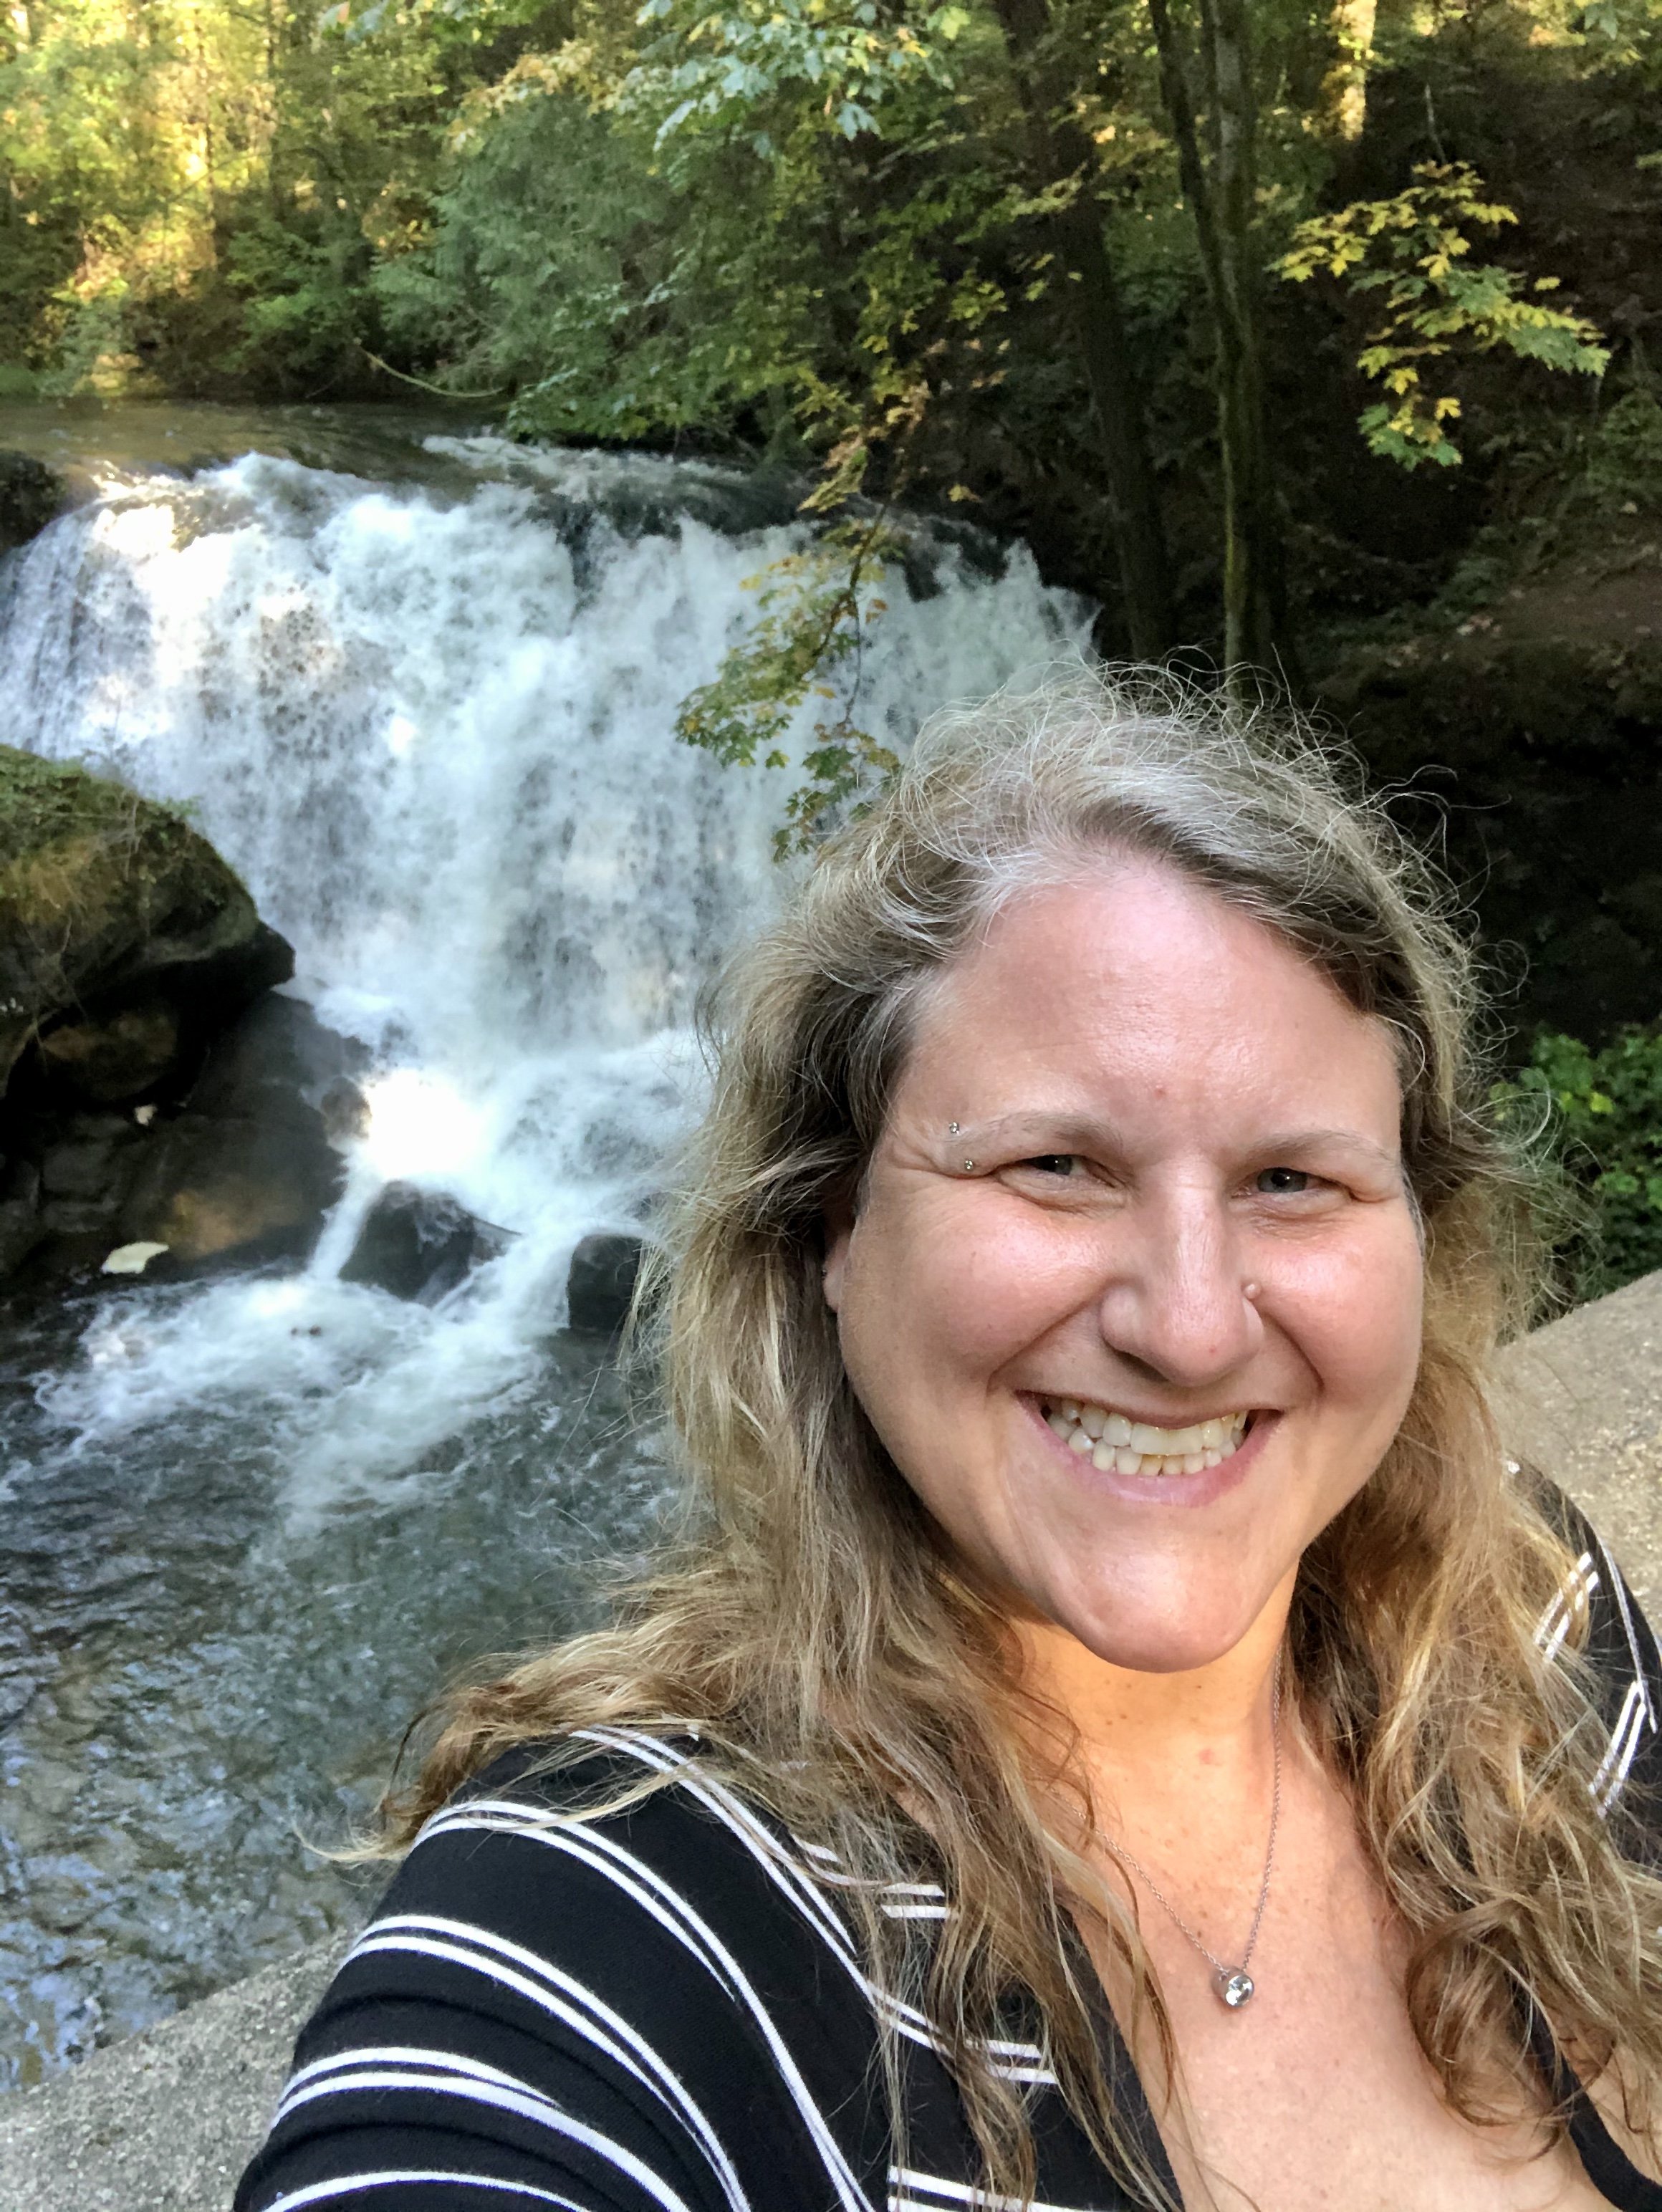
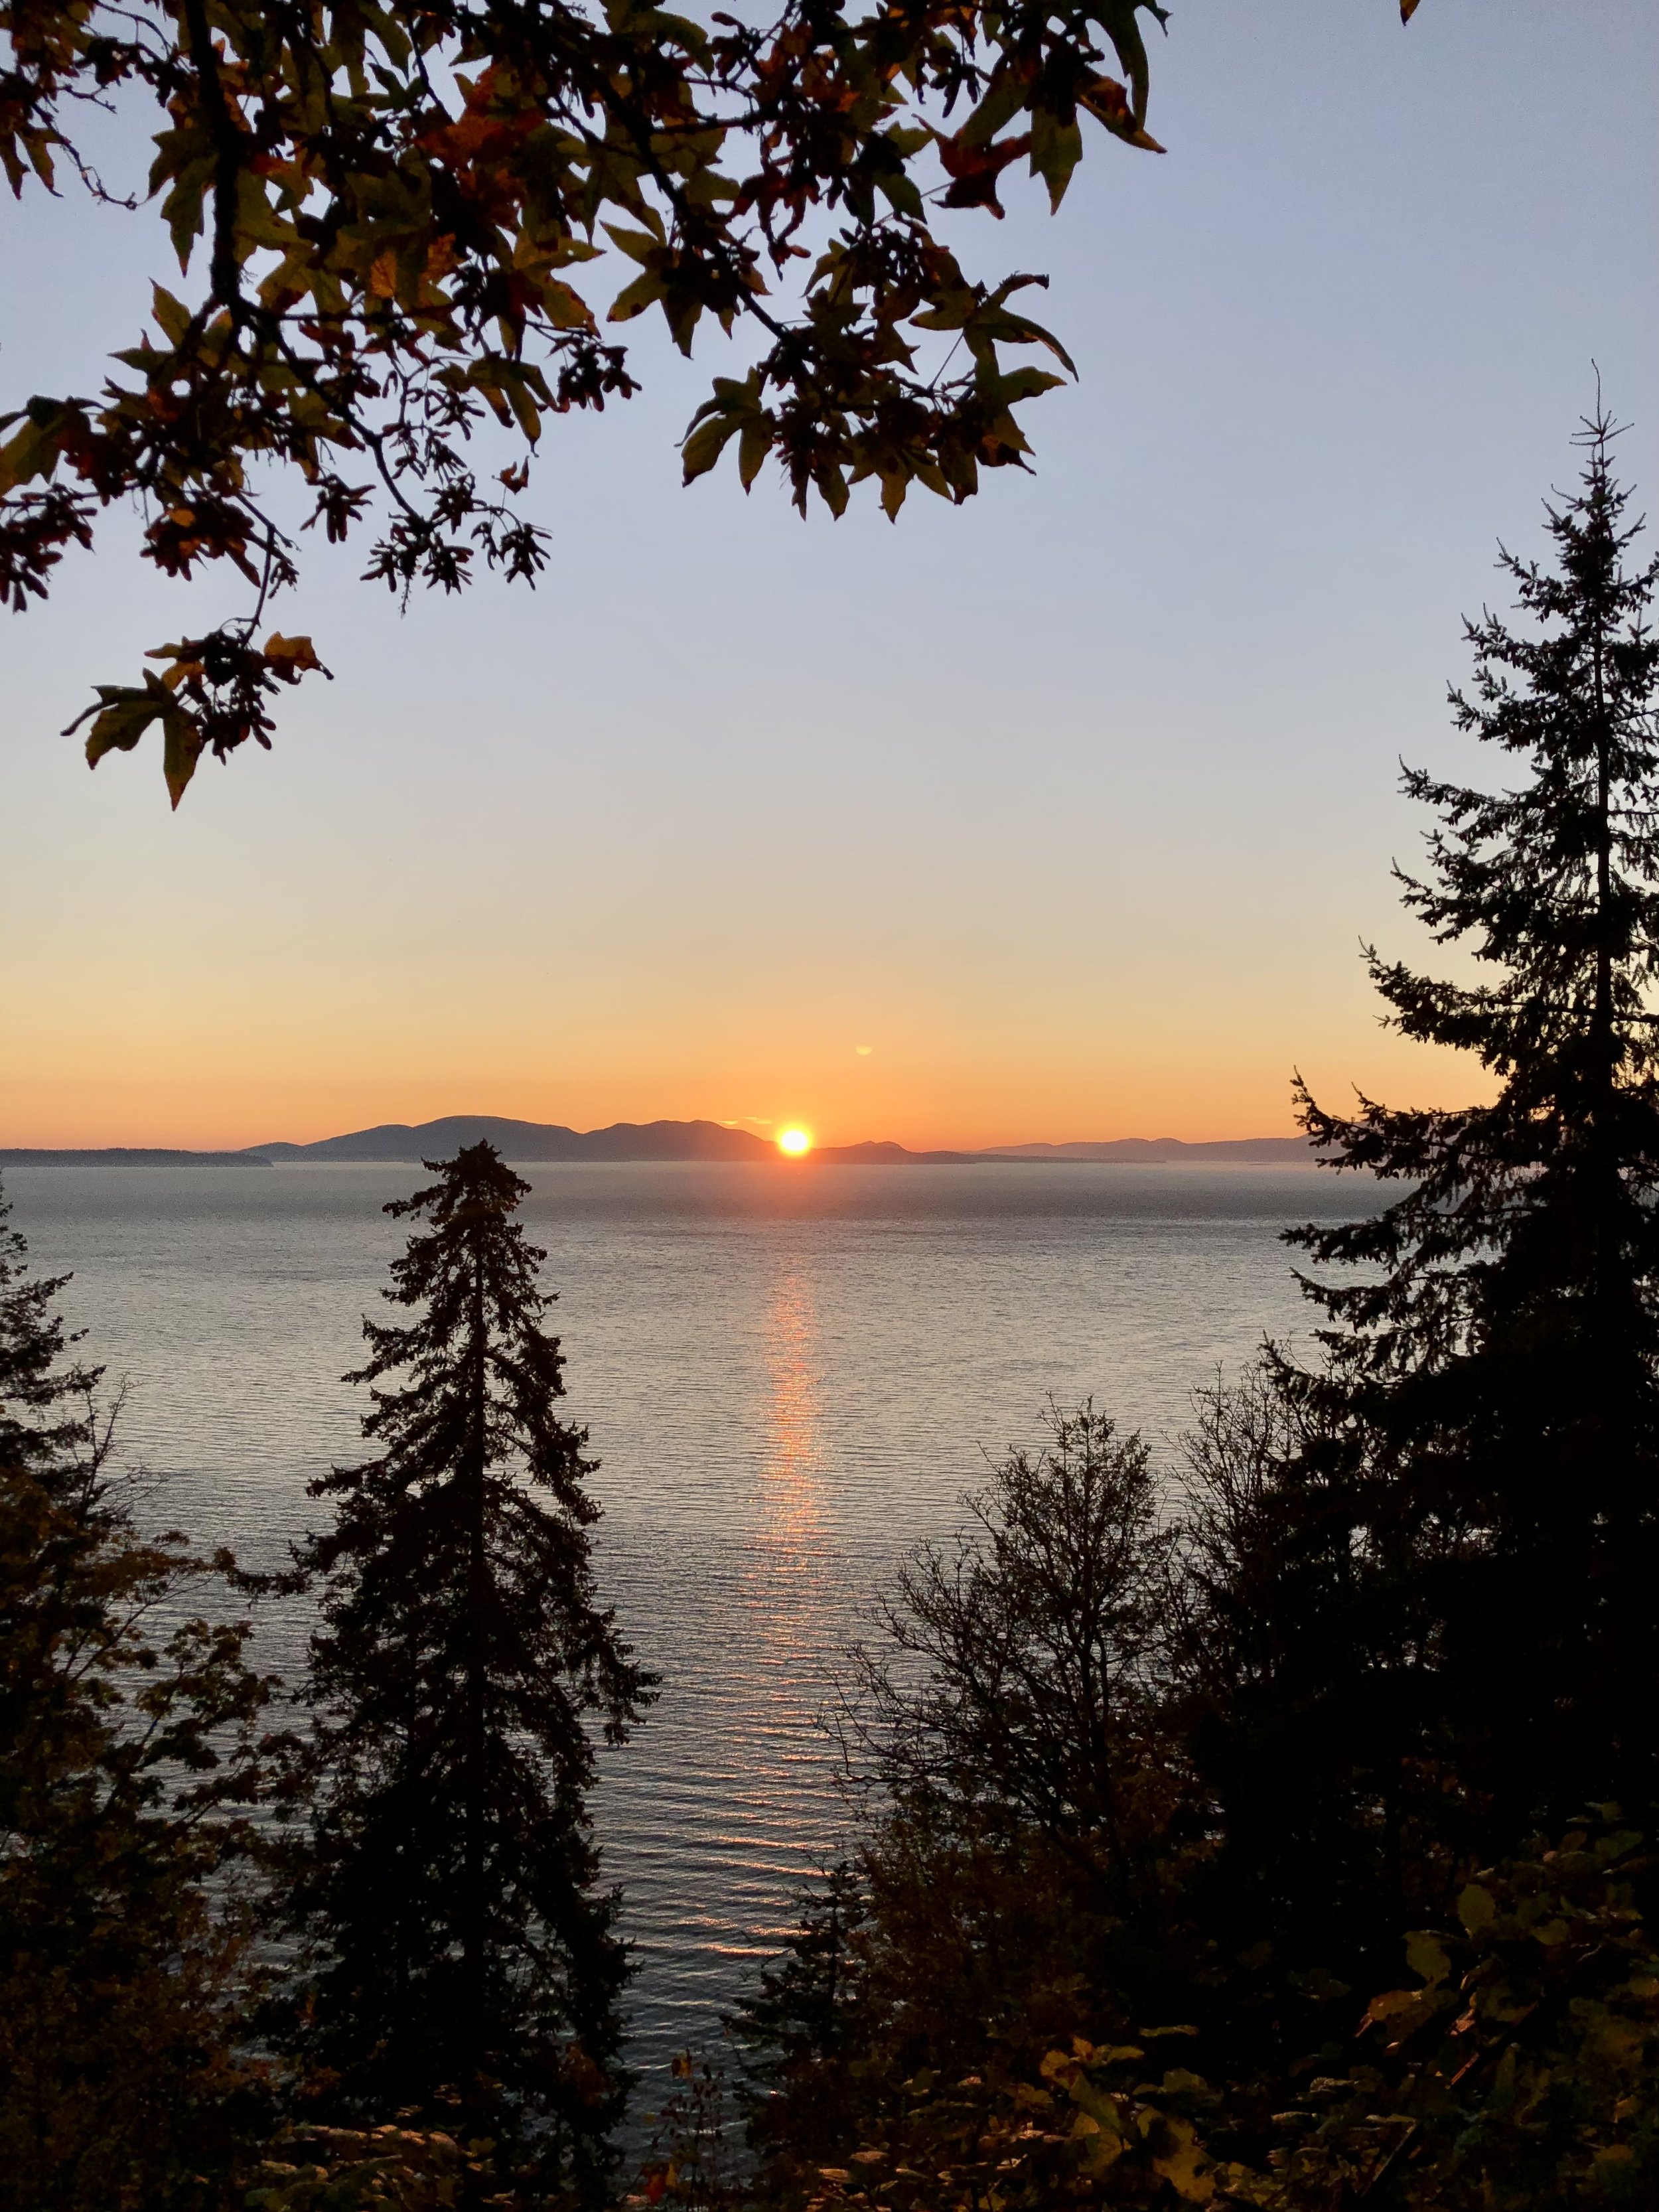
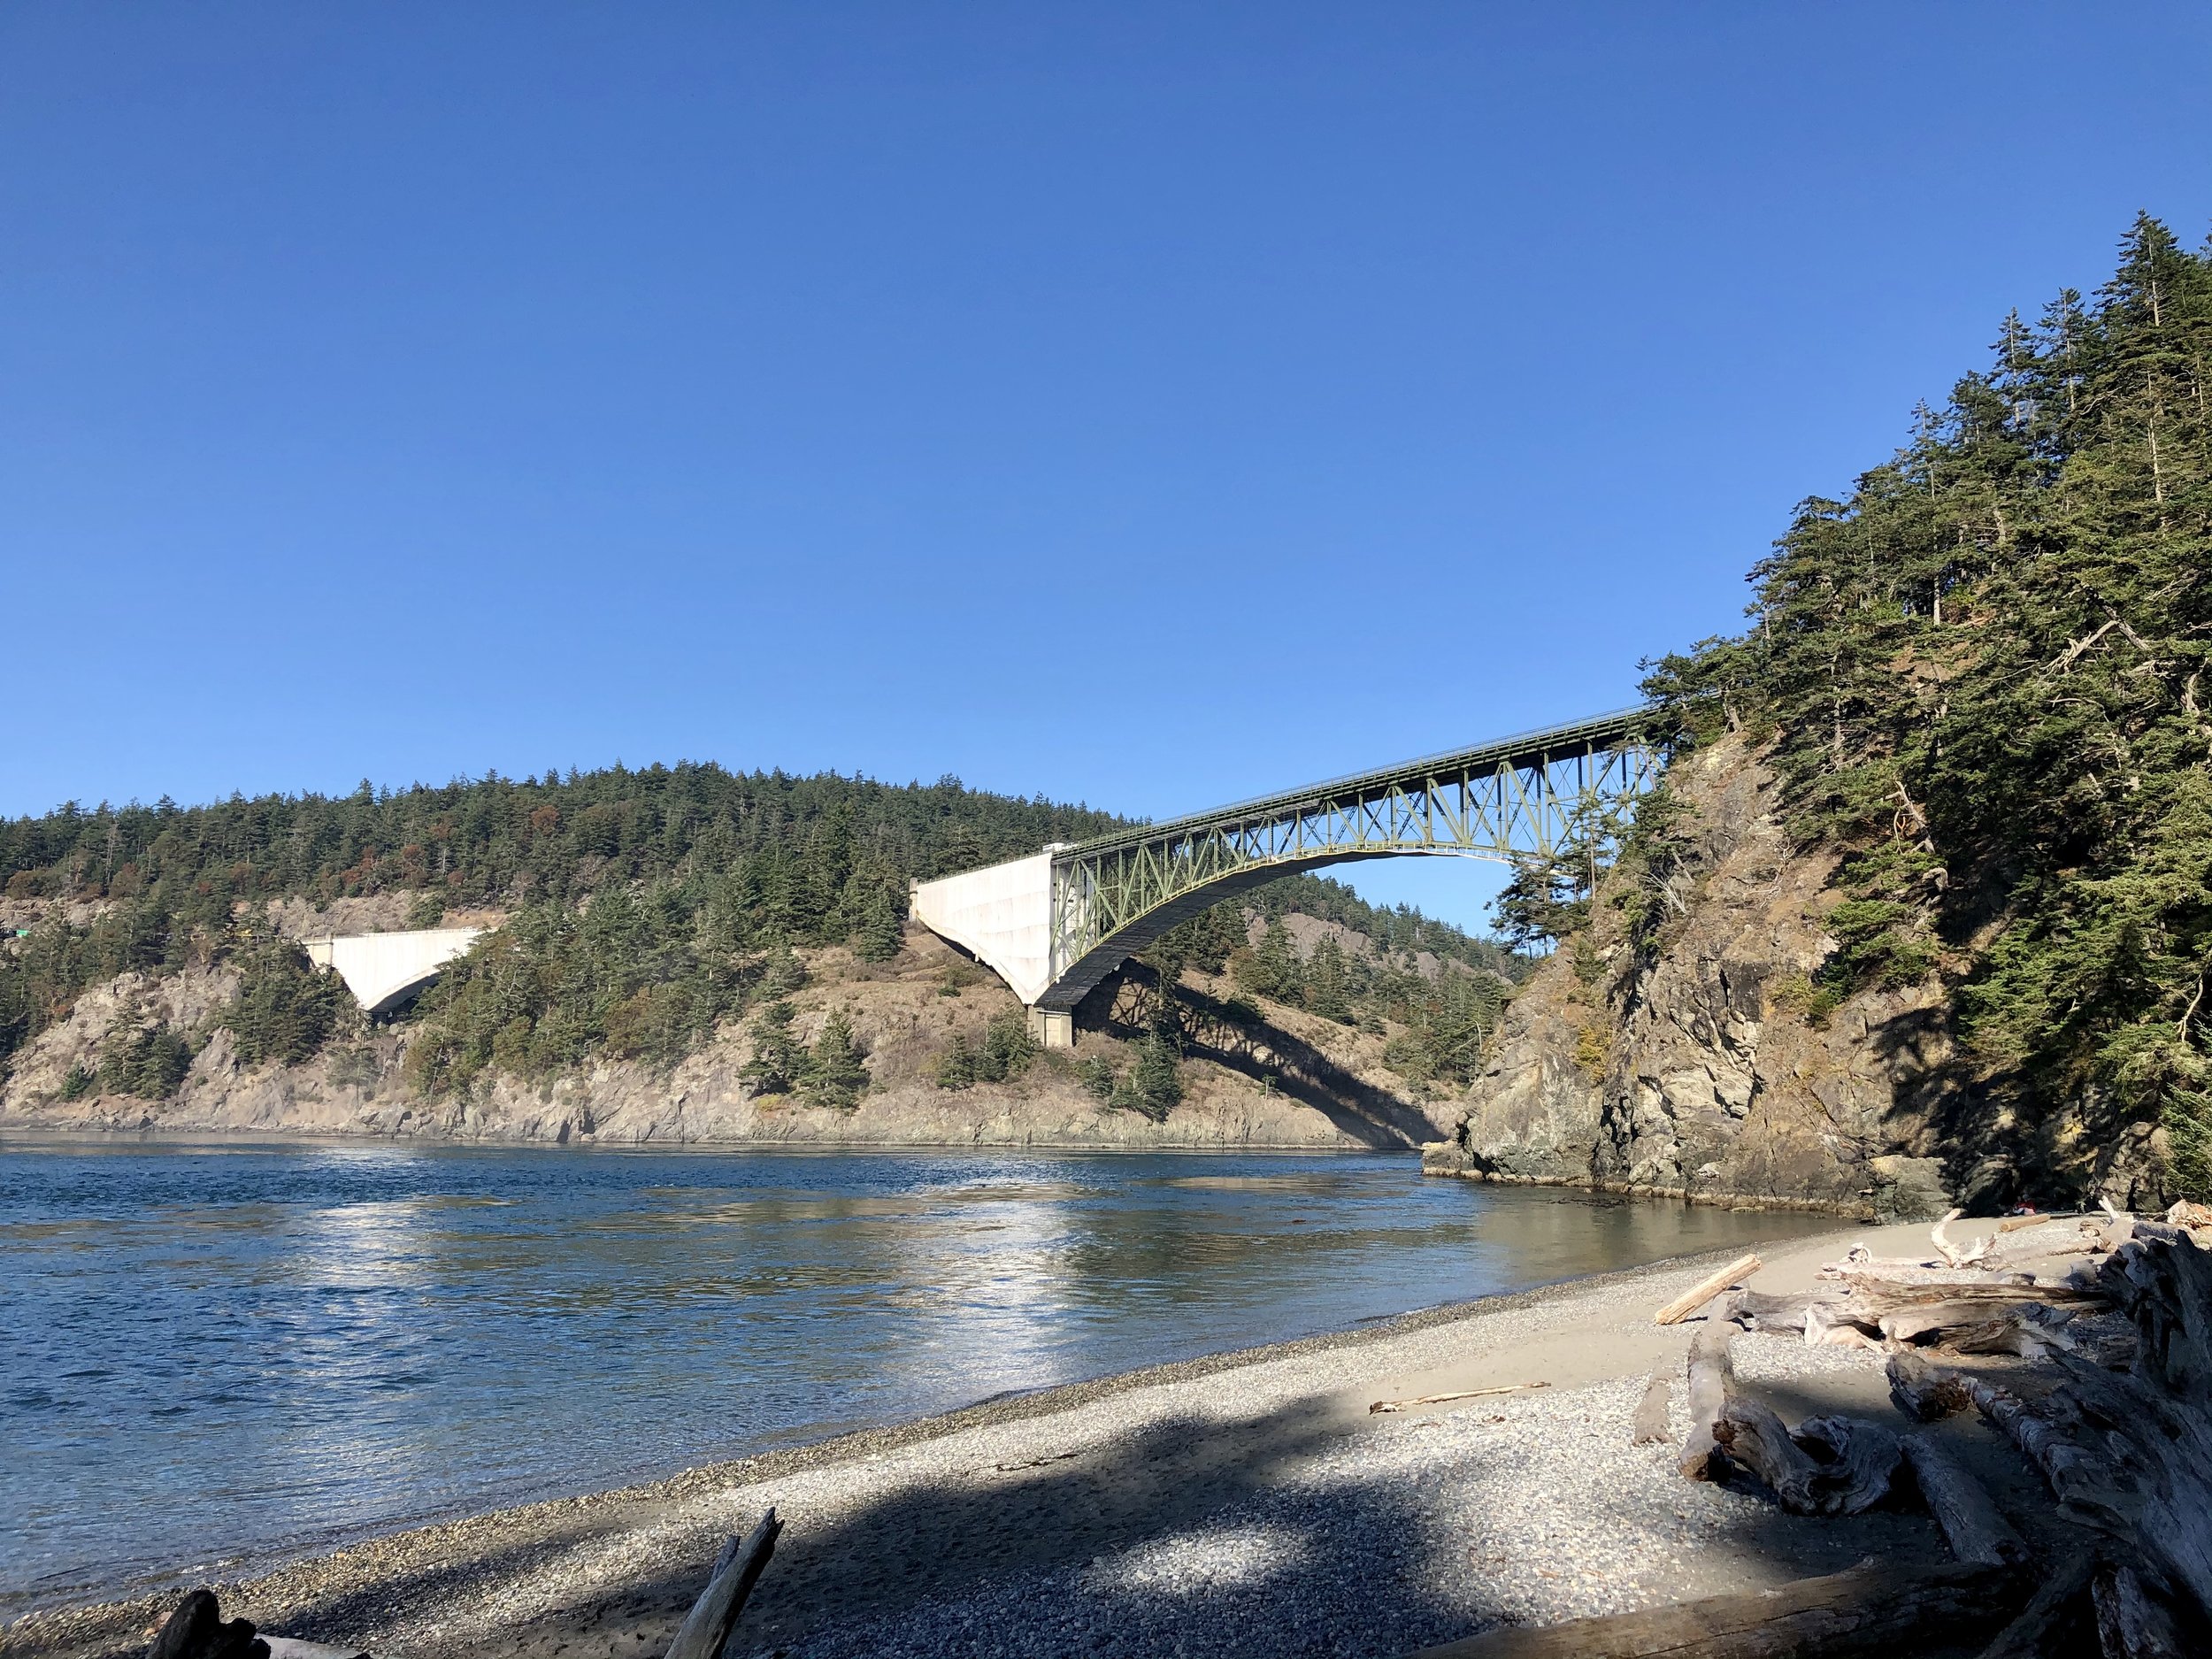
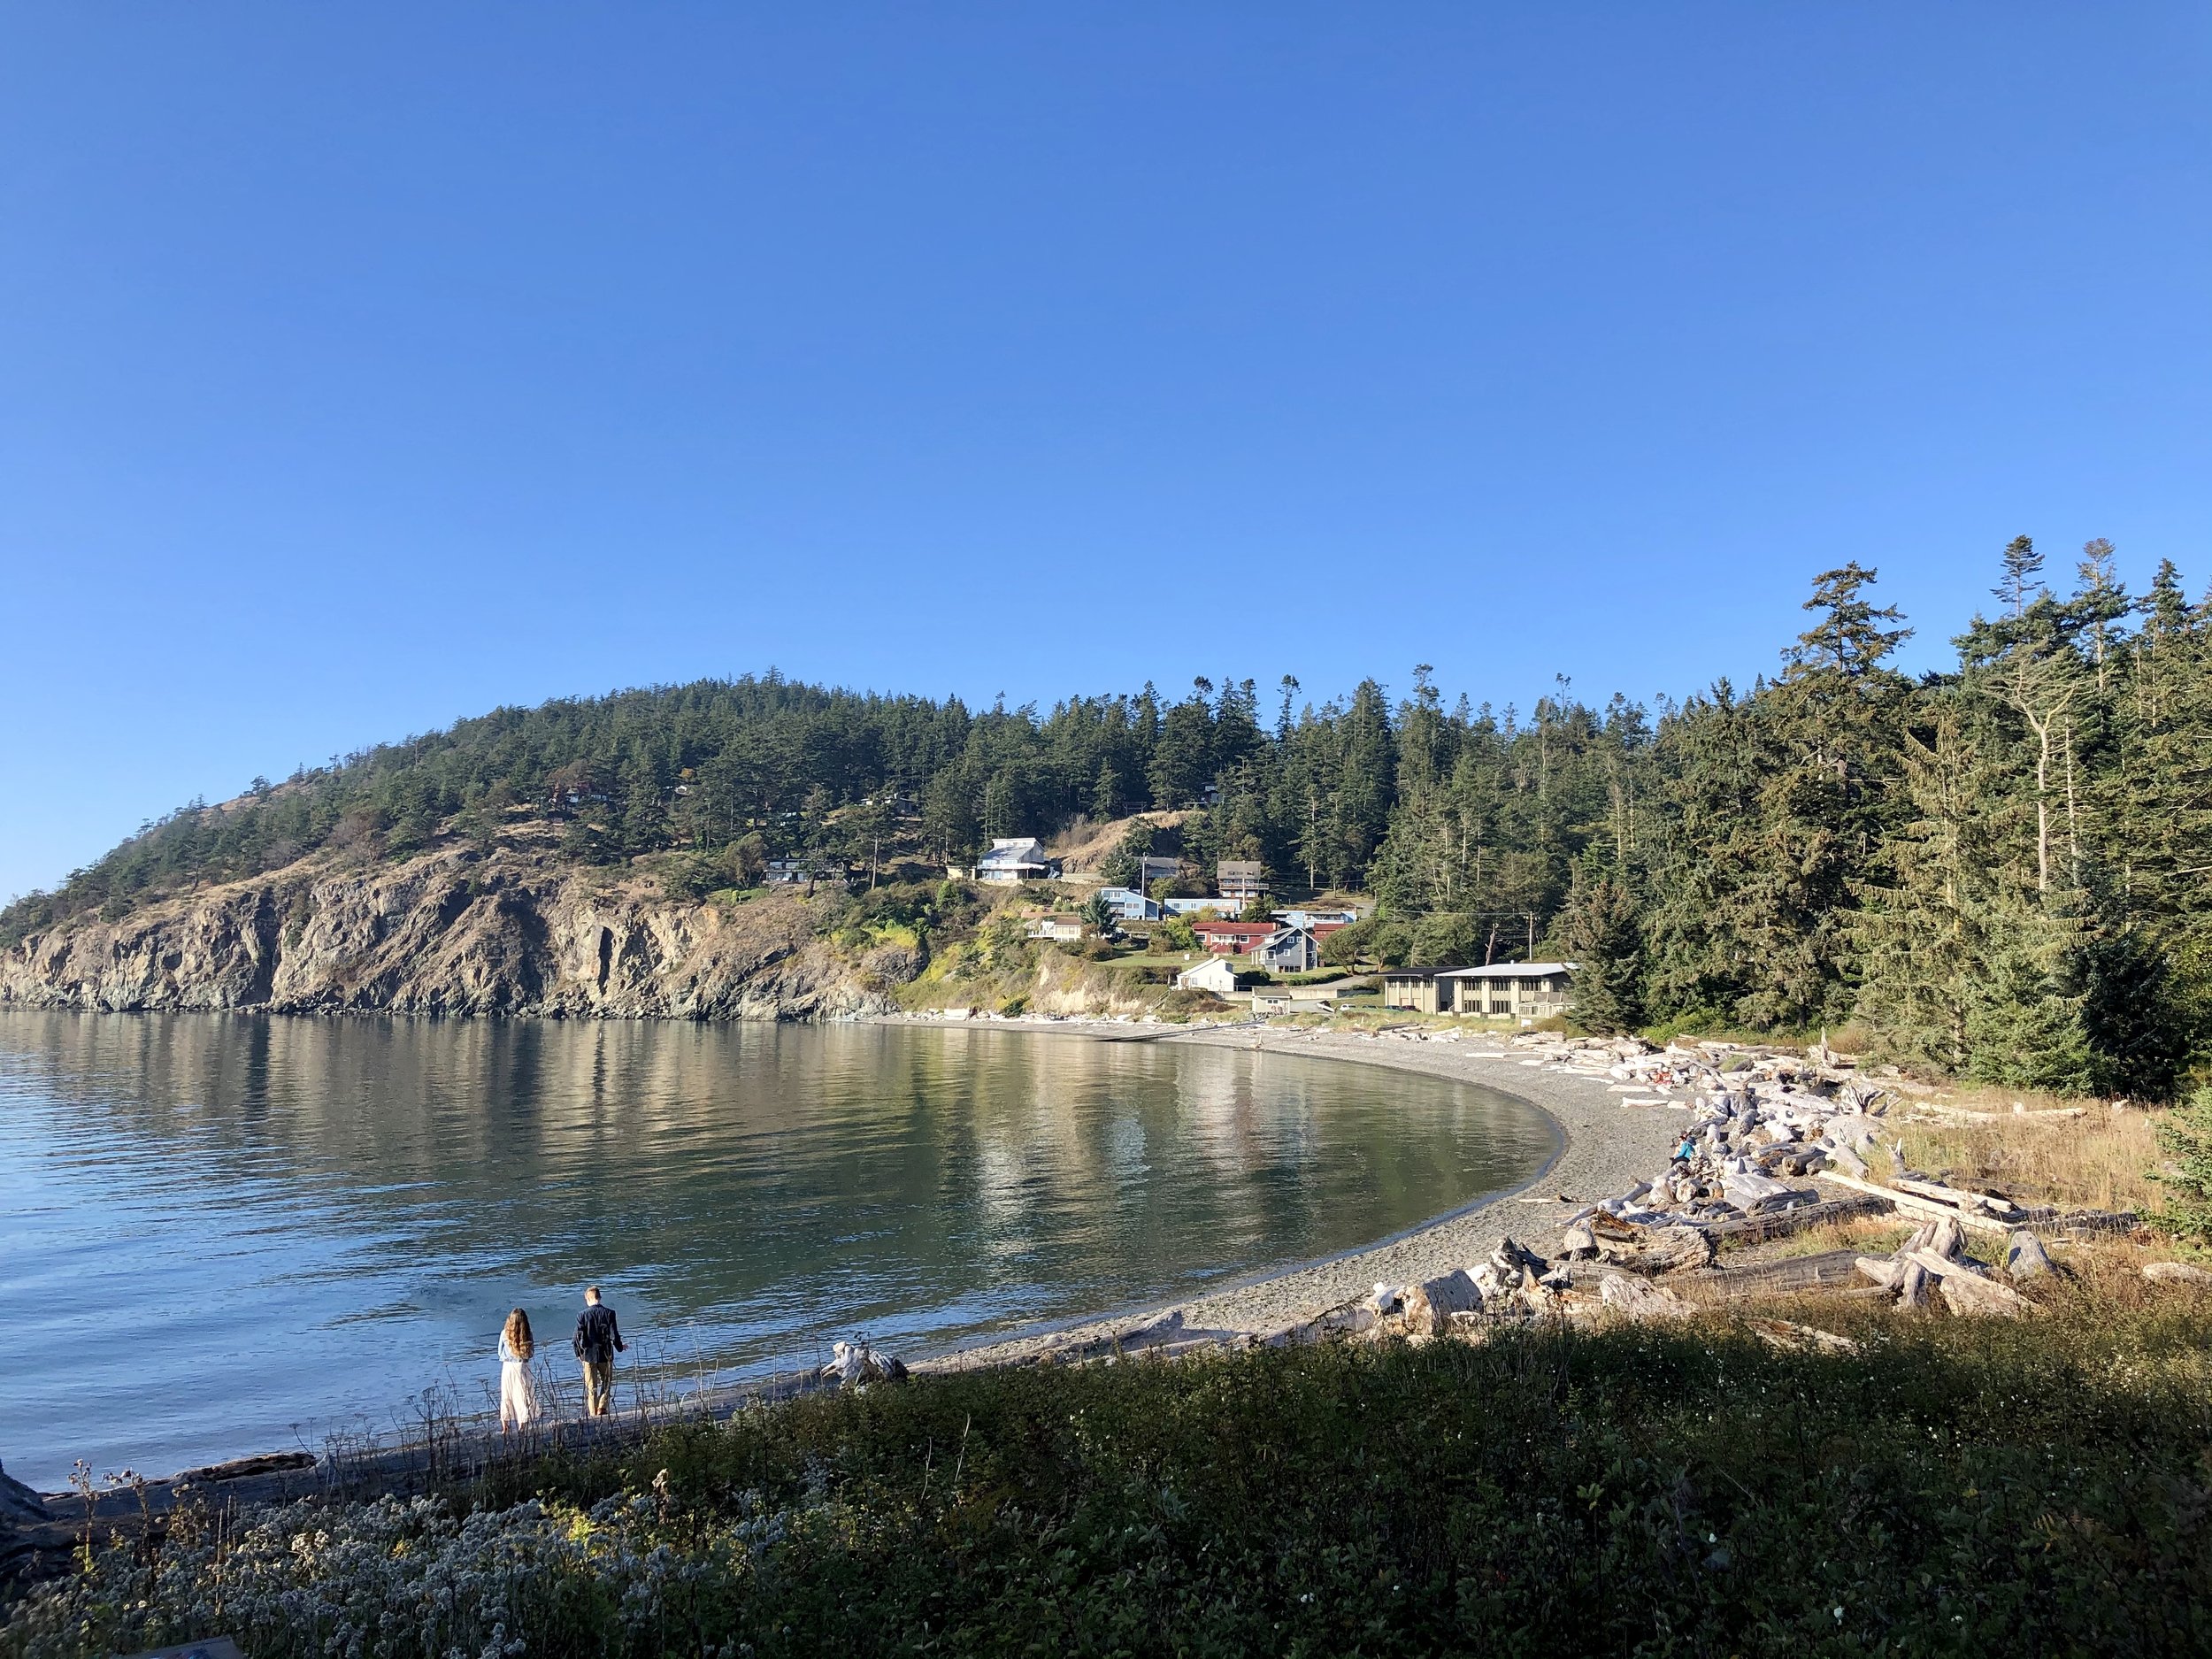
What I didn’t realize at the time was how this part of the trip would change my life forever. I literally FELL IN LOVE WITH BELLINGHAM! I had the best four days exploring this idyllic bayside city that feels like a big town. There are no high rise buildings, no traffic, lots of parks, waterfront trails, a beautiful waterfall, and the huge 13 miles long Lake Whatcom only 10 minutes from downtown. The weather was sunny and between the bay, the lake, and the mountains, I just felt like I was home. Bellingham has a European feel to it and there are a lot of outdoor activities to enjoy without having to drive far. It’s a haven for hiking, kayaking, paddle-boarding, boating, fishing, mountain biking, and even skiing and snowboarding at Mount Baker. I also took a day trip to Anacortes, which is a charming island town close to the San Juan Islands, and Deception Pass State Park. I hired my friend’s real estate agent with hopes of finding a house with lake or sunset view in the Bellingham vicinity before I left.

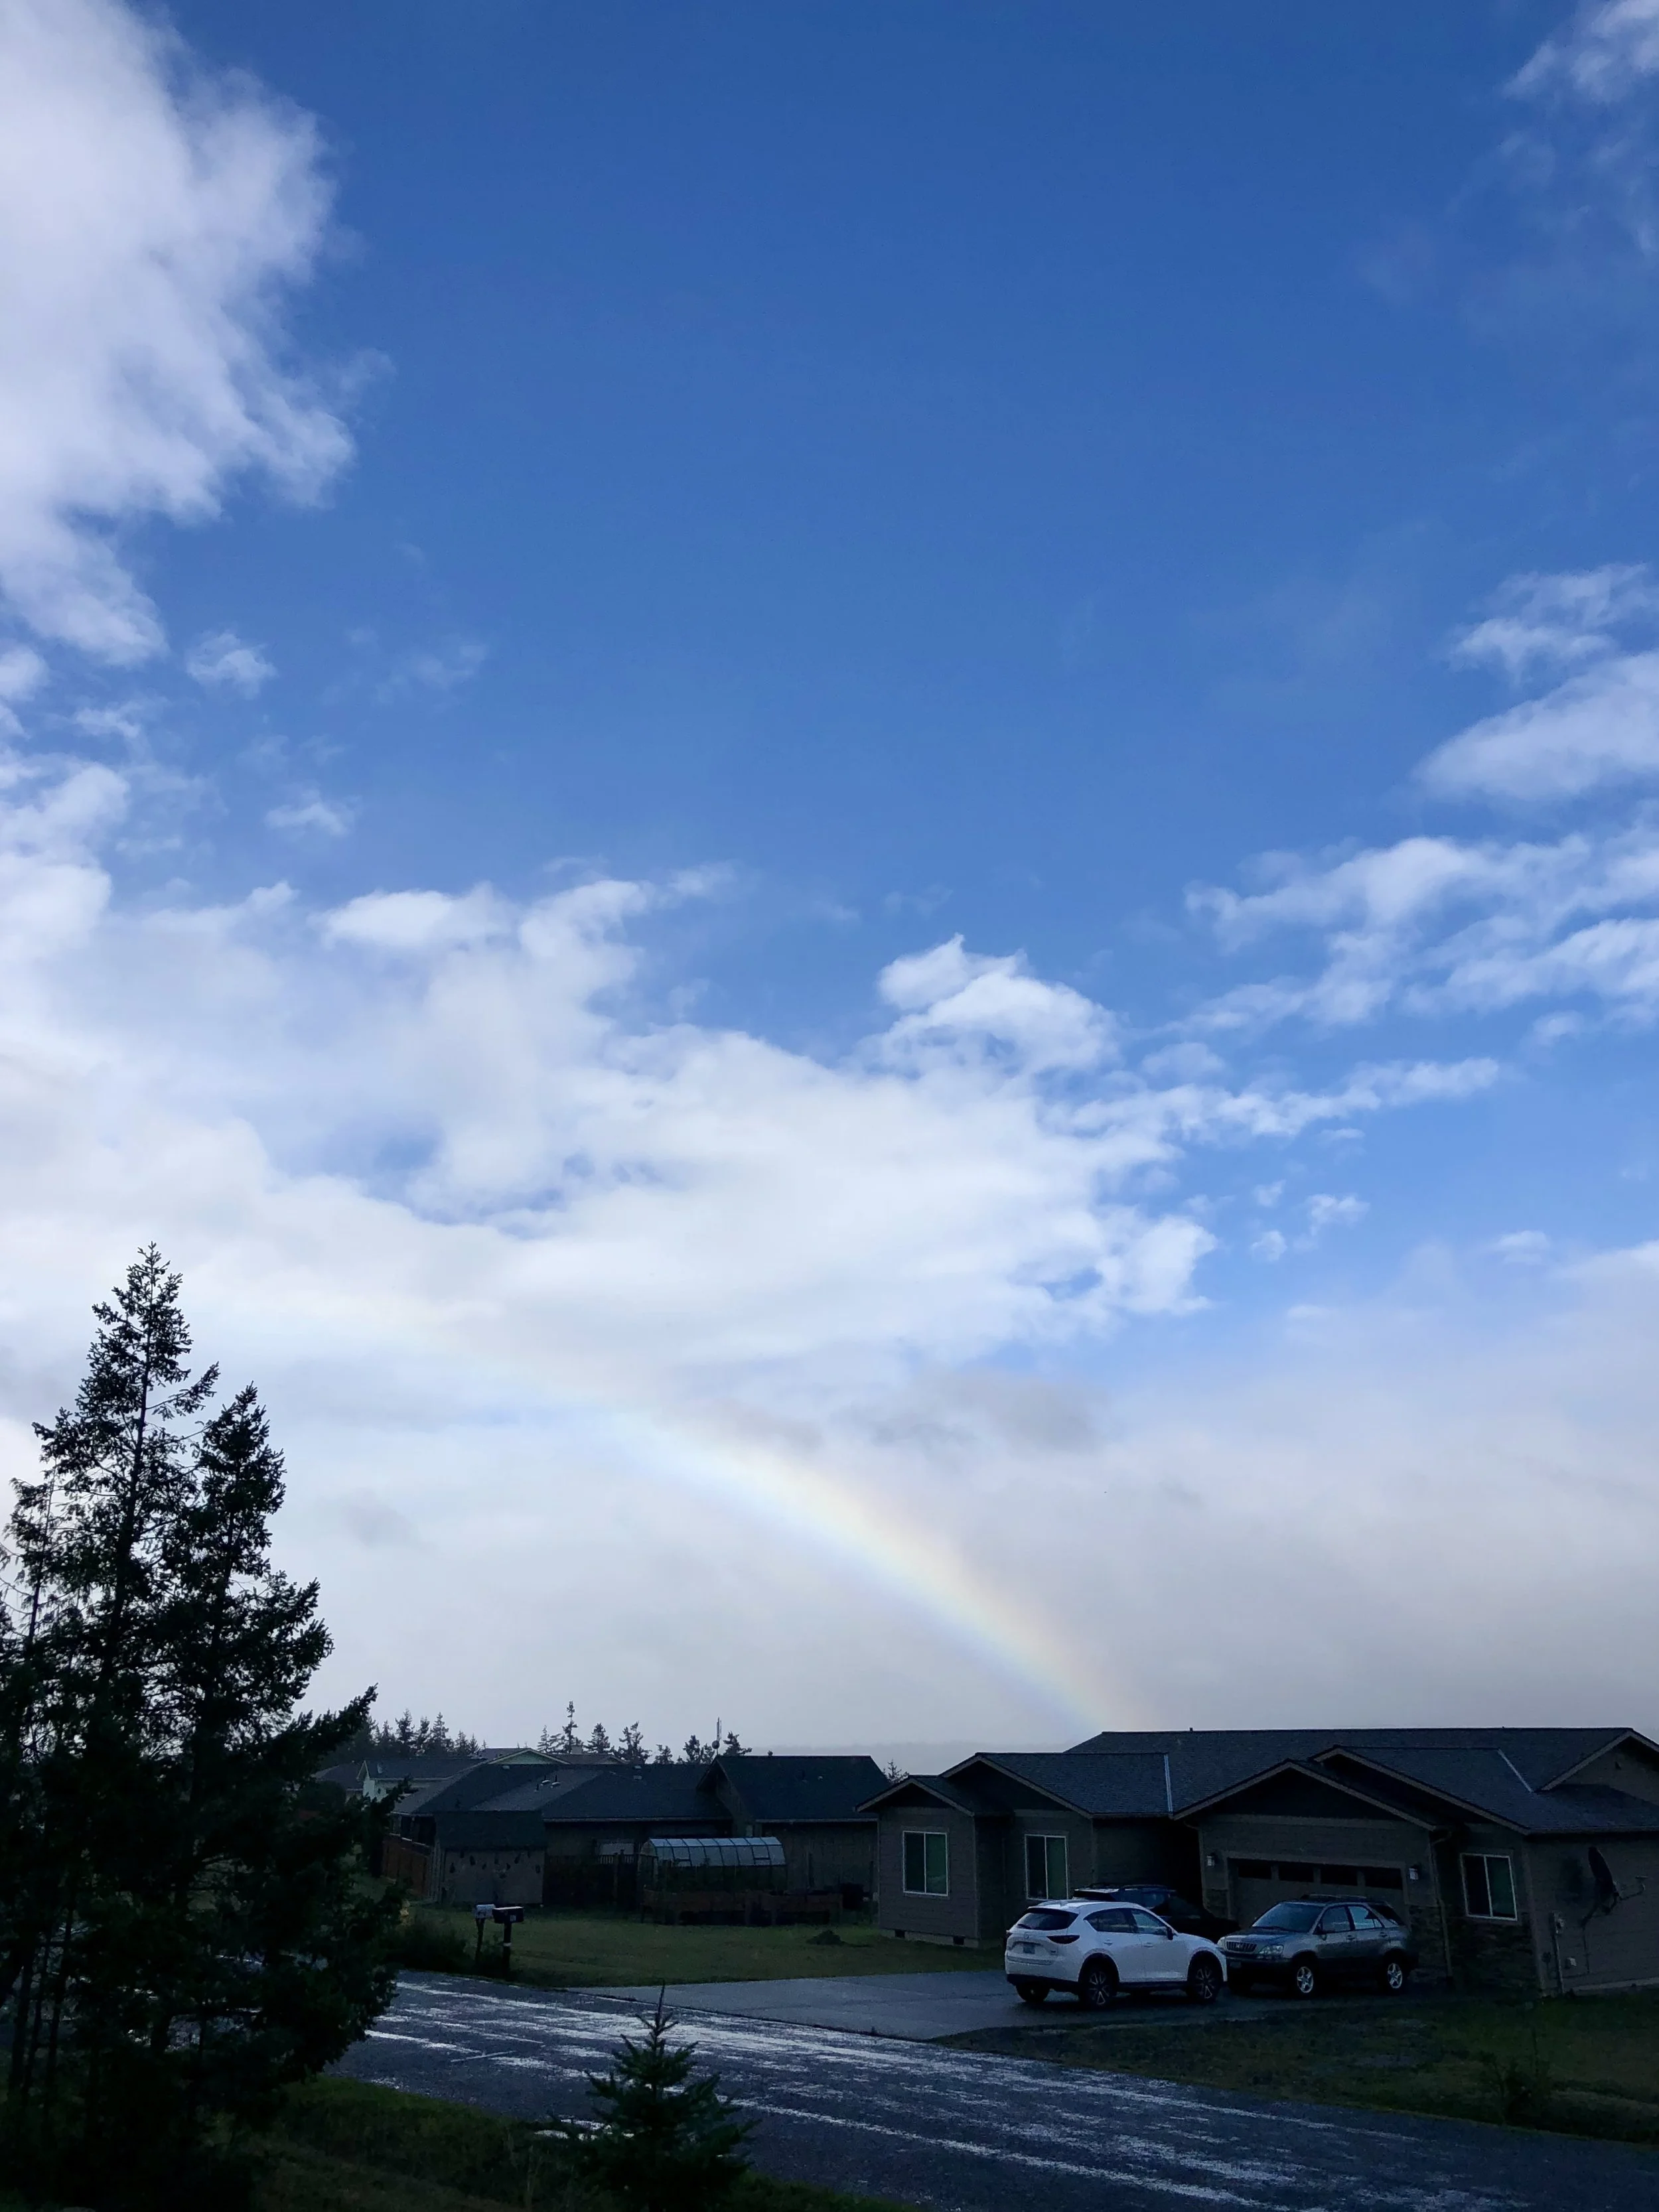
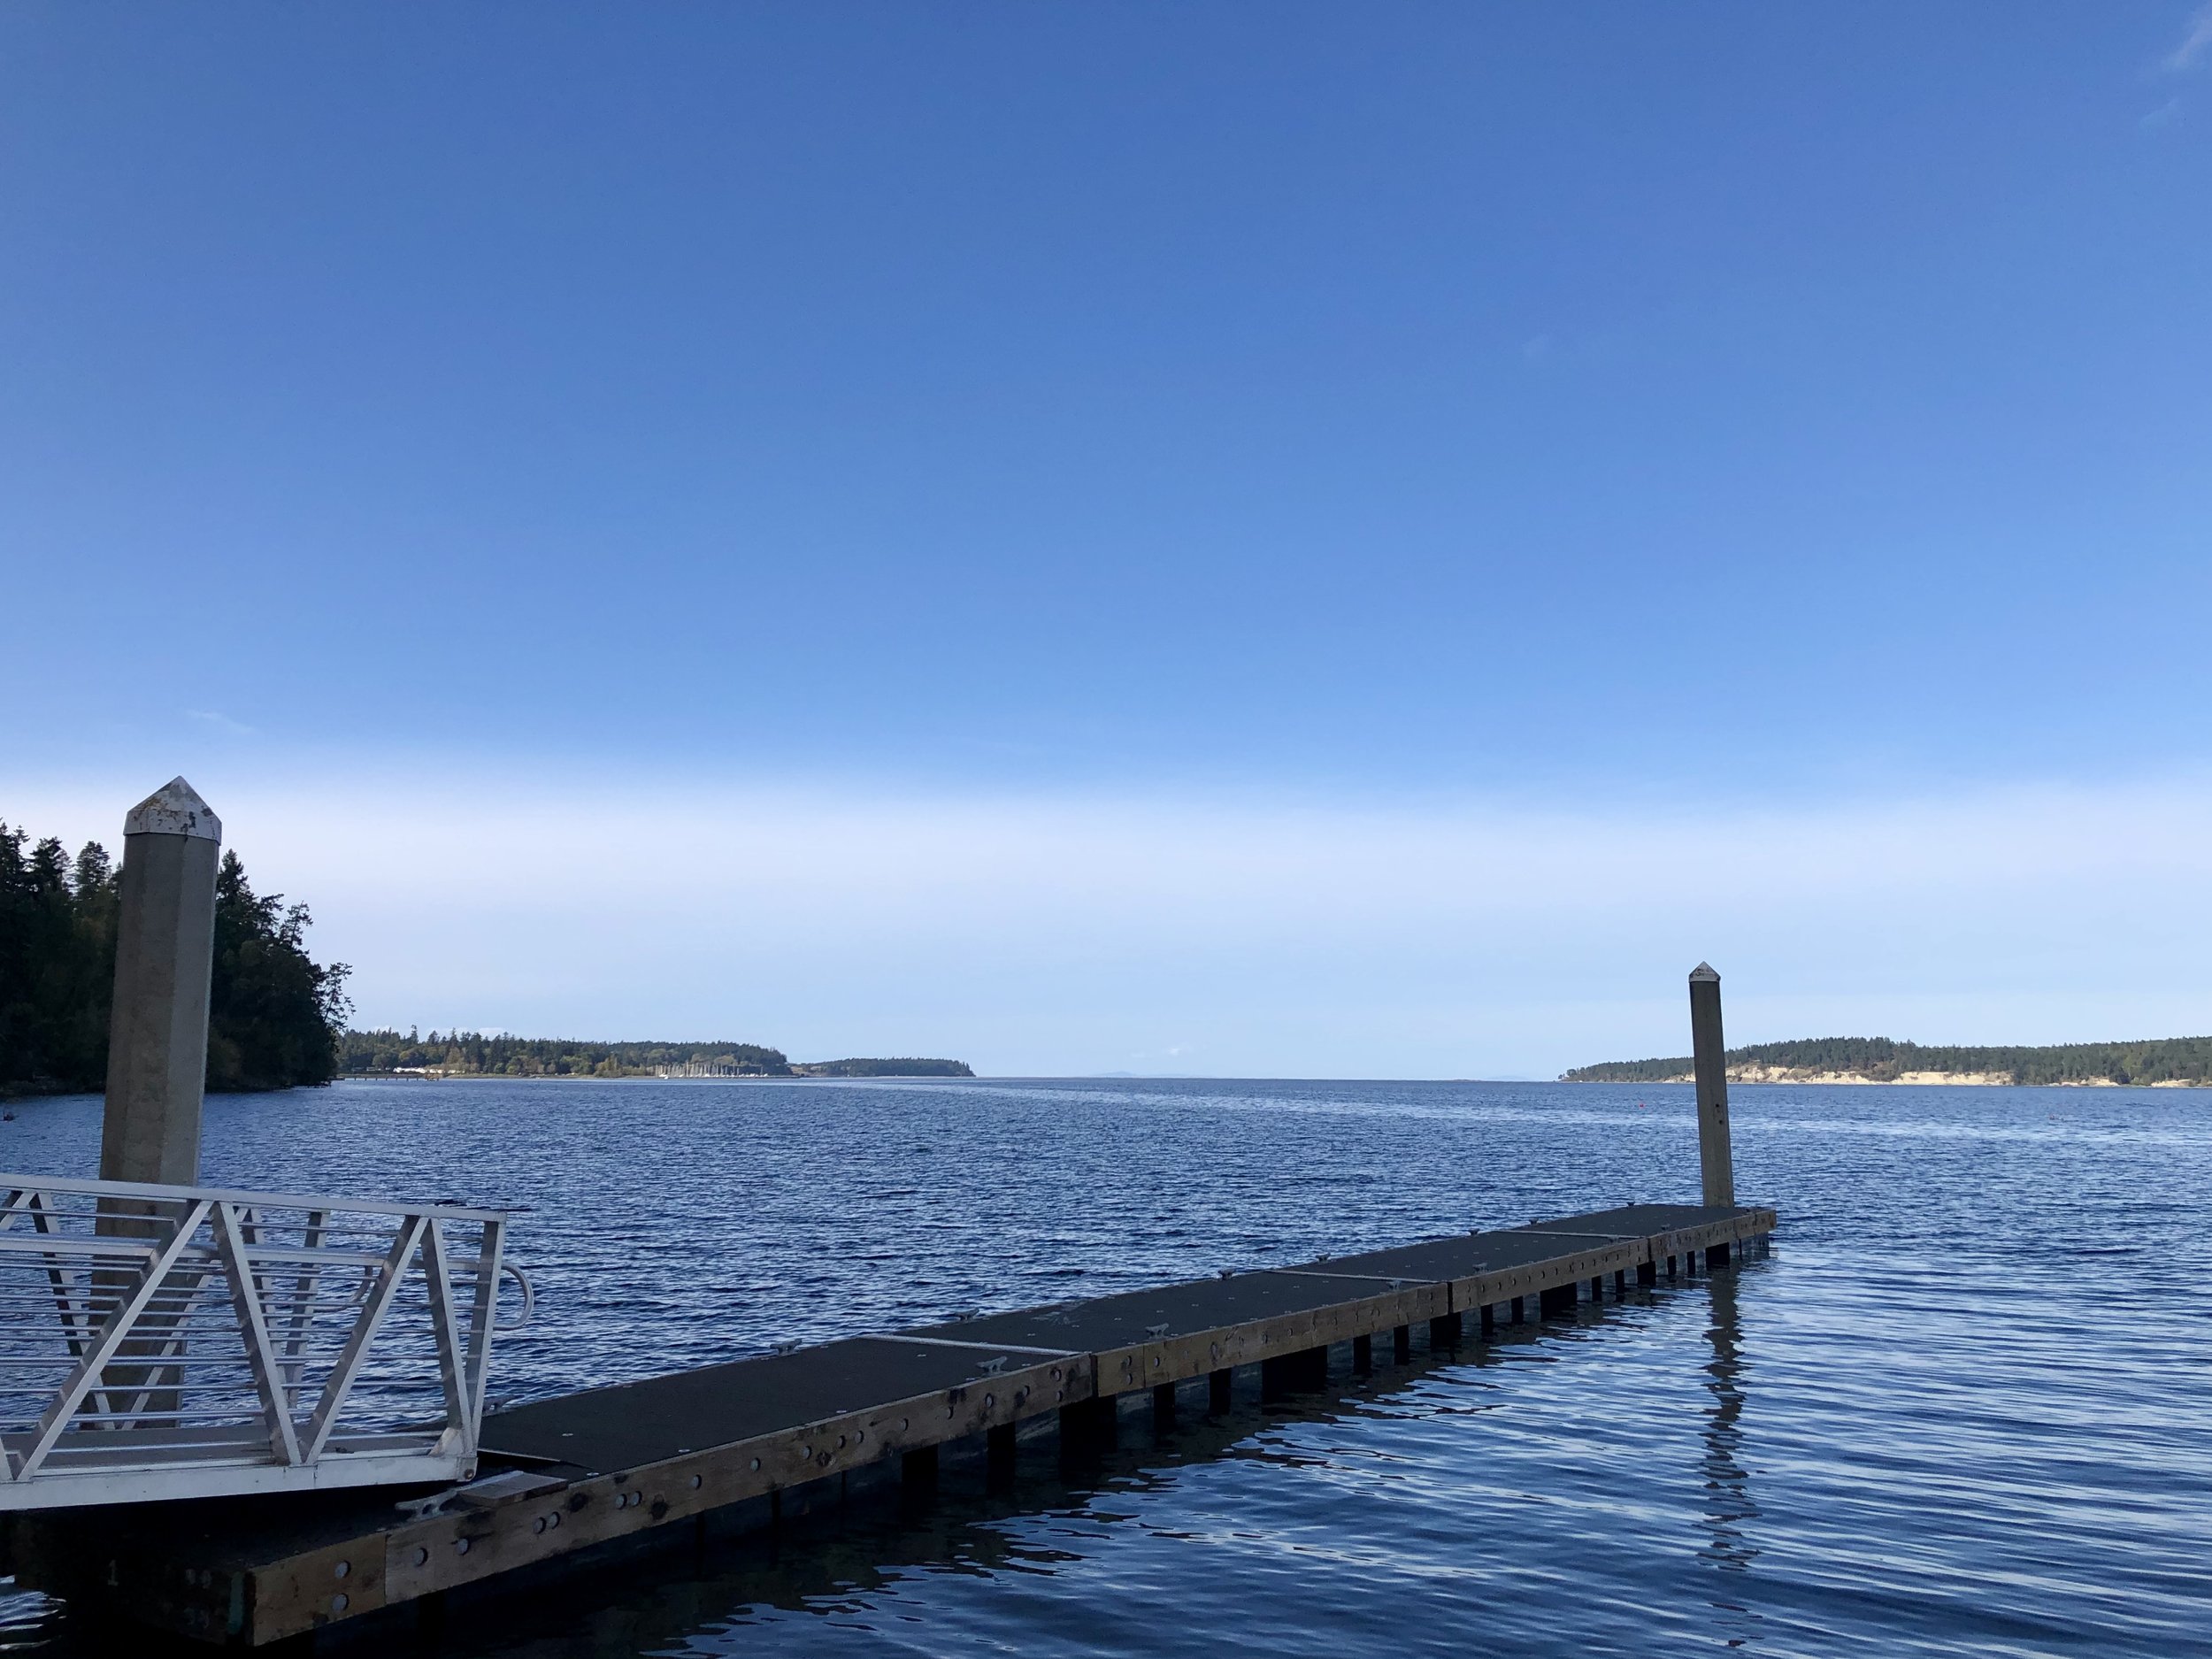
After my incredible days in Bellingham, Cory and I met up again and headed south to Bay View State Park for some camping, meeting up with another vanlifer whom I met on Instagram named Cameron. Then after a stop at Snoqualmie Falls, the three of us headed to the Olympic Peninsula to spend a few days in Sequim, known for its lavender, game farm, and lots of water and mountain views. Sequim is a small town of 30K people (if you count the greater surrounding area) and is often referred to as the “Blue Hole” because it is in the rain shadow of the Olympic Mountains and stays sunnier than most of the Puget Sound area. There are still some occasional drizzles of rain, but those led to seeing lots of rainbows!! Cory and I met with a real estate agent and got familiar with the different regions of Sequim and I even found a house on sale that appealed to me. I made an offer on it, but was beaten by a much higher cash offer. Turns out one of the founders of Descend on Bend lives in Sequim, so I spent one night at their place enjoying the sunset view and bonding with the family. My days in Sequim were quite lovely, making it my second choice to move to.

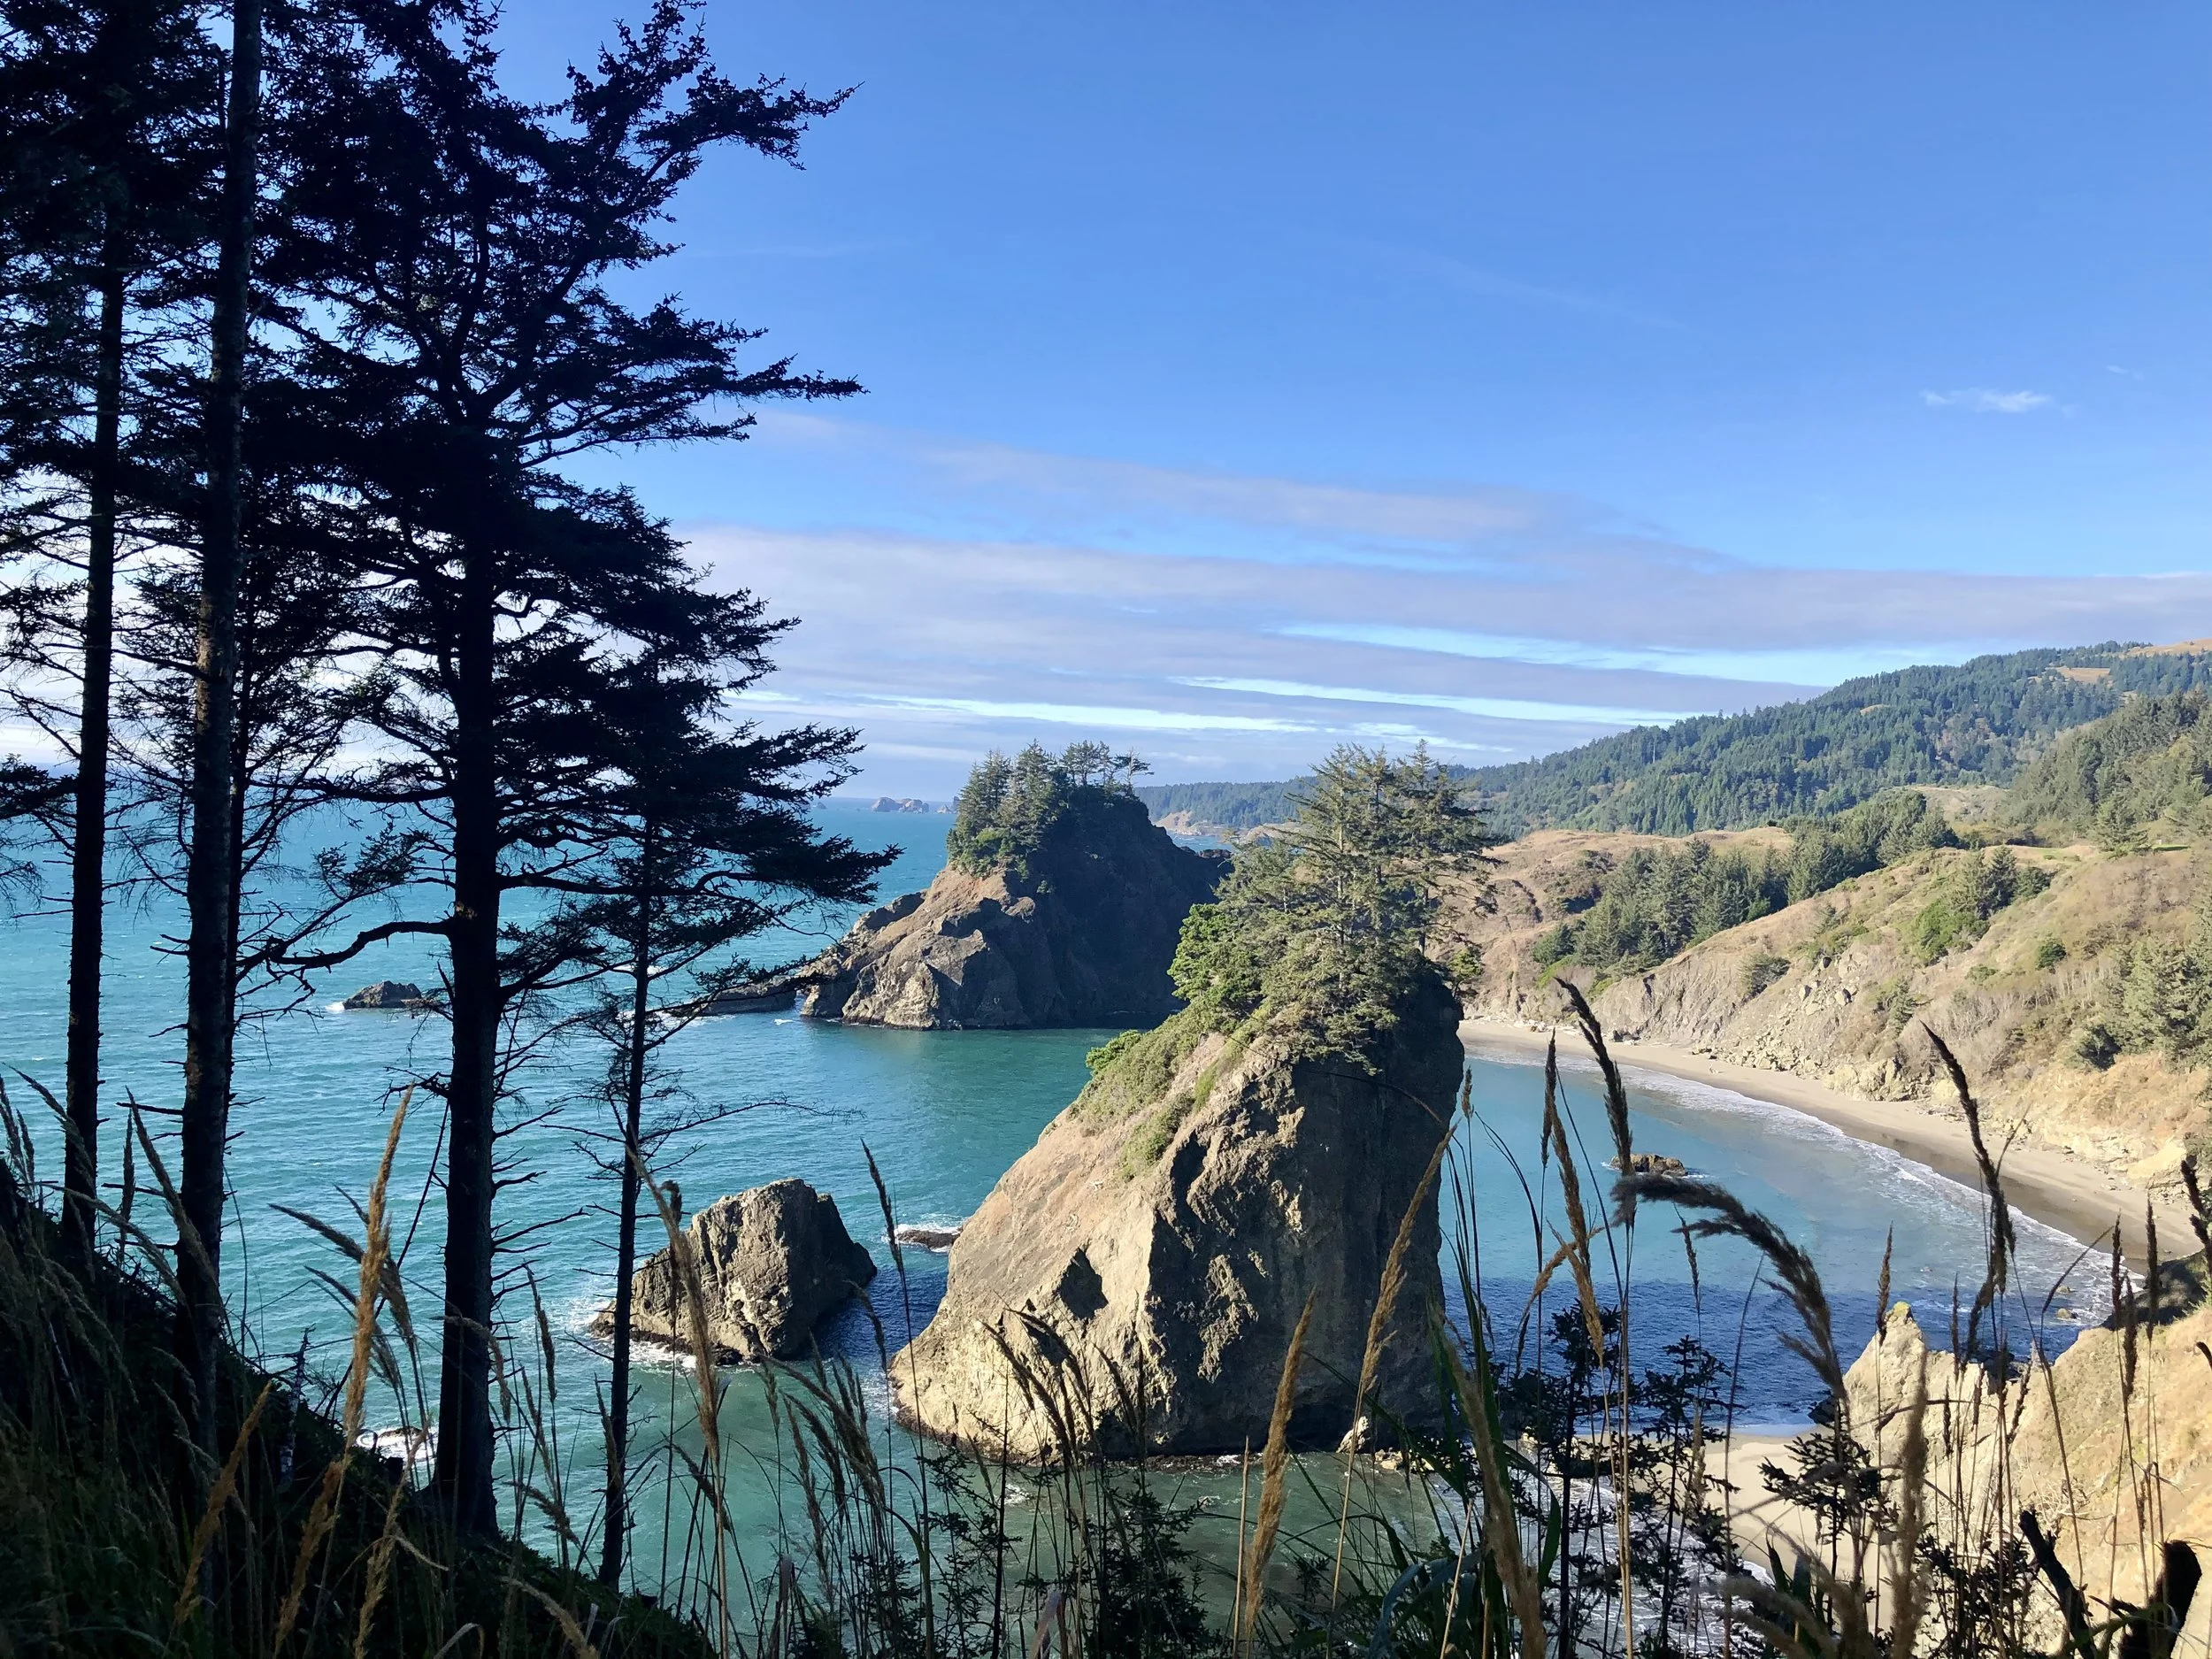
Cameron, Cory, and I parted ways after Sequim. Cameron headed to spend time with a friend of his in Port Angeles, Cory headed to Oregon’s wine country, and I headed further west and then south on the Olympic Peninsula to explore Lake Crescent, Marymere Falls, and the Hoh Rainforest, all of which are located in the Olympic National Park. It was a wet and rainy few days, therefore, I headed back inland to McMinnville, Oregon, for some wine tasting in sunny warm temps. From there, I worked my way south with a stop in Corvallis for cider tasting, and then west to Highway 101 to take the scenic, mostly ocean-front drive south with quite a few stops in the Samuel H Boardman Scenic Corridor just north of Brookings. The moment I crossed the border and saw the “Welcome to California” sign, my heart sank, which is when I knew the time for me to move was official — I no longer wanted to live in California.

I got home on October 30, 2020, and packed up the 10% of my belongings I wanted to keep in 2 weeks. I had an estate sale on November 21st. The following week I had friends and acquaintances take whatever they wanted from what was left, and then the weekend after Thanksgiving, I made a Craigslist post for people to grab whatever they wanted from the garage. I had very little left for donation and dump runs, and then my house was cleaned, staged, photographed, and went on the MLS on December 4th. I had so many offers the following day that I went under contract on the 5th. That’s how quick the process was, a little over a month and I no longer owned property in California! The crazy part was that I hadn’t found a house yet in Bellingham nor Sequim, so I started looking for a rental and found one just outside of Bellingham. Then the day after I closed escrow on my California house, this beautiful modern house near Lake Whatcom in Bellingham went on the market. It was everything I ever I wanted style wise, so I bid on it sight unseen, though my Bellingham friend did go look at it for me and gave me his approval. The sellers didn’t want a bidding war so they took my offer and I went under contract with a mid-February close. I was able to stay in the California house I just sold until January 21st, then I stayed at my friend’s ranch until I moved to Washington on February 1, 2021.

That Pacific Northwest vanlife trip was the best decision of my life. Many of my Bay Area friends didn’t understand my urge to pack up and move in such a short time frame, but for me it was the right decision. I just had a gut feeling that I needed to start over somewhere fresh with a healthier lifestyle. Was it a bold move with some risk involved? SURE! But I also knew that if by chance I didn’t love living in Bellingham, I could always move after two years and find another place. I also knew to trust my instincts and they told me that living in Washington was just what I needed. My instincts were right! Turns out I absolutely love where I live, that the Pacific Northwest climate, landscape, scenery, and lifestyle really suit me, and I’ve never looked back. Sometimes I even wish that I moved here when I was younger because I feel so at home now.

I always encourage everyone to FOLLOW YOUR DREAMS. Moving can be scary, especially when you’ve lived somewhere most of your life, but moving can also be SO REWARDING! I can honestly say I live a much healthier lifestyle, enjoying nature, exploring new places, camping, hiking, kayaking, spending time outdoors, all things I was not doing in California. The heat and the traffic kept me from exploring and made me lethargic. I can no longer imagine living in a big city. I finally live near water like I’ve always wanted, I even live in the forest. Plus I love that I can be completely immersed in nature feeling like I’m far from civilization within 5 minutes of my house. So if you’re reading this and you’ve been feeling the need to change your life, I encourage you to go for it, even if it seems scary or impossible. You are the the only person that can change your quality of life and make it better. JUST DO IT, take the plunge!

A quick closing note. Cory also ended up finding her retirement place on this caravanning trip. She moved to Florence, OR, about a year after I moved. She’s also super happy with her decision!

Comment

Comment

Vanlife Products That I Love

I know there’s a lot of vanlifers out there that promote products. Many do it because they rely on the kickbacks to earn money on the road. I fully respect and understand that and try to support as many of them as I can because it’s their livelihood and I want people to succeed. I also like to promote products that I believe in and use when I’m in the van on the road. Here are some of those products:


MoonShade — I didn’t want to be restricted with an expensive awning that was affixed to one side of the van, so when I heard that a San Francisco company came up with a more versatile and cheaper awning, I was stoked. I was one of the first buyers of the MoonShade and absolutely love it! It packs up small to the size of a yoga mat, fits in one of my back drawers in the van, and sets up fast and easy. Use code 'barbrocks' for $30 off! They launched a Kickstarter for the new MoonShade XL, which I supported, so I can’t wait for the new 12’x9’ awning with over 100 sq ft of shade! Once I get it, I’ll probably sell my original size one, so stay tuned if you’re wanting one that’s barely used at a discounted price!


Quest Overland — I have the Sprinter blackout window covers for the front cab and back windows and they fit perfectly with strong magnets holding them up. They are well constructed in a neutral color, and last years and years; mine are from 2019 and they don’t show any wear and tear. The company also makes bug screens for the sliding door now, which install into the rubber gasket so they stay secure, though they sell out and aren’t always available. Use code “barbrocks5” to save 5% in their shop!

UPDATE: Hally & Ian the founders of Quest Overland sold the company in September 2023 and the new owner Josh is not fulfilling orders, nor replying to emails. I sadly can no longer recommend this company to people unless the new owner gets his business affairs in order and customer service improves.


Ripplewear — I bought these easy to put up bug screens on eBay and am overall happy with them. They attach with magnets and stay up decently, though if you pull too hard, they do come down. If you don’t want to spend a lot of money on van screens, these are a good solution, plus they pack up small when you don’t need them. I only put mine up when I’m in an area with mosquitoes.


Kula Cloth — I love my Kula pee cloths and use them at home and in the van. Kula is an anti-microbial cloth made from advanced silver-infused textiles that saves the environment and is the perfect item for women that are into outdoor activities like hiking, mountaineering, camping, fishing, etc, as well as for people living the nomadic lifestyle. This well-designed reusable pee cloth wipes after squatting, attaches to backpacks with a snap, snaps closed after use, and keeps toilet paper from littering nature. I have a bidet at home, so I use it to avoid getting toilet paper fuzz on me, and I keep one in my purse for those occasions when public bathrooms don’t have anything to wipe with. Practice “leave no trace” and keep your genital area clean, all while using a practical, eco-friendly item with pretty art on it!


SandCloud — These towels dry quickly and fold up small, which is essential in a small space, plus they have some cool patterns/designs, and 10% of profits goes to marine conservation. They have a Disney collaboration now and have released Star Wars, Harry Potter, and Micky Mouse designs, and continually release other cool marine designs with various preservation organizations. For my home I own two sets of the Pantone bath bundle (in French Blue and Bluing), and the Mud Cloth bath bundle (in black). In addition, I have the Harmony, Sundown, Mandala, and Vista (zebra print) towels (some of these designs are no longer available), which I use for beach, lake or pool excursions. I also have the Cyperus kitchen towels bundle for the van since they match my interior colors so well.


Rumpl — I love their puffy blankets as they keep you super warm with cool designs, which are available in different types (original, nano, down), plus they have an indoor line (sherpa, hemp, wool), as well as towels, mats, and other gear. I own 4 puffy blankets them now and I have the Lake Tahoe Everywhere Towel, which is super soft! The company does limited edition artist collaborations (I own 2 of those) and they have a super cool National Parks collection, and even an NFL collection! I love how there’s a clip on the puffy so you can wear it outside to stay warm.


Amazon — I have a few different Amazon lists with products that I use and think are good. The lists are divided up into Vanlife Essentials, Van Build, Cat Products, Household Items, Sports & Fitness Gear, Good Books, Beauty Products, and Fashion. My favorite thing to promote for ladies living vanlife is the female urination device which fits perfectly between the legs so there’s no mess! I also have all the items from my van build that are available on Amazon up, as well as other practical items for vanlifers.


Curie — I’ve tried many natural deodorants out there but many don’t fully work for me because I sweat easily. I discovered this brand on Shark Tank and decided to try it after seeing the founder get the investors to smell her armpits after a hike and scoring a deal. Guess what? This clean, aluminum-free deodorant really works! Even after hours of salsa dancing, my armpits still smell good despite all the sweating. In addition to the deodorant, I also use the deodorant & body spray for a refreshing spritz, and the armpit detox mask for a deep cleaning when needed, which also works on your face if you have problem areas. I recommend getting the Pit Kit as a starter packet.


Paka — An amazing apparel line founded in Peru that makes all-purpose clothing for people who love the outdoors with alpaca fiber and other materials that are healthier for people and the planet. I personally love the Breathe Zip-up and The Hoodie, as well as the baselayers and socks. These garments keep you so warm and are so soft to the touch! Not only does this company ethically source the alpaca fibers, they employ Peruvian weavers and multiply their daily income by 8x. Some of the garments are even hand-signed by by the woman artisan who wove it!


SkinADX — Clean beauty is important, especially for the ladies out there. A friend of mine started this company and they are the best skincare products I’ve ever used. I have the best skin of my life now thanks to her 5 steps cleansing and moisturizing system made from quality essential oils and absolutely no fillers. I highly recommend the Azulene Cleansing Oil Concentrate, Harmony Cleanser, Quench Hydrating Toner, Defi Vitamin C&E Age Defying Serum, Radiance Blue Tansy Serum, Green Godess Repair Serum, Nutrish Day Cream, iBrite Eye Cream, and Body Guard Hand Cream. I use all of these and refuse to try another skin care line now. Use code “SkinADX4U” to save 20%!

Comment

Comment

Vanlife Gatherings 2023

Vanlife & Overlanding Events 2023

January
Women's RTR — Jan 7-12 | Quartzite, AZ
Rubber Tramp Rendezvous (RTR) — Jan 13-20 | Quartzite, AZ
Xscapers Annual Bash — Jan 14-22 | Lake Havasu, AZ
Florida Suncoast Tiny Home Festival — Jan 21-22 | Pinellas Park, FL
Skooliepalooza — Jan 23-29 | Ehrenberg, AZ
Arizona Outdoor Adventure Fest — Jan 28-29 | Scottsdale, AZ

February
Escapar A La Baja — Feb 4-6 | Playa El Tecolote, Baja, Mexico
The Florida Vanlife Gathering — Feb 3-6 | Dade City, FL
Truck Camper Adventure Rally — Feb 9-12 | Quartzsite, AZ (SOLD OUT)
Project Van Life Summit — Feb 17-19 | Online Event
Skoolie Swarm — Feb 18-27 | Melrose, FL

March
Borrego Bonanza — Mar 3-5 | Borrego Springs, CA
TinyFest California — Mar 11-12 | San Diego, CA
A Roam Of Our Own — Mar 17-19 | La Quinta, CA (WOMXN ONLY)
Camper Expo — Mar 17-19 | Utrecht, Netherlands
Revel In Baja — Mar 19-23 | Baja, Mexico

April
Red Rock 4-Wheelers Easter Jeep Safari — Apr 1-9 | Moab, UT
CamperFest — Apr 6-10 | Chester, Chestershire, UK
Rendezvous — Apr 19-23 | Mt Bachelor, OR
Back To Baja With Flarespace — Apr 20-23 | Sea of Cortés, Baja, Mexico (CANCELED)
Moore Expo — Apr 21-22 | Springfield, MO
Weird Wild West — Apr 20-24 | Bisbee, AZ
Moab Magic — Apr 21-23 | Moab, UT
Revel Club Big Bend Backroads — Apr 23-26 & Apr 27-30 | Big Bend, TX (2 SESSIONS)
Georgia Tiny House Festival — Apr 27-28 | Madison, GA
Camper Van Week-End — Apr 28-30 | Angers-Brissac, France
Adventure Van Expo — Apr 29-30 | San Juan Capistrano, CA
Camp Quirky — Apr 28-May 1 | Kelmarsh Estate, Northamptonshire, UK

May
Adventure Van Expo — May 13-14 | Sonoma, CA
Overland Expo West — May 19-21 | Flagstaff, AZ
Descend on Pinnacles — May 26-29 | Pinnacles, CA

June
Small Home Expo — Jun 3-4 | Abbotsford, BC, Canada
Randi’s Adventures — Jun 2-4 | Munising, MI
Fort Desolation — Jun 8-10 | Torrey, UT
Wind River Rally — Jun 15-18 | Hudson, WY
Outdoor Adventure X — Jun 17-18 | Huntsville, UT
Vanlife Iceland Midsummer Edition — Jun 17-24 | Iceland (SOLD OUT)
Adventure Van Expo — Jun 18-19 | Hood River, OR
Rose Fest — Jun 23-25 | Salida, CO
Buena Vista Brouhaha — Jun 23-25 | Buena Vista, CO
The Bus Fair — Jun 23-25 | Oakridge, OR
FWC Owner’s Rally & Campout — Jun 23-25 | Grass Valley, CA
Colorado Tiny House Festival — Jun 24-25 | Brighton, CO
Georgia Tiny Home Festival — Jun 24-25 | Madison, GA

July
50th National Truck-In — Jul 5-9 | Sterling, CO
Camper Jam — Jul 7-9 | Weston Park, Shropshire, UK
Revel Club Wings & Wheels Alaska — Jul 7-9 | Alaska
Overland Expo PNW — Jul 7-9 | Bend (Redmond), OR
Adventure Van Expo — Jul 8-9 | Evergreen, CO
People's Tiny House Festival — Jul 16-17 | Loveland, CO
Holy Toledo — Jul 20-23 | Toledo, OR
Black Nomads Beach Weekend & Campout — Jul 23-25 | Georgetown, SC
Adventure Van Expo — Jul 29-30 | Topsfield, MA
Open Roads — No Event in 2023 | McCall, ID (Returning 2024)

August
Skoolie U.P. — Jul 31-Aug 7 | Upper Peninsula Michigan
Revel Club 4X4 Van Training — Aug 10-11 | Ellenville, NY (Session 1)
Vanlife Iceland August #1 — Aug 12-19 | Iceland
Vanlife Iceland Lofoten #1 — Aug 12-19 | Lofoten, Iceland (SOLD OUT)
Northwest MogFest — Aug 17-20 | Sheridan OR
Vanlife Iceland August #2 — Aug 20-27 | Iceland
Vanlife Iceland Lofoten #2— Aug 20-27 | Lofoten, Iceland
Overland Expo Mtn West — Aug 25-27 | Loveland, CO
Leadville Lollygag — Aug 25-27 | Leadville, CO

September
Descend on Bend — Sep 1-4 | Bend, OR
Revel Club 4X4 Van Training — Sep 9-10 | Ellenville, NY (Session 2)
Black Nomads Hammock Hang — Sep 9-11 | Villa Rica, GA
VanWILD — Sep 14-17 | Montrose, CO
Keweenaw Overland Adventure Retreat (KOAR) — Sep 14-17 | Copper Harbor, MI
United Tiny House Off-Grid Workshop Camp — Sep 15-17 | Eatonton, GA
Project Van Life Summit — Sep 15-17 | Online Event
Adventure Van Expo — Sep 16-17 | Palisades Tahoe, CA
Vanlife Iceland Northern Lights #1 — Sep 16-23 | Iceland (SOLD OUT)
Vanquinox — Sep 21-24 | Grandjean, ID
Northwest Nomads — Sep 21-25 | Fort Rock, OR
Vanlife Iceland Northern Lights #2— Sep 24-Oct 1 | Iceland
Big Iron Overland Rally — Sep 29-30 | West Mineral, KS
Camp Carpe Diem — Sep 28-Oct 1 | Kalispell, MT
Adventure Van Expo — Sep 30-Oct 1 | Bend, OR
Midwest Vanlife — Sep 23-26 | Makanda, IL
Revel Club Rocky Mountain Meetup — Sep 28-Oct 1 | Estes Park, CO

October
Overland Expo East — Oct 4-6 | Arrington, VA
The Pilgrimage — Oct 3-6 | South Royalton, VT
Skooliepalooza — Oct 5-10 | Moab, UT
Vanlife Australia — Oct 6-8 | Bundjalung Region, Gold Coast, Australia
Adventure Van Expo — Oct 7-8 | Chattanooga, TN
Moonlanding — Oct 12-15 | Sky View, NM
Ring of Fire — Oct 14 | Valley of the Gods, UT
Adventure Van Expo — Oct 14-15 | Big Bear, CA
Nomadic Creatives — Oct 19-22 | Northwest, AZ
VanFest USA — Oct 27-29 | Hurricane, UT
C.H.A.S.M.Fest — Oct 27-30 | Lake Havasu City, AZ

November
Vanarky In The Ozarks — No Event in 2023 | Ponca, Arkansas (Returning 2024)
Florida Tiny House Festival — Nov 18-19 | Gainesville, FL
Revel Club Northeast Off-Road Adventure — Nov 19-20 | Ellenville, NY

December
TinyFest Southwest — No Event in 2023 — Phoenix, AZ (Returning 2024)

Other
Sēkr App — Community Based Events
Good Vibe Collective — Various Events Throughout The Year
Seattle Vanlife Meetup — Monthly Meetup
Xscapers — Yearly Events For Members
She Explores — Women On The Road Gathering
Home On Wheels Alliance — Regular Caravans
Wandering Footprint — Date Pending | Saanichton, BC

If you know of any events that aren’t listed, please leave a comment with link so I can add it!

Comment

Comment

Vanlife Gatherings 2022

Vanlife & Overlanding Events 2022

January
Rubber Tramp Rendezvous (RTR) — Jan 14-23 | Quartzite, AZ
Skooliepalooza — Jan 21-31 | Parker, AZ
Florida Suncoast Tiny Home Festival — Jan 29-30 | Pinellas Park, FL

February
Escapar A La Baja — Feb 2-4 | Playa El Tecolote, Baja, Mexico
Truck Camper Adventure Rally — Feb 9-12 | Quartzite, AZ
Skoolie Swarm — Feb 19-28 | Melrose, FL

March
Camper Expo — March 18-20 | Utrecht, Netherlands
TinyFest California — March 12-13 | San Diego, CA
Buena Vantura — March 24-26 | Ventura, CA

April
Moore Expo — April 8-10 | Springfield, MO
Red Rock 4-Wheelers Easter Jeep Safari — April 9-17 | Moab, UT
CamperFest — April 14-18 | Chester, Chestershire, UK
Rendezvous — April 20-24 | Mt Bachelor, OR (SOLD OUT)
Back To Baja With Flarespace — April 21-24 | Laguna del Diablo, Baja, Mexico
Weird Wild West — April 22-24 | Bisbee, AZ
Southern Xpeditions Overland Challenge — April 29-May 1 | Uwharrie, NC
Camper Van Week-End — April 29-May 1 | Angers-Brissac, France
Adventure Van Expo SoCal — April 30-May 1 | San Juan Capistrano, CA
Georgia Tiny Home Festival — April 30-May 1 | Macon, GA

May
Camp Quirky — May 13-15 | Kelmarsh, Northamptonshire, UK
Overland Expo West — May 20-22 | Flagstaff, AZ
Descend on Lost Sierra — May 20-23 | Portola, CA
Vanlife Iceland Spring Edition — May 25-29 | Iceland

June
Black Nomads Meetup — June 3-6 | Wrightsville, GA
Adventure Van Expo NorCal — June 4-5 | Placerville, CA
Small Home Expo — June 4-5 | Abbotsford, BC, Canada
FWC Owner’s Rally & Campout — June 10-12 | Lake Tahoe, CA
Vanlife Iceland Midsummer Edition — June 17-24 | Iceland
Summer Solstice Van Camp — June 17-19 | Mt Shasta, CA
Tennessee Tiny Home Music Festival — June 18-19 | Nashville, TN
Adventure Van Expo Hood River — June 25-26 | Hood River, OR
Wind River Rally — June 23-26 | Hudson, WY

July
Camper Jam — July 1-3 | Weston Park, Shropshire, UK
Overland Expo PNW — July 8-10 | Bend (Redmond), OR
Holy Toledo — July 15-18 | Oregon Coast
Open Roads — July 15-18 | McCall, ID
People's Tiny House Festival — July 16-17 | Loveland, CO
Adventure Van Expo CO — July 16-17 | Eagle, CO
49th National Truck-In — July 20-24 | Old Washington, OH
Van Pride Meetup — July 29-31 | Western OR

August
Skoolie U.P. — Aug 1-8 | Upper Peninsula Michigan
Fort Desolation — Aug 12-14 | Torrey, UT
Northwest MogFest — Aug 18-21 | Sheridan OR
Vanlife Iceland August Edition — Aug 20-27 | Iceland
Overland Expo Mtn West — Aug 26-28 | Loveland, CO
Descend on Bend — Aug 26-29 | Bend, OR

September
Adventure Van Expo Bend — Sep 3-4 | Bend (Redmond Expo), OR
TinyFest California — Sep 10-11 | San Jose, CA
Keweenaw Overland Adventure Retreat (KOAR) — Sep 15-18 | Copper Harbor, MI
Adventure Van Expo LT — Sep 17-18 | Lake Tahoe, CA
VanFest USA — Sep 22-24 | Hurricane, UT
Vanquinox — Sep 22-25 | Grandjean, ID
Northwest Nomads — Sep 22-26 | Fort Rock, OR
Revel Van Rally — Sep 29-Oct 1 | Moab, UT

October
Adventure Van Expo Chatt — Oct 1-2 | Chattanooga, TN
Moonlanding — Oct 6-10 | Sky View, NM
Red Rock & Roll — Oct 7-9 | Moab, UT
Overland Expo East — Oct 7-9 | Arrington, VA
Adventure Van Expo Big Bear — Oct 15-16 | Big Bear, CA
C.H.A.S.M.Fest — Oct 28-31 | Lake Havasu City, AZ

November
Vanarky In The Ozarks — Nov 3-6 | Ponca, Arkansas

December
TinyFest Southwest — Dec 3-4 — Phoenix, AZ

Monthly Meetups
Seattle Vanlife Meetup

Other
Sēkr App — Community Based Events
Home On Wheel Alliance — Regular Caravans
Off-Road Safety Academy — 4x4 Training Courses & Various Tours

To Be Announced
Vanstock Alaska
Good Vibe Collective
Asheville Van Life Rally
Midwest Vanlife
Kentucky Skoolie Fest
Wandering Footprint
Teton Valley Vanlife Gathering
Gutted
United Tiny House
Vanl
ife Diarie Australia
Women On The Road Gathering

If you know of any events that aren’t listed, please leave a comment with link so I can add it!

Comment

Comment

New Headliner Shelf From Carrve Custom Vans

While I was at Carrve Custom Vans for my custom hitch storage and bike rack solution, I saw the great work Ken did on a headliner shelf in his own van, so I asked him to make me one. Even though I’ve enjoyed the headroom in the cab part of my Sprinter, I didn’t have a great place to store my Quest Overland window covers, as well as blankets and pillows, and other bulky items that don’t fit in my cabinets well.

Ken did a great job building and installing the headliner shelf. Since my van build was already done with cabinets in place, it was a matter of lining everything up exactly so the headliner shelf fit in, which required a little extra work of removing the Sprinter visors, and in the end, everything lined up perfectly. The best part is that the black headliner shelf works well with my existing build color scheme, as well as the dark gray cab interior, and it doesn’t take away from the overall look and feel. Granted, I have hit my head a few times on it the first few weeks, but I’ve adapted now and find the extra storage super convenient and practical!

I highly recommend Carrve Custom Vans to anyone in the Northwestern Washington area. Ken and Ryan do great work, are super nice and accommodating, and they do quality work!

Also, if you need window covers for your cab, your back windows, and your side windows, please checkout Quest Overland. The quality of the window coverings is superb! I’ve owned mine for two years now and they are still in excellent shape, show no wear and tear, and will probably last me the life of the van. Use code barbrocks5 to save 5% on your order with them!

Comment

4 Comments

Custom Hitch Storage & Bike Rack Solution

After I bought my Aventon Pace 500 Step-Through eBike, I knew I needed a convenient bike rack to take it with me on my road trips. I looked at all the available bike racks online and didn’t really like any of the choices. The main reason was that most hitch racks are for 2 or 4 bikes, and since I am a solo female traveler, that would be waste of half the rack. I also wanted a storage box on the outside of my van and since my roof rack is pretty full with solar panels and my traction boards, I didn’t want to use up more of that space, plus carrying anything big and bulky up the side ladder is really difficult and inefficient. Therefore, I wanted a hitch storage solution via my hitch but I couldn’t find a solution that could work for both a bike rack and a box.


The two solutions I found that would somewhat work are the hinge racks that both Owl Vans and Aluminess offer, but there were a few downsides to these solutions:
1) The 270 hinges I have on my van that allow for the doors all the way to the side, would need to be removed and replaced with the 45 degree hinges.
2) The eBike is much heavier than a regular bike, so lifting it up overheard to sit on a box would be too difficult.
3) The largest box they offer does not have enough space for an inflatable kayak or SUP.
4) The weight of everything can take a toll on the hinges and doors of the van.
5) Both companies had a wait list for getting the solution installed and I wanted something sooner as I was planning to leave on a Baja road trip before Christmas.

Because I couldn’t find a solution that fit my needs and desires, I looked into a custom solution. I was referred to a local welder by Lenny’s Bike Shop, and Ian the welder started looking into options for me. He wasn’t sure he could make something as I requested, so he referred me to Ryan and Ken at Carrve Custom Vans, a great local van building shop. Ryan was super helpful and excited to come up with a solution for me. He also showed me first hand what the Owl Vans solution looked like since the vertical bike rack set up could have been an option, but I will still hesitant due to the small size of the storage box.

The solution Ryan and I came up with that fit my needs the best was as follows:
1) HitchSwing Arm from Wilco Offroad
2) Smooth Aluminum Barn Door Toolbox from Chandler Truck Accessories (18x18x48 size)
3) 1Up Bike Tray from Owl Vans

Ryan built a T-shaped support arm for under the toolbox that fits into the HitchSwing and mounted the 1Up Bike Tray on top of the toolbox. The end result is practical and just what I need to take extra gear on the road, with a bike rack that is at the right height for me to easy put my eBike on and take it off, and still allows me to open my back doors due to the hitchswing arm.

This custom solution cost me $1973.13 for parts, plus Ryan’s labor cost. I did buy the locking pins for both the HitchSwing Arm and the 1Up Bike Tray so I can lock everything to deter theft. I also bought the Sunlite Heavy Duty Bike Cover so that the elements don’t damage the eBike as much.

I’m curious if anyone else has a custom solution for their van, or what you think of mine, so please let me know!

If you ever need any van work done in the Pacific Northwest, or are looking for a great company to do your custom build in Northwest Washington, check out Carrve Custom Vans. Ryan and Ken do wonderful work and are super great to work with!

4 Comments

Comment

Guest Blog: Live the Dream, Become a Digital Nomad

Live the Dream: Become a Digital Nomad

Image credit: Pexels

Being self-employed and having the flexibility to work anywhere at any time is more achievable than ever. With a good Wi-Fi connection, a laptop, and a passport, your dreams of becoming a digital nomad are within reach.

You may wonder how these remote, self-employed folks break into the business. How can you go from a traditional work setting into this enviable style of self-employment? Here are some tips on how to make the transition, guides you through the process, and helps you land your first client.

Getting Established

First things first: you’ll need to choose what type of structure you’ll be operating as. You also may choose to run your operation as a DBA (“doing business as”), which is beneficial as part of your marketing and branding strategy. A DBA name is essentially a pseudonym for your registered, legal business name. Many business owners use it to avoid using their own surname (if the business entity includes their name) or, for corporations, an assumed name makes expansion easier, as it’s not necessary to create a completely new corporation.

Once you’re up and running as a legal entity, as a digital nomad you’ll need to build a ubiquitous online presence. This requires a solid understanding of the skills you can offer and the ability to convey those services to potential clients. Expert-Market notes that branding is an important part of the process of establishing your online business. It is an opportunity to show the world what you can offer and how it differs from what every other freelancer provides.

Freelance work can be unpredictable, so it is important to establish your business in a way that affords you multiple income streams. This may mean that, rather than offering one service, you diversify the skills within your wheelhouse. Start to establish yourself with a few regular freelance clients by offering your services for less or even for free, then take on more paid work as you build a reputation.

You may even consider being a “one-stop shop” for your clients, offering more than just one service. For instance, if you’re a freelance writer producing primarily web content, branch out and offer website hosting and design services. Assuming you’re not proficient in these additional areas, collaborate with others who are, bringing them under your business’s operational umbrella.

Staying Afloat

As a beginner freelancer, you are bobbing around in a rubber raft in a sea crowded with other freelancers — some in yachts, others in canoes. Starting out in your raft, it may feel as though you could sink at any moment or get tossed overboard. You can work your way from the raft into a schooner over time with some hustle and perseverance. To stay afloat as you begin freelancing, consider reducing unnecessary expenses such as subscriptions, reduce your entertainment budget, and consider cooking meals at home rather than dining out.

Amp up your social media presence to get the word out about your availability — these free marketing opportunities are priceless. You may also be able to access funds to help support yourself as a self-employed person impacted by the pandemic. Freelance unions offer access to affordable insurance benefits and advocacy resources, according to MoneyMiniBlog. As a digital nomad, you can opt to live in a location that offers a lower cost of living, which can save you a ton of money.

Staying on budget is key, especially to those who hope to support loved ones back home. Many people immigrate to the US and start their freelance journey with the intention of helping those left behind. This can be critical to populations like Brazilian immigrants — a group that has grown by leaps and bounds in recent years. Using fast and secure wire transfers is a smart way to ensure funds are received in the homeland. Those sending remittances should also consider whether the service they hire guarantees funds will be received within a certain time frame.

Survival on the Move

A crucial aspect of survival as a digital nomad is tech-friendly rental space to conduct business. As you investigate rentals in varying locations, first ask about high-speed internet and Wi-Fi access. You may be able to negotiate rental fees by bartering services such as maintenance or, better yet, offering your freelance skills to boost their rental business.

You are likely to have a fair amount of travel expenses as a digital nomad, but these can be reduced through business deductions and by selecting reduced-cost airfare. As a freelancer, you are available to travel during varying times of the year and at any hour of the day or night, which means cheaper airfare. Also consider rideshare services and even traveling by train as you make your way to new destinations. With these ideas in mind, you’ll be living the dream in no time!

Big thanks to Lance Cody-Valdez of Free-Lance-Now for this great guest blog!

Comment

Comment

Why I Choose MoonShade Portable Awning

When I was having my Sprinter van built out, I had to decide whether to get a permanent awning installed. I had one on my previous RV but I hated that I was limited to shade on one side of the van. I decided to hold off on one and was stoked to hear about MoonShade by Moon Fabrications in early 2020 right before I went to pick up my finished van. I got in contact with this brand new company right away and bought one. What I love about MoonShade is that it’s versatile. You can attach it to either side, as well as the back, and you have the option of width or length ways depending on the sun and your needs. It fits on vans, cars, truck campers, overlanding vehicles, fences, and any sturdy structure, making it great for road trips, camping, hunting, and fishing. MoonShade covers a 9’x7’ site, weighs 8 lbs., packs down to about the size of a yoga mat, protects you from the sun during the day, and provides reflective illumination at night.

There are a variety of ways to attach the MoonShade to your van, including suction cups and magnets, but I thought it would be even cooler and sturdier to attach it to my roof rack bar, so my handyman buddy figured out a great solution using stage can lighting clamps which I attach to the roof rack and then attach the MoonShade to the hook in the clamps. I’m really happy with the functionality of this setup and by having it so high up, I can just take the outside legs off when it gets super windy and have the MoonShade tied down against the side of my van until the wind dies down. It does handle wind quite well as long as you anchor the poles and shade with two guylines on each side.

UPDATE: I have changed how I attach the MoonShade to my van since my original solution. I now have two short paracord rope loops that I permanently attached to my roof rack, so all I need to do is clip the hooks into those loops.

I lowered the MoonShade poles here due to high winds in OR high desert

If you’re looking for a portable awning that is decently priced and versatile, I highly recommend MoonShade! Since I’m a brand ambassador for them, if you use my referral link and coupon code BARBROCKS, you can save $30! I’m also happy to answer any questions you may have about the awning and how it works!

UPDATE: MoonShade released a new XL version in the summer of 2023, which provides 12’x9’ of coverage against sun and weather, but still packs down tight and weighs under 13 lbs., making breakdown and storage a breeze. I’m waiting to get mine so I can enjoy almost double the shade!

Comment

Comment

My Gray Tank Valve Failure

BrokenValve.jpg

In January 2021, my gray tank valve stopped working. This was quite disappointing since I’ve only had my van for 10 months and it had less than 8K miles on it. Luckily the valve was stuck in the open position, which meant my gray tank would still drain, so I decided to wait until I could address it at a later time.

As luck would have it, I met Bill Franz from Franz Customs and he was able to take care of this issue for me in May 2021. I would like to thank Bill for the following detailed description of why my gray tank valve failed and what he installed instead, which is a much better solution. I am posting this directly from the email he sent me with some minor grammatical fixes, so the rest of this post is his expert analysis, which I hope helps others who are installing a gray tank valve do it the proper way with the right kind of valve.


I do not use Solenoid valves on mobile water systems for 3 main reasons:
1) Solenoid valves will eventually have operational problems if debris/sediments are in the water.
2) Electric solenoid valves will have a run time limit (duty cycle) because they use a coil. Coils will generate heat the longer they are energized (valve open in your case).
3) They are not as reliable as Ball valves because of 1 and 2 above, plus there are more moving parts that could fail.

The use of a Solenoid valve is the real failure. To understand what went wrong, you need to use the diagram below. The diagram is not an exact match to the valve you had, but close enough to use for explanation. Your grey tank drain is connected to CLOSED side, which is the left side of the diagram below.

This is how it works:
1) You push the button to energize the coil on the top of the valve.
2) When the coil is energized, it creates a magnetic field that pulls the plunger up.
3) Water then flows from the left side to the right side of the valve body (input/output). This flow is the OPEN on the right side of the diagram.
4) To stop the flow you push the button again, the coil is de-energized, the magnetic field is lost and the plunger drops back down to close the valve.

Problem 1:

The coil is operating intermittently. When I tested the resistance across the coil, the reading would be stable and then randomly spike up and down, which explains the intermittent behavior. The coil also appears to have burn spots, or spots that are overheating. Most manufactures add a layer of protective coating around the coil winding to provide a layer of insulation from moisture or other environmental contaminates. This coating is generally uniform around the entire coil area. When coils overheat they will start to melt this coating to the point where it will start to run, like paint does when you spill it or put too much on a wall. If you look at the photo below on the left closely, you will notice that the color looks smeared and crispy, which is an indication of burning. This is generally the coating on the coil heating up to the point that it liquifies and starts seep through the insulation. I can’t say with certainty that it is burning because I don't have the same valve to compare the coil. However, I have seen coils start to take on this appearance when they are overheating and starting to burn. US Solid make really good valves so I doubt they would have Solenoid Valve coils leave a factory looking like yours. There is a cover on the coil, however, it is only held on by a single nut, and water can work its way up into the coil area, so enclosing the valve is needed when it is used outside.

The coil can also burn due to heat if the valve is on longer than the rated duty cycle. In the most basic terms duty cycle is the amount of time the valve can be on, before the coil starts to heat. The valve you had is not rated for 100% duty cycle (on all the time), so coil burning could have easily started to happen if the valve was left on for a long period of time. Because you don't have an indicator light you would not know if the drain valve was left on. Any electrical device that does not have a duty cycle of 100% needs to have a method for indicating it is on. Actually, any electrical device that generates heat should have an indicator light to let the user know it is on. In this case the valve coil is not large enough to create enough heat to start a fire, but a burnt coil is a valve that no longer works.

A coil can also burn if water gets into the coil and creates a short. A coil is a long piece of wire that is coiled, this coiling creates resistance, and resistance creates heat. If water is introduced into the coil it can create shorts in the coil, which add more resistance and burn the coil. The valve was mounted at a low point under your van and water could easily make it onto the coil housing.

I looked up the specifications for the valve you had and I found it has an IP65 rating, however, if the valve is mounted outdoors it needs to be enclosed. On the same page is an overheating warning and a statement that says the valve is NOT 100% duty cycle, which means it can’t be left on or it will overheat.

ValveCoil.jpg

Problem 2:

The photo above on the right is the outbound side of the valve. You will notice hair is lodged inside. Both the inbound and outbound port had hair and sludge lodged between them. This stopped the plunger from operating correctly, which explains why you saw the dripping and thought your tank was empty. This happened because it is hung up on the input side, so the hair never made it out of the valve. When this happens, the valve will start to collect debris like a spider web. A ball valve will not do this because the design uses a simple hole in the ball.

I installed a US Solid Stainless Steel ball valve with auto return and I added a water proof connector to it.
* The valve will return to the closed position if power is lost.
* The electronics are sealed so it is splash resistance from all angles.
* It has a very low power consumption when fully open (no need to worry about accidentally leaving it on).
* Full flow when open so it would take something at least 1/2” to clog the valve.
* It is stainless steel and I did this because it will resist corrosion better than brass will. Corrosion comes in many different forms when dealing with drains and it was about 10 bucks more than brass.

The diagram below is what a ball valve looks like, which you now have an electric version of. Instead of the handle, there is a small motor that turns the stem. When you depress the button, the motor turns the ball and the water flows through the 1/2” hole in the ball. This is a simpler design over the Solenoid valve and is less likely to clog when minor debris are in the water. There is also nothing for hair to snag on like there is in a Solenoid vale. Some ball valves have a smaller diameter hole, and this is generally done in pressurized systems, but you don’t need a controlled flow because your tank is a gravity drain for dumping water. This is the portion when I reference full flow. You have a 1/2” drain pipe so water will flow as fast as 1/2” can dump the water.

BallValve.png

Below is a picture of your old valve on the input side (water entering from your tank). This is where the valve makes the 90 degree turn up, which uses water pressure to help move the plunger up when the valve is opened. You can’t see the plunger portion but the hair becomes lodged in that top areas.

OldValve.jpg

Photos below are the cover over the coil. The picture on the left is what it looks like installed and this is also the same position it was mounted under your van. The picture on the right kind of shows the open area under the coil cover where water can works its way in. On a really rainy day or wet road, the underside of your van becomes a hurricane and water will eventually make its way into the valve cover. There is no seal, so simply removing the bolt on the top allows the cover to be removed.

Valve.jpg

Below is your new ball valve installed. The blue pipe is 1/2” PEX that is connected to the ball valve with a 1/2” 90 degree shark bite connector. That white portion on the picture above is called a reducer sleeve. This sleeve reduces the 3/4” fitting on the valve to 1/2”, so the PEX 90 they used would work. I had questioned why a 3/4” valve was used when the connection is 1/2” at the tank. Flow will not move faster than the 1/2” can move water, so at face value a 3/4” valve does nothing to help water move faster. However, this gets thrown out the window when a Solenoid valve is used because that 90 degree turn on a Solenoid valve changes flow rate. That blue area on the valve is where the electronic components are and it is sealed. The white cable is your positive and negative wires up to the water proof connecter. I also made sure that I mounted the valve so the wire has maximum protection.

NewValveInstalled.jpg

One final note about this configuration. I recommend a manual valve to be installed between that blue pipe. I would also recommend that a light weight plate be installed to protect the valve and pipe. There is a risk of something possible ripping the valve out along with that pipe. Think about some of the roads you have gone down or shit that you have heard hit the bottom of any vehicle you have driven. If you go off road, you should definitely add a protection plate, aka skid plate. Its an easy modification that will not cost an arm and a leg.


Bill is going to be installing that manual valve for me soon, plus I’m going to ask him to install the skid plate as well.

Comment

Comment

Vanlife Gatherings in 2021

Here is a list of Vanlife Gatherings that are happening in 2021:

Smoky Mountain Overland Rally in Crosby, TN on April 20 to May 2

VanFest in Hurricane, UT on May 8

TinyFest in San Diego, CA on May 14-16

Descend on Lost Sierra in Portola, CA on May 28-31

Backcountry Hunters and Anglers Rendezvous in Missoula, MT on June 3-5

Black Nomads Meetup in Warthen, GA on June 4-6

Adventure Van Expo in Hood River, OR on June 19-20

Camper Jam in Shropshire UK on July 2-4

Adventure Van Expo in Logan, UT on July 31 - Aug 1

Revel Rally in Durango, CO on Aug 20-22

CamperFest in Chester, UK on Aug 26-30

Overland Expo in Loveland, CO on Aug 27-29

Descend on Bend in Bend, OR on Sept 2-6

Adventure Van Expo in Redmond, OR on Sept 4-5

Asheville Van Life Rally in Asheville, NC on Sept 16-19

Keweenaw Overland Adventure Retreat in Copper Harbor, MI on Sept 16-19

Adventure Van Expo in Lake Tahoe, CA on Sept 18-19

Overland Expo in Flagstaff, AZ on Sept 24-26

TinyFest in Austin, TX on Sept 25-26

Adventure Van Expo in Chattanooga, TN on Oct 2-3

Overland Expo in Arlington, VA on Oct 8-10

Adventure Van Expo in Big Bear Lake, CA on Oct 17-18

4 Wheel Pop-up Camper in Ocotillo Wells, CA on Dec 4-5

For 4x4 Overlanders, check out these gatherings:

Southern Xpeditions in Uwharrie, NC —> Spring Overland Challenge is April 23-25 & Fall Overland Challenge is Nov 5-7

Off-Road Safety Academy —> they have 4x4 training courses and various tours all around the USA & Baja

Red Rock 4-Wheelers —> labor day campout in Moab, UT

There are also a few festivals that have not announced 2021 dates, but may announce 2022 dates:

Open Roads Fest in McCall, ID

Vanstock Alaska in Summer 2022

Midwest Vanlife Gathering in Makanda, IL

Vanlife Diaries in Australia

Women On The Road Gathering in Taos, NM

The Oregon Love in Sisters, OR

If you know of any gatherings, festivals, and meetups not on this list, please let me know! Also, check out Sēkr (formerly known as The Vanlife App) for more gatherings people post!

Comment

Comment

Washing Ardanwen The Van

WashedVan.jpg

I washed my van Ardanwen on September 11th during that crazy week when the California sky looked like nuclear winter due to all the wildfire’s smoke. Despite the eerie apocalyptic sky, I really like how my van still shines bright and clean. I figured it would be dirty covered in ash within a few days, but luckily Ardanwen is still sparkling and ready for our next adventure.

On Thursday September 24th, my cat Maverick and I left on our month long road trip to Oregon and Washington. We are caravanning with a vanlife friend and taking our time exploring various towns to see which ones appeal to us the most. In the last few years, the idea of moving up north has weighed heavily on my mind, but I haven’t made up my mind whether the colder climate is ideal for me. This will also be the longest trip in a vehicle for me, so I want to test out whether I will miss being in a house or whether life on the road suits me. I have considered going full time, therefore, I need to see if my cat and I can handle it.

If you’re in Oregon or Washington please DM me so we can meet up! I want to see all my friends living in the Pacific Northwest and make new friends along the way!

Comment

Comment

Traction Board Roof Rack Setup

TractionBoards.jpg

I’ve been trying to find a practical solution to store my traction boards on my van. I didn’t want the system where they hang on the side of the roof rack because they’re so obvious then and it’s less aerodynamic. After doing some research online, I found a great mounting system from Equipt which allows them to lay flat on my Aluminess roof rack!

The mounting brackets fit into the perforated roof rack floor and then the mounting pins go into those brackets. The traction boards then fit onto the pins and you put a padlock on one for extra security.

The only problem was that I thought I had MaxTrax brand traction boards, but it turns out I have a cheaper brand that I purchased off Amazon. So the mounting pins don’t fit in the corner holes because they aren’t the specific shape MaxTrax has. But my handyman friend figured out a way to utilize the handle slots instead and secure them with pins and a padlock. It’s not the perfect system but it’s been holding up!

What I like most about it is that you barely see the traction boards on top when you look up. If they were black and not orange then I doubt you’d notice them at all. You can only see them when standing on my passenger side, so I’m happy with the mounting system.

Check out more photos of the mounting job in my Instagram post!

Comment

Comment

Camping With A Chance Of Drinking

CampingSign.jpg

At the end of August, my favorite ladies and I went on another Pinecrest camping trip, our favorite place we go to every summer.

It was a little smoky due to all the fires burning in California but overall a fun 5 days of time at the lake with friends. There were a lot less people than in July, so the beach wasn’t crowded and the campground wasn’t full. The weather was perfect, not too hot nor cold.

As usual, I swam in the lake every day and my cat Maverick hung out in his backpack on the beach with us. Due to less activity of people and dogs, Maverick actually went on walks with me near the beach and did really good exploring.

My friend’s son learned how to climb up my van’s side ladder and enjoyed hanging out on my roof rack. He was so happy up there that he climbed up daily. You’ll see him chillin’ up there in the van photos.

Last time I was at Pinecrest I decided to go skinny dipping in the lake late at night. I enjoyed it so much that I did it again this time! There’s something exhilarating and very freeing being in the lake naked and alone in the darkness of night. The moonlight and stars just add an ambiance you don’t feel during the day; the water looks slick black, almost like oil, and feels refreshing against the skin. I’m pretty sure that late night skinny dips are a new tradition.

More photos from the camping trip up on my Instagram!

Comment

Comment

Baker Beach

BakerBeach.jpg

My final stop on my Highway 1 trip was Baker Beach, a place I’ve never been to despite living only an hour away! Stretching a mile below the rugged cliffs on the Presidio’s western shoreline, Baker Beach’s spectacular views of the Golden Gate Bridge and the Marin Headlands are unsurpassed. I enjoyed walking along the beach on this beautiful sunny day and let the water crash over my feet.

The views really are amazing so I’m not sure why it took me so long to visit this place. But for some reason, driving to San Francisco always seems so tedious to me, especially with Bay Area traffic. But now that I’ve been here, I know I’ll come back to enjoy it again.

For those of you that appreciate history, Baker Beach is part of the 160 acres (65 ha) property that was settled by John Henry Baker in the 1850s and was known as Golden Gate Milk Ranch back then. Sadly, his widow Maria lost the property to foreclosure in 1879 after his death in 1863.

From 1986 to 1990, the north end of Baker Beach was the original site of the Burning Man art festival. In 1990, park police allowed participants to raise the traditional large statue but not to set it on fire, since the beach enforces a limit on the size of any campfires. Subsequently, Burning Man events have taken place in Black Rock Desert, Nevada.

The northern section of Baker Beach is "frequented by clothing-optional sunbathers," and as such it is considered a nude beach. So keep that mind if you’re planning to visit!

Check out more pics on my Instagram!

Comment

Comment

Golden Gate Bridge & Battery Spencer

GoldenGate.jpg

The Marin Headlands is a hilly peninsula located just north of San Francisco across the Golden Gate Bridge. The entire area is part of the Golden Gate National Recreation Area and is famous for the views of the Bay Area, especially of the Golden Gate Bridge. Even though I don’t live far from there, I haven’t been to this area since I was a child, so I decided to check out the headland and get some of those fabulous shots of the bridge, especially since the weather was perfect.

The Marin Headlands is also the site of a number of historic military settlements fortifications, including Battery Spencer, which back in the early 1900s was one of the main protection points for the San Francisco Bay. It featured multiple 12″ guns that were operated by the military and a few buildings for housing the generators and shells. Today it’s just a piece of history that you can walk around and enjoy, as well as capture those iconic photos of the Golden Gate Bridge, the San Francisco skyline, the Bay Bridge, Alcatraz, Farallon Islands, Angel Island, and the East Bay.

The Golden Gate Bridge is a suspension bridge spanning the Golden Gate, the one-mile-wide (1.6 km) strait connecting San Francisco Bay and the Pacific Ocean. The bridge is one of the most internationally recognized symbols of San Francisco and California and was initially designed by engineer Joseph Strauss in 1917. It has been declared one of the Wonders of the Modern World by the American Society of Civil Engineers. The Frommer's travel guide describes it as "possibly the most beautiful, certainly the most photographed, bridge in the world." At the time of its opening in 1937, it was both the longest and the tallest suspension bridge in the world, with a main span of 4,200 feet (1,280m) and a total height of 746 feet (227m).

See more of the incredible photos I took in my Instagram post!

Comment

Comment

Rodeo Beach

RodeoBeach.jpg

I decided to check out the Marin Headlands as my last stop on my Highway 1 trip. I never knew about this wonderful beach called Rodeo Beach in the Golden Gate National Recreation Area. This unique beach is just 2 miles north of the Golden Gate Bridge and is largely made up of coarse, pebbly chert grains, both red and green in color. Interesting fact is that its mineral composition sets it apart from every other beach in the state!

Rodeo Beach is characterized by a spit of around 50 meters (164 ft) width at the mouth of a long embayment, known as Rodeo Lagoon. For much of the year the lagoon is cut off from the ocean, making the beach spit a baymouth bar.

There’s a cool bridge one has to walk over to get to the dark, pebbly sand, which gets really hot from the sun. You definitely need to wear shoes to not burn your feet! I strolled from the bridge to the ocean, walked around a bit, and then headed back out because it was very busy with people and really hot out which was amplified by the dark colored sand. I’ve read that it’s a popular surfing spot, although there’s a risk of shark attacks.

Check out more photos in my Instagram post!

Comment

Comment

Muir Beach Overlook

MuirBeachOverlook.jpg

Muir Beach Overlook is part of the Golden Gate National Recreation Area, just south of Stinson Beach on Highway 1 and north of the Golden Gate Bridge. Not only does this cliffside park have some beautiful sweeping views of the Pacific Ocean and the coastline, but it also provides a glimpse into our wartime history.

Muir Beach Overlook contains several historic base-end stations. From these stations, soldiers viewed ships and triangulated the distance, speed, and direction of these ships in coordination with different stations. These stations were mostly important for artillery units stationed on the coast to attack any invasion. They gained particular importance during World War II immediately after the bombing of Pearl Harbor when many in California feared San Francisco or Los Angeles would be the next target. These stations became obsolete when radar technology took over. A few of them remain open like ruins where you may enter them to get somewhat of a perspective of the soldiers who were stationed there.

On clear days you can see San Francisco but there was a little bit of cloud cover so I could only see the Sutro Tower in the distance (photo 7). You also get a slight view of Muir Beach (photo 3) and you can see the top of Mount Tamalpais (photo 4, top right peak). The last photo is the large scale tactile topographic model which I thought was quite cool! It’s a beautiful place to visit with an iconic staircase that leads to the small overlook on the cliff. I highly recommend it if you’re ever in the area!

Check out my Instagram post for more pics!

Comment

Comment

Mount Tamalpais State Park

MountTamalpaisStatePark.jpg

On the last day of my Highway 1 road trip, I drove from Bodega Bay down along Tomales Bay, through Point Reyes National Seashore, to Stinson Beach. I tried to park to check out the beach since I’ve never been, but due to the sunny weather it was super packed, so I gave up and moved on.

I drove a bit further and found a nice pull-out along Mount Tamalpais State Park to take a break at. Maverick climbed up a tree while I took some photos and ate some lunch. From there I continued to conquer my fear of cliffside driving until I hit the Muir Beach Overlook. More on that in my next post!

Check out more photos of the coastline and Maverick climbing the tree!

Comment

Comment

Spectacular Sunset At Wright's Beach

WrightsBeachSunset.jpg

I had the pleasure of enjoying one of the most spectacular sunsets while I was on my Highway 1 road trip at Wright’s Beach!

After a day of mostly gray foggy skies along the whole coast from Fort Bragg to Bodega Bay, the marine layer finally lifted at the perfect time to a beautiful blue sky and a magical sunset of bright orange hues. There were a few streaks of clouds hanging low over the ocean which that led to some wonderful captures as the sun dropped through them and sunk in a lovely red haze into the horizon!

For more photos, check out my Instagram post!

Comment

Comment

Wright's Beach Campground

WrightsBeach.jpg

My Highway 1 journey continued with me driving back south through Fort Bragg, down the Mendocino Coast, all the way back to Bodega Bay. I’m not a fan of driving near cliffs, but I’m working through my fears and handled the drive wonderfully. It helps that I got to drive slow through all the switchbacks as that reduces my anxiety, plus I always use the turnouts when a vehicle ends up behind me.

There’s an awesome small campground called Wright’s Beach where you basically camp right up on the beach. There’s about 9 sites that actually have beach front access but I was in the next row, claiming the last site that was available by chance when I booked it two days prior.

Even though my site wasn’t beach front, it was still lovely with trees all around, giving me some privacy from neighboring sites. It almost felt like a cool tree cave and made for some nice ambiance while Maverick & I hung out on my bed with the rear doors open.

When I arrived in the late afternoon, it was very gray with a low marine layer, but I still enjoyed my time on the beach watching the waves crash. Some kids were flying kites since the winds were perfect for it; one was a gorgeous butterfly that flew bright and high. Then around 7pm, the fog lifted to beautiful blue skies and it was absolutely stunning! I watched an incredible sunset (posting that next), and enjoyed a lovely fire while eating dinner.

The Perseid Meteor Shower was still going on, so I climbed up my van and laid on my roof rack to enjoy the show. I had a wonderful view of lights blazing through the night sky with so many stars and constellations to gaze at.

I woke up to a gorgeous sunny day, the first non-foggy one of my trip, and spent some more time on the beach enjoying the waves and blue sky before I had to leave. This is definitely a spot I want to camp at again!

For more photos from the campground and beach, check out my Instagram post!

Comment