Viewing entries in
Van Build

Comment

New Sliding Door Window For My Van

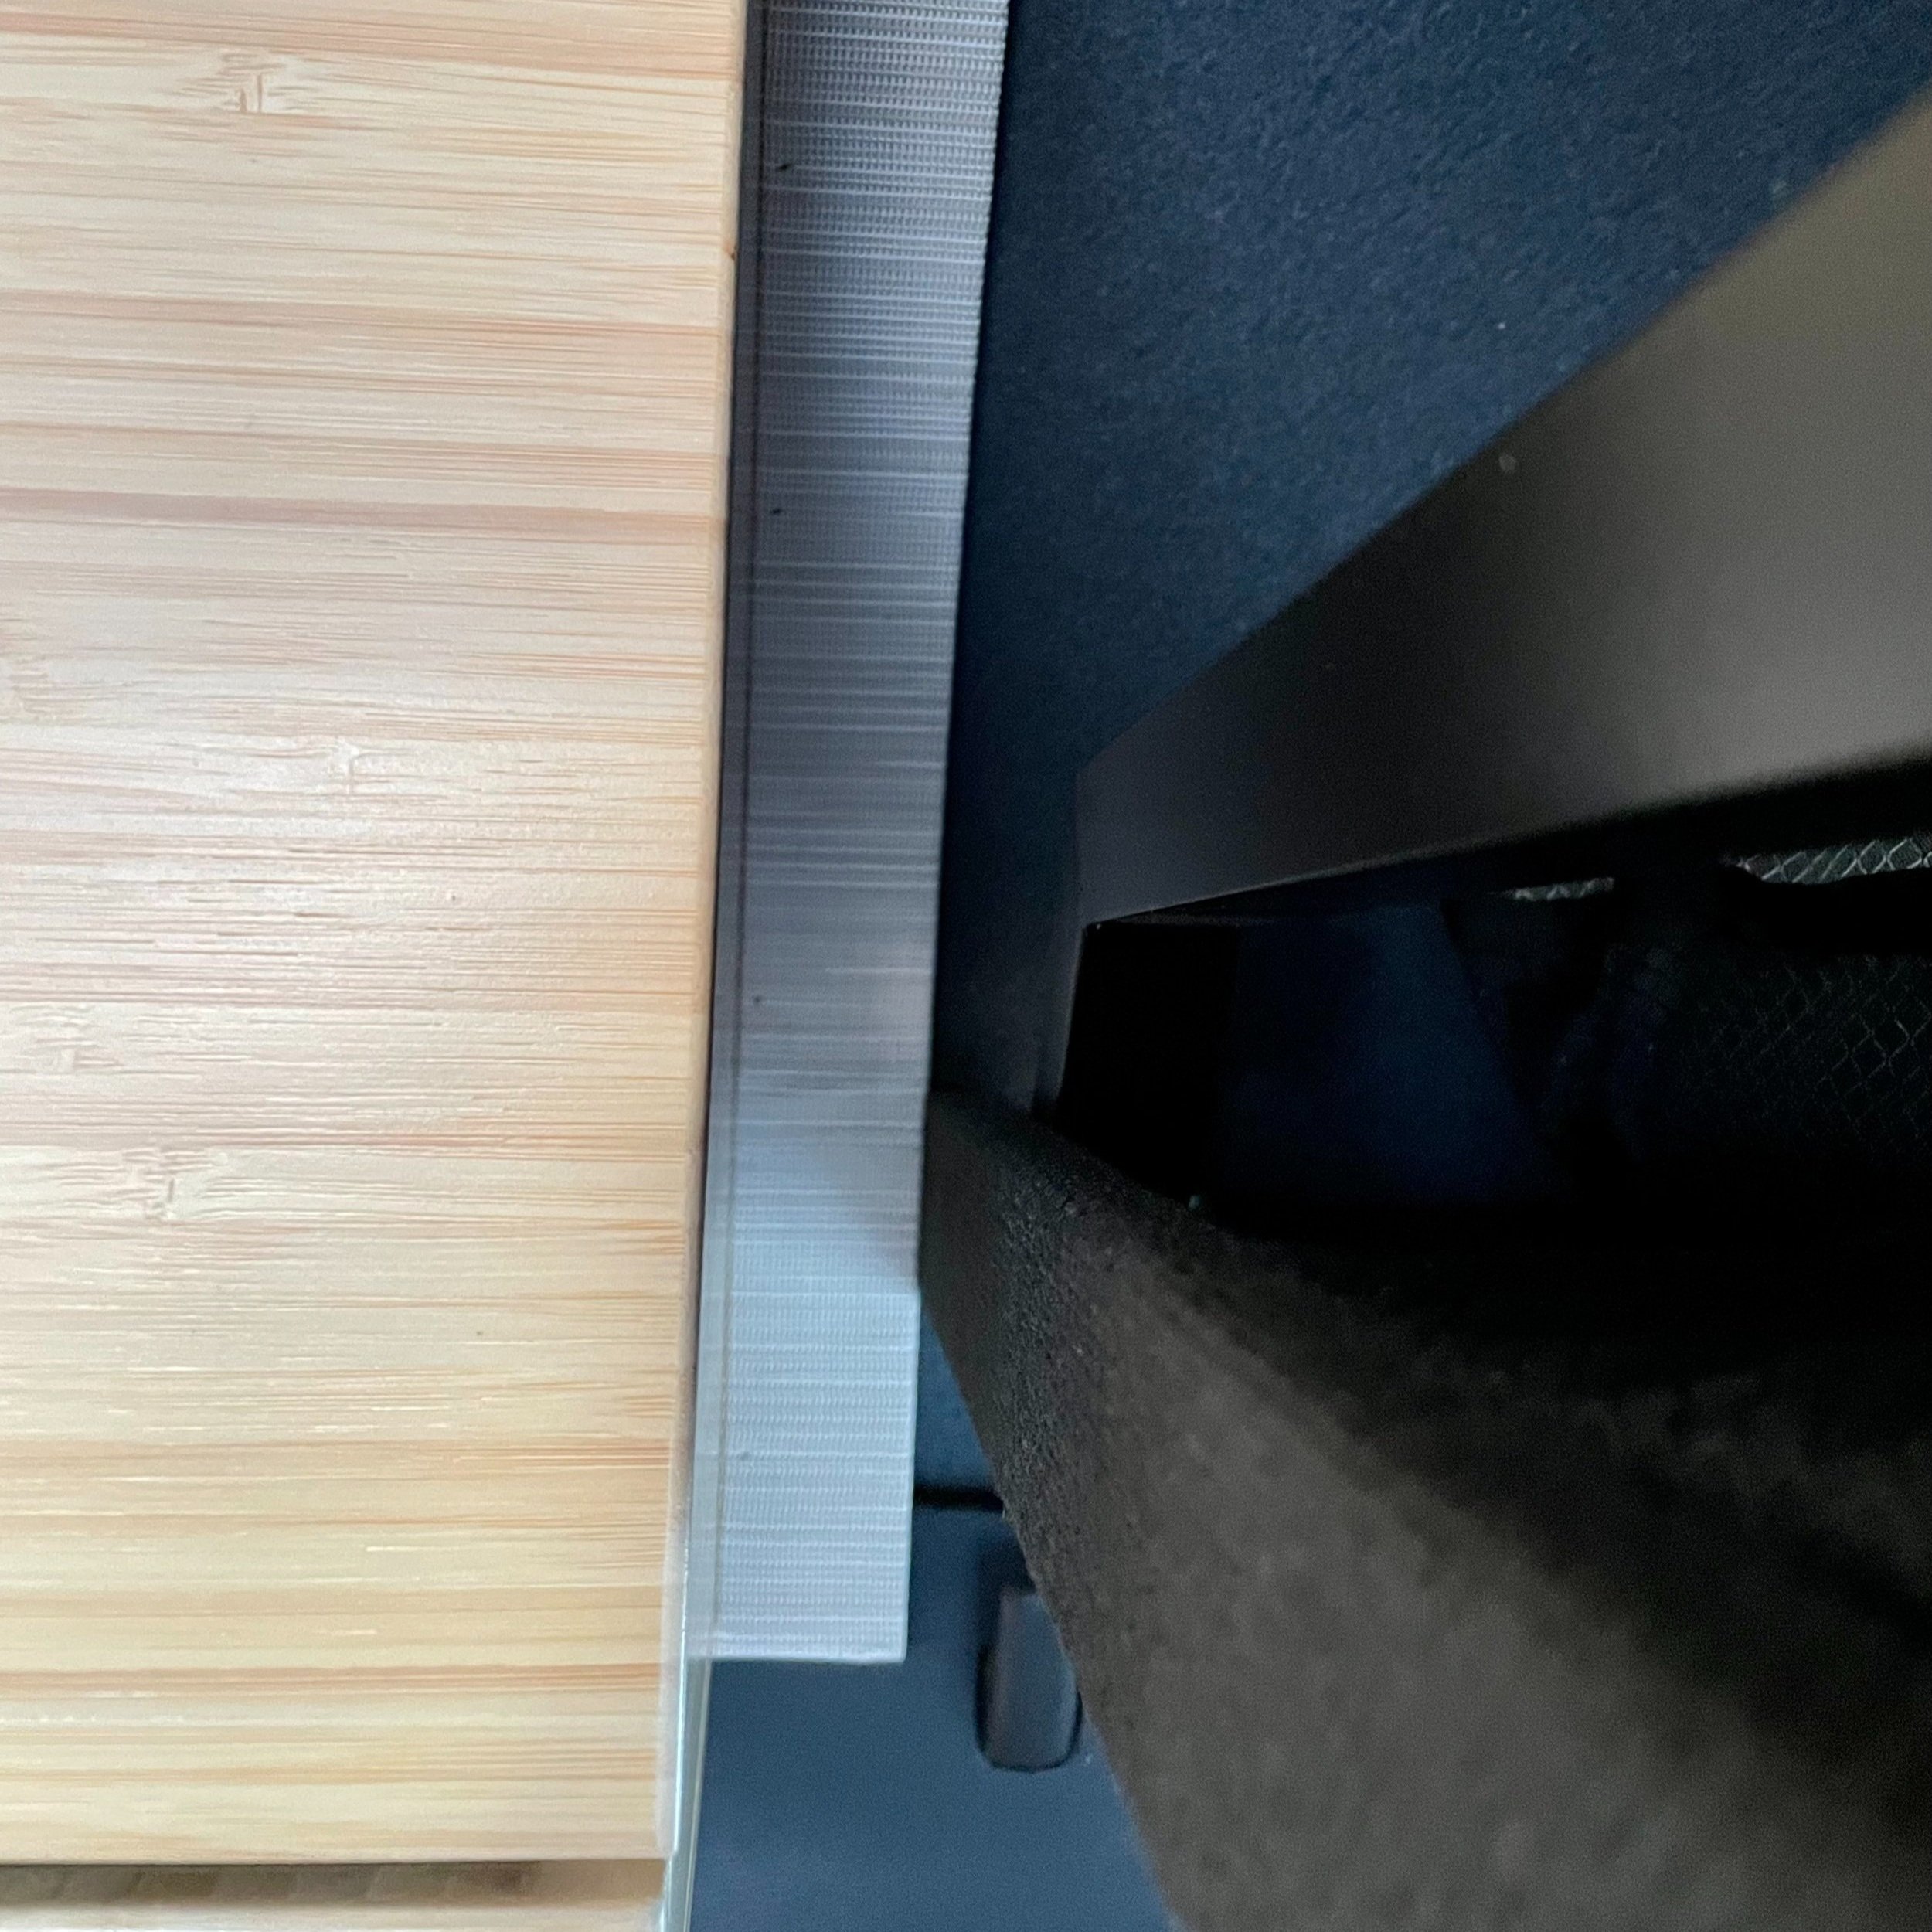
I’m super excited to announce that I recently had a new window installed on my van! When I designed my Sprinter’s layout and build, I didn’t think I wanted a lot of windows because any non-insulated opening can bring heat into the van on hot days, as well as allow heat to leave the van on cold days. Therefore, I went with three smaller Tern Overland windows instead, one of each end of the bed and one at the kitchen galley. In the past 3.5 years using my van, I realized that I would love to be able to see the outside views more when I’m inside the van, especially on a cool night or in a place with bugs when I didn’t want the sliding door open. Any time I was in someone else’s van that had a window in the sliding door, I realized what I was missing out on. Another reason to get a window installed was that the wooden panel that was put onto the sliding door during my original van build always rattled when I was driving. From what I’ve been told by a few builders now, this is a common issue with panels on the sliding doors, plus they get loose over time from all the opening and closing of the slider.


Last year, I went to the annual Freedom Vans van gathering here in Bellingham. They are a well-known and reputable van building company and I enjoyed meeting the owners and crew. At that time, I showed them my rattling panel and discussed window installation options. During our conversation, the company owner Tim told me that a wonderful advantage of having a window in the sliding door is the ability to see out while driving. Often when you need to turn into traffic, without a window there you have limited visibility on the right side, so being able to look over your right shoulder and see out that back side window is super helpful. I was also very impressed to learn about all the pros and cons of each after-market window styles and seeing them in action on some the van builds they were working on.

After some deliberation, I decided to go with the AMA Slider with Fly-Screen. I liked the bigger opening that would sit right above my passenger-side cabinet so my cat Maverick could sit there and enjoy the fresh air and view. I also heard that the T-vents on the CRL windows, which are most commonly installed, often break, though they do have the best “unobstructed” view since there’s no big piece sliding within in. I did consider the VWD slider, but preferred the opening to be at the back of the sliding door versus the front. I would say the only downside to the AMA and VWD slider windows is that the part that opens is not flush on the outside, which some people don’t like visually. It also allows for debris to get caught in the cracks, something I’ve already learned living in the forest where pine needles get into everything!

I finally took the plunge to get my window installed earlier this month. The installation only takes a few hours, but my van did have to stay overnight for the glue to set. I was so excited to pick up my Sprinter the next day and see the final result — and I love it! I can’t wait to go on adventures and experience all the views through the new window. Right now the weather isn’t ideal so I do not have any trips planned, but come next Spring, I will taking off to explore, including planned trips to North Cascades National Park, some vanlife gatherings, and hopefully a long road trip to Idaho, Montana, Wyoming, and the Dakotas, maybe even Alberta, Canada to check out Banff and Jasper National Parks. If anyone wants to caravan with me on that, please let me know!

On a side note, my buddy Stavros started Nomadic Supply Company a few years ago and I highly recommend them for all van products you may need. They have curated a collection of more than 10,000 of the world’s highest-quality products and donate 10% of their profits to the Sierra Club Foundation and 1% of every sale is donated directly to the Stripe Climate Change initiative. Stavros is an avid vanlifer himself and he’s built out his own van, therefore, he knows what works, what products are good, and which brands have the best quality. I have asked him lots of questions about products over the years and can vouch that his customer service is excellent and many van builders like Freedom Vans order from him. If you like my set up, I suggest ordering the AMA windows from him, or use the links for the other window styles (in this post) if you prefer them better.

Now that the window is installed, I made sure to order an insulated window cover to blackout the window when I’m sleeping in the van, as well as to keep the van cool in the summer and warm in the winter. Since I already have the Sprinter blackout window covers for the front cab and back windows from Quest Overland, as well as their fan cover, I went ahead and purchased the matching Sliding Door Window Cover from this amazing company. Not only do her products fit perfectly with strong magnets holding them up, they are well-constructed in a neutral color, and last for a long time. I am very happy with all the covers I’ve had since 2019, which don’t show any wear and tear, so getting the matching cover from the same company only made sense. If you need good quality blackout window covers, I highly recommend Quest Overland and you can use code “barbrocks5” to save 5% in their shop!
UPDATE: Hally & Ian the founders of Quest Overland sold the company in September 2023 and the new owner Josh is not fulfilling orders, nor replying to emails. I sadly can no longer recommend this company to people unless the new owner gets his business affairs in order and customer service improves.

I would love to hear what you all think of my new sliding door window. If you have the same AMA window, I’m curious to get your feedback on what your experience is with that brand and style. For those of you looking to install a window in your sliding door, I hope this post helps you decide which option is best for your needs. Happy Travels!

Comment

Comment

New Headliner Shelf From Carrve Custom Vans

While I was at Carrve Custom Vans for my custom hitch storage and bike rack solution, I saw the great work Ken did on a headliner shelf in his own van, so I asked him to make me one. Even though I’ve enjoyed the headroom in the cab part of my Sprinter, I didn’t have a great place to store my Quest Overland window covers, as well as blankets and pillows, and other bulky items that don’t fit in my cabinets well.

Ken did a great job building and installing the headliner shelf. Since my van build was already done with cabinets in place, it was a matter of lining everything up exactly so the headliner shelf fit in, which required a little extra work of removing the Sprinter visors, and in the end, everything lined up perfectly. The best part is that the black headliner shelf works well with my existing build color scheme, as well as the dark gray cab interior, and it doesn’t take away from the overall look and feel. Granted, I have hit my head a few times on it the first few weeks, but I’ve adapted now and find the extra storage super convenient and practical!

I highly recommend Carrve Custom Vans to anyone in the Northwestern Washington area. Ken and Ryan do great work, are super nice and accommodating, and they do quality work!

Also, if you need window covers for your cab, your back windows, and your side windows, please checkout Quest Overland. The quality of the window coverings is superb! I’ve owned mine for two years now and they are still in excellent shape, show no wear and tear, and will probably last me the life of the van. Use code barbrocks5 to save 5% on your order with them!

Comment

4 Comments

Custom Hitch Storage & Bike Rack Solution

After I bought my Aventon Pace 500 Step-Through eBike, I knew I needed a convenient bike rack to take it with me on my road trips. I looked at all the available bike racks online and didn’t really like any of the choices. The main reason was that most hitch racks are for 2 or 4 bikes, and since I am a solo female traveler, that would be waste of half the rack. I also wanted a storage box on the outside of my van and since my roof rack is pretty full with solar panels and my traction boards, I didn’t want to use up more of that space, plus carrying anything big and bulky up the side ladder is really difficult and inefficient. Therefore, I wanted a hitch storage solution via my hitch but I couldn’t find a solution that could work for both a bike rack and a box.


The two solutions I found that would somewhat work are the hinge racks that both Owl Vans and Aluminess offer, but there were a few downsides to these solutions:
1) The 270 hinges I have on my van that allow for the doors all the way to the side, would need to be removed and replaced with the 45 degree hinges.
2) The eBike is much heavier than a regular bike, so lifting it up overheard to sit on a box would be too difficult.
3) The largest box they offer does not have enough space for an inflatable kayak or SUP.
4) The weight of everything can take a toll on the hinges and doors of the van.
5) Both companies had a wait list for getting the solution installed and I wanted something sooner as I was planning to leave on a Baja road trip before Christmas.

Because I couldn’t find a solution that fit my needs and desires, I looked into a custom solution. I was referred to a local welder by Lenny’s Bike Shop, and Ian the welder started looking into options for me. He wasn’t sure he could make something as I requested, so he referred me to Ryan and Ken at Carrve Custom Vans, a great local van building shop. Ryan was super helpful and excited to come up with a solution for me. He also showed me first hand what the Owl Vans solution looked like since the vertical bike rack set up could have been an option, but I will still hesitant due to the small size of the storage box.

The solution Ryan and I came up with that fit my needs the best was as follows:
1) HitchSwing Arm from Wilco Offroad
2) Smooth Aluminum Barn Door Toolbox from Chandler Truck Accessories (18x18x48 size)
3) 1Up Bike Tray from Owl Vans

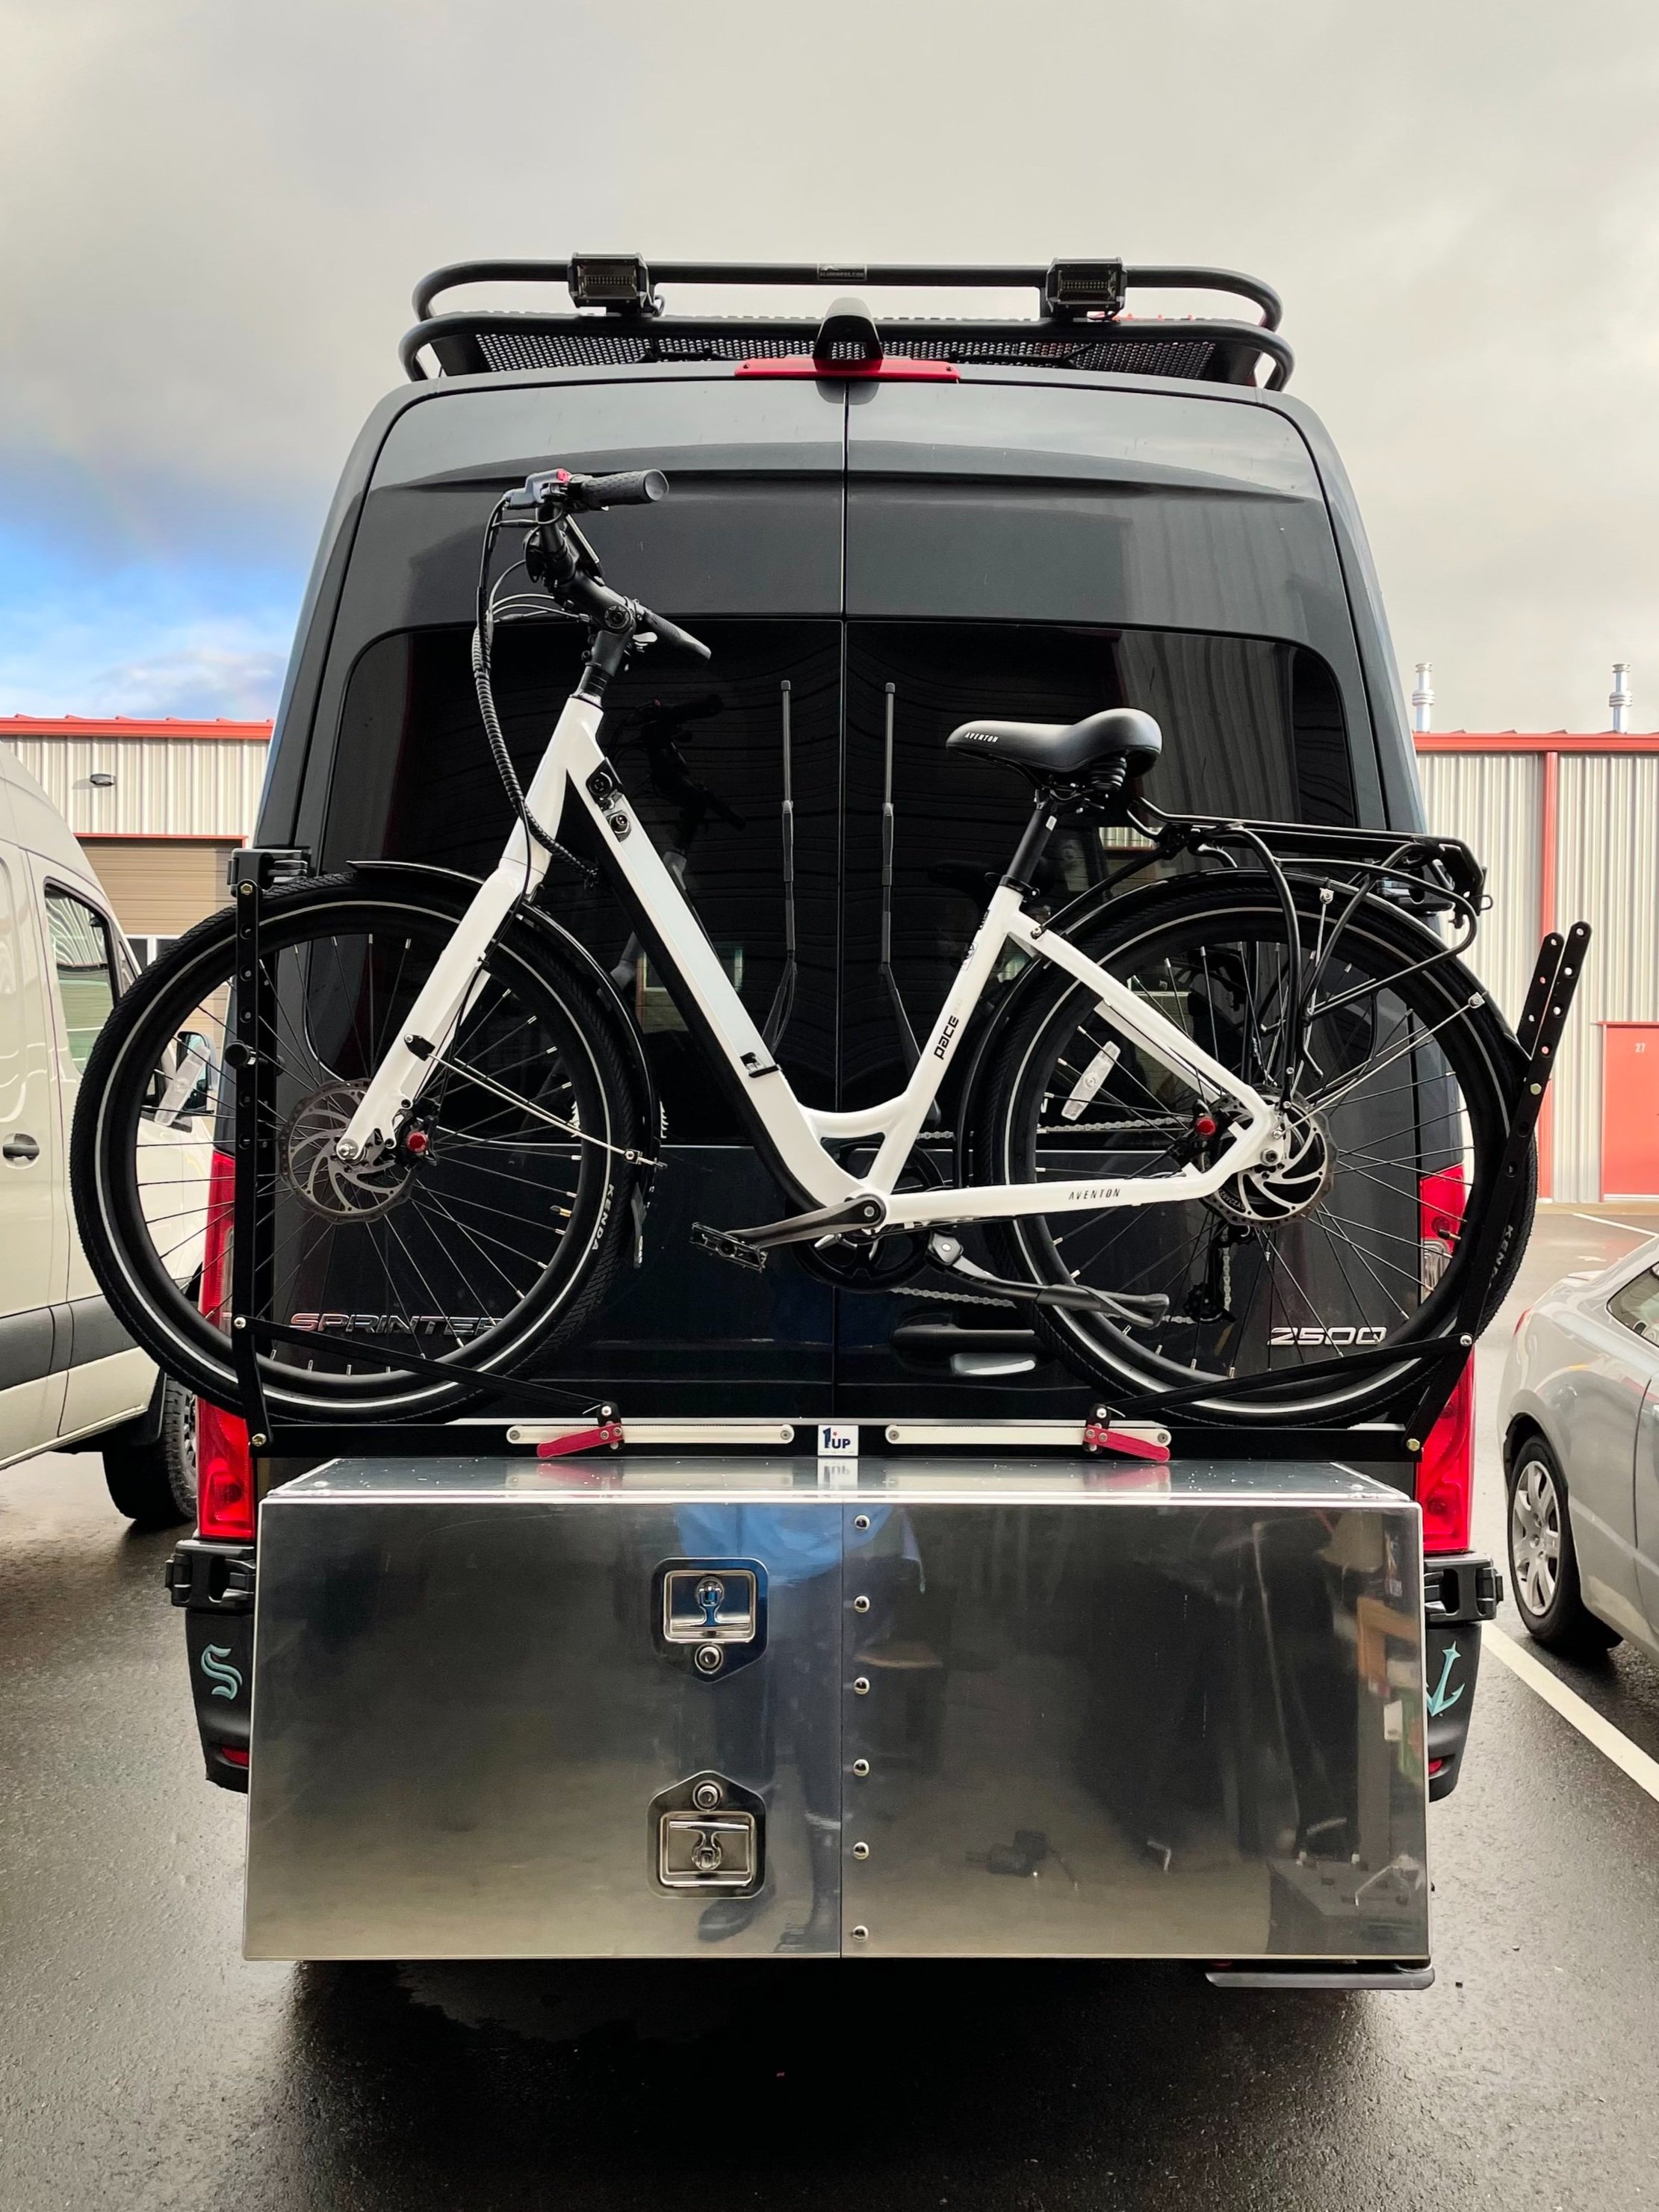
Ryan built a T-shaped support arm for under the toolbox that fits into the HitchSwing and mounted the 1Up Bike Tray on top of the toolbox. The end result is practical and just what I need to take extra gear on the road, with a bike rack that is at the right height for me to easy put my eBike on and take it off, and still allows me to open my back doors due to the hitchswing arm.

This custom solution cost me $1973.13 for parts, plus Ryan’s labor cost. I did buy the locking pins for both the HitchSwing Arm and the 1Up Bike Tray so I can lock everything to deter theft. I also bought the Sunlite Heavy Duty Bike Cover so that the elements don’t damage the eBike as much.

I’m curious if anyone else has a custom solution for their van, or what you think of mine, so please let me know!

If you ever need any van work done in the Pacific Northwest, or are looking for a great company to do your custom build in Northwest Washington, check out Carrve Custom Vans. Ryan and Ken do wonderful work and are super great to work with!

4 Comments

1 Comment

Why I Choose MoonShade Portable Awning

When I was having my Sprinter van built out, I had to decide whether to get a permanent awning installed. I had one on my previous RV but I hated that I was limited to shade on one side of the van. I decided to hold off on one and was stoked to hear about MoonShade by Moon Fabrications in early 2020 right before I went to pick up my finished van. I got in contact with this brand new company right away and bought one. What I love about MoonShade is that it’s versatile. You can attach it to either side, as well as the back, and you have the option of width or length ways depending on the sun and your needs. It fits on vans, cars, truck campers, overlanding vehicles, fences, and any sturdy structure, making it great for road trips, camping, hunting, and fishing. MoonShade covers a 9’x7’ site, weighs 8 lbs., packs down to about the size of a yoga mat, protects you from the sun during the day, and provides reflective illumination at night.

There are a variety of ways to attach the MoonShade to your van, including suction cups and magnets, but I thought it would be even cooler and sturdier to attach it to my roof rack bar, so my handyman buddy figured out a great solution using stage can lighting clamps which I attach to the roof rack and then attach the MoonShade to the hook in the clamps. I’m really happy with the functionality of this setup and by having it so high up, I can just take the outside legs off when it gets super windy and have the MoonShade tied down against the side of my van until the wind dies down. It does handle wind quite well as long as you anchor the poles and shade with two guylines on each side.

UPDATE: I have changed how I attach the MoonShade to my van since my original solution. I now have two short paracord rope loops that I permanently attached to my roof rack, so all I need to do is clip the hooks into those loops.

I lowered the MoonShade poles here due to high winds in OR high desert

If you’re looking for a portable awning that is decently priced and versatile, I highly recommend MoonShade! Since I’m a brand ambassador for them, if you use my referral link and coupon code BARBROCKS, you can save $30! I’m also happy to answer any questions you may have about the awning and how it works!

UPDATE: MoonShade released a new XL version in the summer of 2023, which provides 12’x9’ of coverage against sun and weather, but still packs down tight and weighs under 13 lbs., making breakdown and storage a breeze. I’m waiting to get mine so I can enjoy almost double the shade!

1 Comment

Comment

My Gray Tank Valve Failure

BrokenValve.jpg

In January 2021, my gray tank valve stopped working. This was quite disappointing since I’ve only had my van for 10 months and it had less than 8K miles on it. Luckily the valve was stuck in the open position, which meant my gray tank would still drain, so I decided to wait until I could address it at a later time.

As luck would have it, I met Bill Franz from Franz Customs and he was able to take care of this issue for me in May 2021. I would like to thank Bill for the following detailed description of why my gray tank valve failed and what he installed instead, which is a much better solution. I am posting this directly from the email he sent me with some minor grammatical fixes, so the rest of this post is his expert analysis, which I hope helps others who are installing a gray tank valve do it the proper way with the right kind of valve.


I do not use Solenoid valves on mobile water systems for 3 main reasons:
1) Solenoid valves will eventually have operational problems if debris/sediments are in the water.
2) Electric solenoid valves will have a run time limit (duty cycle) because they use a coil. Coils will generate heat the longer they are energized (valve open in your case).
3) They are not as reliable as Ball valves because of 1 and 2 above, plus there are more moving parts that could fail.

The use of a Solenoid valve is the real failure. To understand what went wrong, you need to use the diagram below. The diagram is not an exact match to the valve you had, but close enough to use for explanation. Your grey tank drain is connected to CLOSED side, which is the left side of the diagram below.

This is how it works:
1) You push the button to energize the coil on the top of the valve.
2) When the coil is energized, it creates a magnetic field that pulls the plunger up.
3) Water then flows from the left side to the right side of the valve body (input/output). This flow is the OPEN on the right side of the diagram.
4) To stop the flow you push the button again, the coil is de-energized, the magnetic field is lost and the plunger drops back down to close the valve.

Problem 1:

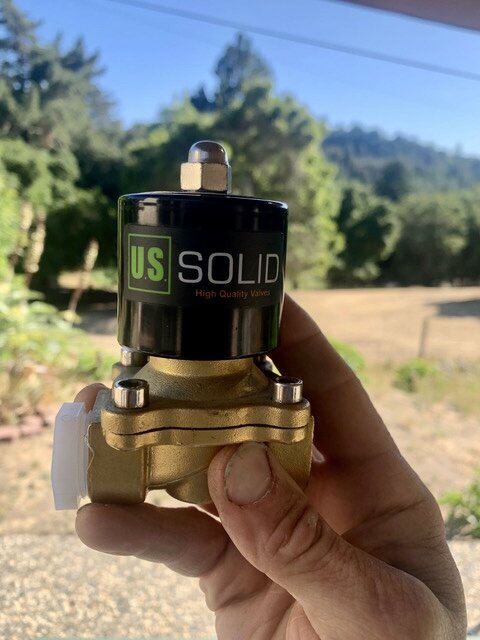
The coil is operating intermittently. When I tested the resistance across the coil, the reading would be stable and then randomly spike up and down, which explains the intermittent behavior. The coil also appears to have burn spots, or spots that are overheating. Most manufactures add a layer of protective coating around the coil winding to provide a layer of insulation from moisture or other environmental contaminates. This coating is generally uniform around the entire coil area. When coils overheat they will start to melt this coating to the point where it will start to run, like paint does when you spill it or put too much on a wall. If you look at the photo below on the left closely, you will notice that the color looks smeared and crispy, which is an indication of burning. This is generally the coating on the coil heating up to the point that it liquifies and starts seep through the insulation. I can’t say with certainty that it is burning because I don't have the same valve to compare the coil. However, I have seen coils start to take on this appearance when they are overheating and starting to burn. US Solid make really good valves so I doubt they would have Solenoid Valve coils leave a factory looking like yours. There is a cover on the coil, however, it is only held on by a single nut, and water can work its way up into the coil area, so enclosing the valve is needed when it is used outside.

The coil can also burn due to heat if the valve is on longer than the rated duty cycle. In the most basic terms duty cycle is the amount of time the valve can be on, before the coil starts to heat. The valve you had is not rated for 100% duty cycle (on all the time), so coil burning could have easily started to happen if the valve was left on for a long period of time. Because you don't have an indicator light you would not know if the drain valve was left on. Any electrical device that does not have a duty cycle of 100% needs to have a method for indicating it is on. Actually, any electrical device that generates heat should have an indicator light to let the user know it is on. In this case the valve coil is not large enough to create enough heat to start a fire, but a burnt coil is a valve that no longer works.

A coil can also burn if water gets into the coil and creates a short. A coil is a long piece of wire that is coiled, this coiling creates resistance, and resistance creates heat. If water is introduced into the coil it can create shorts in the coil, which add more resistance and burn the coil. The valve was mounted at a low point under your van and water could easily make it onto the coil housing.

I looked up the specifications for the valve you had and I found it has an IP65 rating, however, if the valve is mounted outdoors it needs to be enclosed. On the same page is an overheating warning and a statement that says the valve is NOT 100% duty cycle, which means it can’t be left on or it will overheat.

ValveCoil.jpg

Problem 2:

The photo above on the right is the outbound side of the valve. You will notice hair is lodged inside. Both the inbound and outbound port had hair and sludge lodged between them. This stopped the plunger from operating correctly, which explains why you saw the dripping and thought your tank was empty. This happened because it is hung up on the input side, so the hair never made it out of the valve. When this happens, the valve will start to collect debris like a spider web. A ball valve will not do this because the design uses a simple hole in the ball.

I installed a US Solid Stainless Steel ball valve with auto return and I added a water proof connector to it.
* The valve will return to the closed position if power is lost.
* The electronics are sealed so it is splash resistance from all angles.
* It has a very low power consumption when fully open (no need to worry about accidentally leaving it on).
* Full flow when open so it would take something at least 1/2” to clog the valve.
* It is stainless steel and I did this because it will resist corrosion better than brass will. Corrosion comes in many different forms when dealing with drains and it was about 10 bucks more than brass.

The diagram below is what a ball valve looks like, which you now have an electric version of. Instead of the handle, there is a small motor that turns the stem. When you depress the button, the motor turns the ball and the water flows through the 1/2” hole in the ball. This is a simpler design over the Solenoid valve and is less likely to clog when minor debris are in the water. There is also nothing for hair to snag on like there is in a Solenoid vale. Some ball valves have a smaller diameter hole, and this is generally done in pressurized systems, but you don’t need a controlled flow because your tank is a gravity drain for dumping water. This is the portion when I reference full flow. You have a 1/2” drain pipe so water will flow as fast as 1/2” can dump the water.

BallValve.png

Below is a picture of your old valve on the input side (water entering from your tank). This is where the valve makes the 90 degree turn up, which uses water pressure to help move the plunger up when the valve is opened. You can’t see the plunger portion but the hair becomes lodged in that top areas.

OldValve.jpg

Photos below are the cover over the coil. The picture on the left is what it looks like installed and this is also the same position it was mounted under your van. The picture on the right kind of shows the open area under the coil cover where water can works its way in. On a really rainy day or wet road, the underside of your van becomes a hurricane and water will eventually make its way into the valve cover. There is no seal, so simply removing the bolt on the top allows the cover to be removed.

Valve.jpg

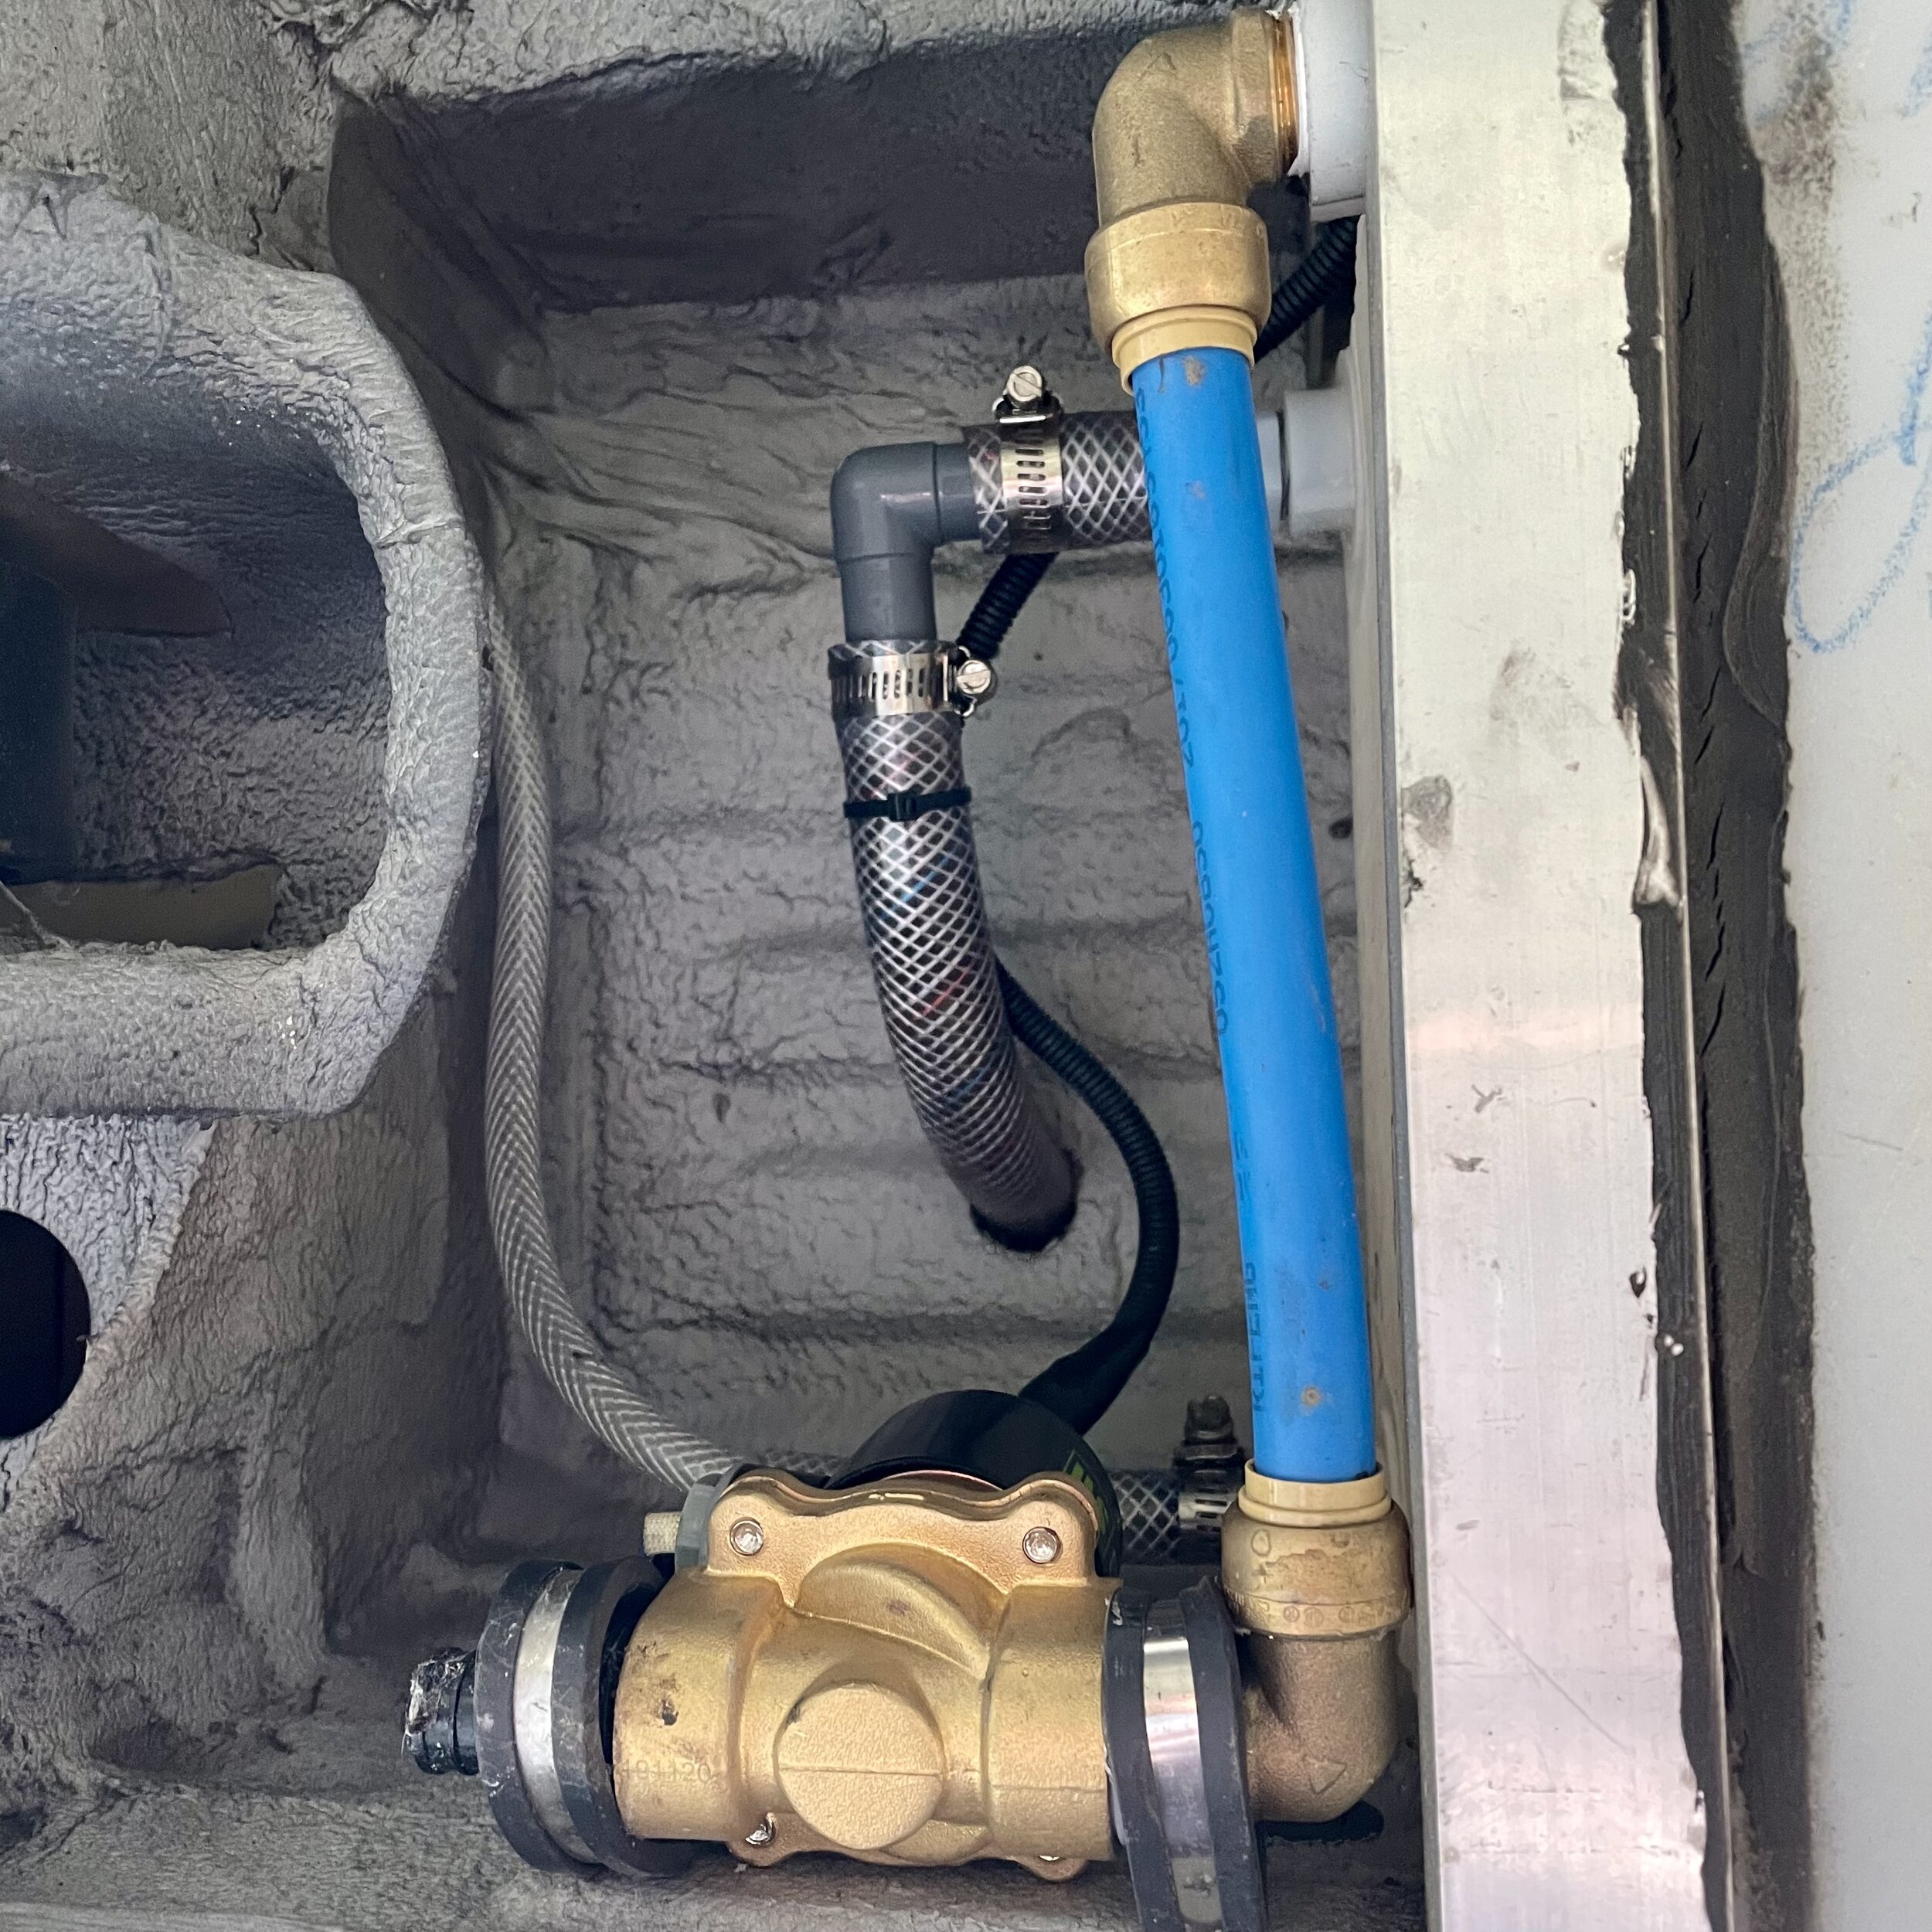
Below is your new ball valve installed. The blue pipe is 1/2” PEX that is connected to the ball valve with a 1/2” 90 degree shark bite connector. That white portion on the picture above is called a reducer sleeve. This sleeve reduces the 3/4” fitting on the valve to 1/2”, so the PEX 90 they used would work. I had questioned why a 3/4” valve was used when the connection is 1/2” at the tank. Flow will not move faster than the 1/2” can move water, so at face value a 3/4” valve does nothing to help water move faster. However, this gets thrown out the window when a Solenoid valve is used because that 90 degree turn on a Solenoid valve changes flow rate. That blue area on the valve is where the electronic components are and it is sealed. The white cable is your positive and negative wires up to the water proof connecter. I also made sure that I mounted the valve so the wire has maximum protection.

NewValveInstalled.jpg

One final note about this configuration. I recommend a manual valve to be installed between that blue pipe. I would also recommend that a light weight plate be installed to protect the valve and pipe. There is a risk of something possible ripping the valve out along with that pipe. Think about some of the roads you have gone down or shit that you have heard hit the bottom of any vehicle you have driven. If you go off road, you should definitely add a protection plate, aka skid plate. Its an easy modification that will not cost an arm and a leg.


Bill is going to be installing that manual valve for me soon, plus I’m going to ask him to install the skid plate as well.

Comment